Olive Cheese Bread

I love the Pioneer Woman aka Ree Drummond.  I have been following her since way back when.  Before she was famous.  When her cookbook cost like 10 bucks on amazon.  Before she wrote that cookbook.  I think she is amazingly talented and feel a kindred spirit with her.  So it is not surprising that I make many of her recipes.  And this is one of her’s.  Olive Cheese Bread.   Now I LOVE olives.  Black olives, green olives, any kind of olives.  Always have.  So of course I had to try this recipe when I came across it in her first cookbook, Recipes From an Accidental Country Girl.   It is a little bit like a muffaletta, but without the meat.  It is buttery, cheesy perfection that is just salty enough.  It is easy and makes a good bit and can be served as an appetizer, a side, a snack…It is extremely versatile.  It is delicious hot and not bad cold.  It is all those things you want it to be.  It aims to please.  And it will.  So grab the minimal ingredients this recipe requires and do the minimal work to make it and sink your teeth into this ooey, gooey, cheesy deliciousness tonight.

531976_539714329442472_903571851_n

You ready?  I thought so.  Make it.  You know you want to.

Olive Cheese Bread (from Pioneer Woman’s cookbook)

Makes 8 servings

Ingredients

1 stick of butter, softened

1 lb. Monterey Jack cheese, shredded

1 can pimiento stuffed olives (6.5 oz.), drained and coarsely chopped

1 can black olives (14.5 oz.) drained and coarsely chopped

2 green onions, sliced

1/2 cup mayo (she insists you must use the real stuff, and I do…I actually I have started using Duke’s mayo and it is the BEST as far as mayo goes, in my very humble opinion.)

1 loaf of crusty french bread, sliced in half horizontally

Preheat oven to 325 degrees.

Combine the softened butter, the shredded cheese, the black and green olives (PW says to give them a rough chop…this means not super finely chopped, but just enough to break them into smaller pieces than whole.  It’s not an exact art, so don’t stress.) Now stir in the mayo and green onions and give it a good stir to combine well.  Spread across both sides of the bread.  Just slather it all over that bread.

Now put the bread on a large baking or cookie sheet.  Slide the sheet into your preheated oven.  Bake for about 15-20 minutes or until the cheesy olive mixture is all bubbly.  Pull it out of the oven.  Resist the urge to tear a piece off of the load like a ravenous dog because it’s super hot at this point.  I speak from er…experience.   Slice into about 4 inch wide slices.  Serve.

Advertisement

Cracker Barrel chicken and dumplings

So I am not from North Louisiana.  I have made that pretty well known.  I am from “central Louisiana” (and dang proud of it) with strong roots in Avoyelles Parish…Marksville to be exact.  I love that about me.  I love that I had never eaten biscuits and gravy before I came to Shreveport.   Or real chicken and dumplings.  Now…let me back it up.  I lived in Natchitoches for 6 years and I loved every single minute of it.  Shreveport is my home now.  I love it.  I love living here and truly cannot imagine living anywhere else.  I have blossomed where I have been planted.  There are some wonderful things about living here.  Real, proper chicken dumplings are at the top of the list.  Now…I am NOT saying that people in central LA or in Avoyelles don’t make chicken and dumplings.  I am sure there are some.  I did not know any of them growing up.  But when you have the wonderfulness that is chicken fricassee…why would you even care?  Exactly.  But now that I live here, I kind of felt like I should learn.  So I tried a few recipes here and there.  I started out doing what my mama did the one time I can recall her making chicken and dumplings.  I used Bisquick.  And they were alright. They sufficed.  But when one of my friends from “up here” made them, I knew I had not hit the mark.  And all respect due to my mama, neither had she.  (But I don’t know anyone “up here” who can smother chicken like my mama, my Momee, or my cousin Robin)…so tit for a tat, so to speak.  Anyway, I found a recipe here and there for chicken and dumplings.  I tried different recipes for dumplings.  I tried the frozen dumplings.  They all just left me wanting another recipe.  I used biscuits…and that was a good one.  But still…my search continued.  Call it being a Cajun mama married to a country boy and the drive to assimilate.  Call it being a chicken and dumpling addict and trying to feed my habit (excuse the pun)…I don’t know.  I do know that the day this very chicken and dumplings recipe came across my Facebook feed, my days of searching for the perfect recipe ended.  Angels sang.  The seas parted.  My kids were perfectly behaved.  Ok ok…I am being overly dramatic…but I do have a good recipe now.  AND I learned to make my own dumplings!!  Yes…me!!!  Baking impaired Cajun mama can make her own dumplings!   And guess what my friends?  I am going to tell you how to do it too!!  Friends share, friends care.  Friends don’t let friends make bad dumplings.  🙂  You can do this.  My oh so country hubby aka Big Daddy, LOVES this dish.  His yummy noises are all the validation I need.  So, I really hope you will give this recipe a try.  It is really so good and very easy.  

Cracker Barrel chicken and dumplings

Ingredients

1 lb. chicken breasts or 3 cups cooked chicken

2 quarts chicken broth * (have a 14.5 ounce can on hand and some chicken bouillon base is what I recommend)

OR 2 quarts of canned chicken broth

2 cups flour

1/2 tsp. baking powder

a pinch of Kosher salt

a little less than 1 cup of milk 

2 tablespoons of butter

Directions

Now…boil your chicken breasts in about 2 quarts of water.  Add a little salt and pepper to the water.  Boil them until they are cooked through and really just falling apart.  Remove them from the water and set aside.  Keep the broth.  Once the chicken is cooled, shred it and then set aside.  Ok…now what I do is keep the broth I have and add some chicken bouillon base.  *I bring the broth to a boil and then whisk in chicken base (found in most supermarkets on the soup aisle.  It is in a jar and usually on the top shelf near the cans of broth.  It is a must have product and really adds authenticity to your soups, stews and gravy.)  I usually whisk in about 2 Tablespoons for about 1 1/2 quarts of stock.  Then I add a can of chicken broth.   You can also just use straight canned chicken broth if you want.  That’s cool too.  If you do that, you will need quite a few cans or at least 2 of the boxes of broth.  Either way is fine.  Ok once you kind of have your broth simmering, start making your dumplings.

In a large bowl, mix your flour, baking powder, and salt.  Then using a fork or a pastry cutter, blend in your butter.  I cut it into pats into the flour and then blend.  Now you want to cut the butter into the flour until it is well mixed in.  Now add in your milk (today I used evaporated milk and it worked out great but whole or 2 % works well too).  Stir until a nice  ball of dough forms.  Then you want to turn the ball of dough onto a floured surface.  I have one of those old school Tupperware rolling mats like mu mama has and that is what I use.  Now take your  well floured rolling pin and just roll it until the dough until it is uniform in thickness.  Really it is a preference thing, but if I had to eyeball it I would say about 1/4 ” thickness is about right.  And then I use a pizza cutter to cut the dough into 2 x 2 squares.  You are not really looking for perfection here.  Now I use a floured brownie spatula to remove them from the work mat and then place them on a heavily floured plate in layers, with plenty of flour between layers.

Image

 Now at this point your broth should be simmering, so add the dumplings one by one into the simmering broth, stirring frequently.  Cook on low for about 15-20 minutes.  Add your shredded chicken.  You are ready to ladle it into some bowls and dive in.  So. dang. delicious.  Now usually I make some cornbread and some purple hull peas to go with this.  As Big Daddy says, “watch out!!!” 

Image

Red beans make me happy

My crockpot red beans recipe. I am reblogging for those who may have missed it.

cajunmamacookin's Blog

Red beans in the crockpot is one of the very first things I learned to cook. My mom was working as a nurse full time and I helped out with the meals. She would call me during the summer and talk me through the process so I could get them on in the morning. In college, I didn’t have a crockpot so I would make red beans own the stove. It just wasn’t the same but I did it. I have always loved red beans and rice but it wasn’t until I was married (I got my big ole red beans crockpot! As I call it) and pregnant with my first child that I developed a deep appreciation (some would call it obsession) with crockpot red beans. And consequently, I craved them throughout all 4 pregnancies. Guess because I was growing some Cajun bebes. 👶 Anyway, the old Cajun saying…

View original post 365 more words

Cookie dough brownie bombs

Ok so I am not usually this quick to post a recipe but the reaction to the picture of the cookie dough brownie bombs was so crazy, I thought well I best get this post up or these people are going to beat me to death with a wooden spoon.  So here I am, Friday night, writing about these fabulous things.  Now, I will be straight up and say these are not my brain child.  A woman named Hayley from The Domestic Rebel, is the amazing genius behind these little pieces of heaven.  All hail the queen.  She is my hero.  You know how sometimes you see a recipe on Pinterest and get all worked up because it looks so good and then you make the recipe only to be disappointed?  Yeah, I kind of wish I could say this but it is so not the case.  These babies are even more delicious than you could begin to imagine.

Image

They taste even better than they look…can you imagine?  You ready to make up a batch of these beauties?

Ok let’s get started.  You are so close to chocolate heaven.

Cookie Dough Brownie Bombs (brainchild of Hayley Parker of The Domestic Rebel)

Ingredients:

3/4 cup butter, softened (this is a stick and a half of butter.  I use the real stuff)

3/4 cup brown sugar

1/4 cup white sugar

2 T. whole milk

1 tsp. vanilla extract

2 cups all purpose flour

pinch of kosher salt

2 cups mini chocolate chips, divided

1 pkg. fudge brownie mix, baked and cooled

1 pkg. chocolate Candiquik or chocolate almond bark

Instructions aka your undoing 

Ok…I was so excited to be finally making a batch of these that my cooking ADD got in my way.  So I will make it easier for you and tell you what to do in an exact order.  First, bake your brownies according to the directions on the box.  You want fudge like brownies, not cake like brownies so make sure you see  to this.  I would use a family size box of brownies and bake them in a 9 x 13 pan. Remove them from the oven when done and set aside to cool

Ok after you have your brownies baking, start making your cookie dough.  Using a stand or hand mixer, cream together the butter and sugars.  Then add in the vanilla and milk.  Mix that in nicely.  Now add your salt and gradually beat in the flour.  Now mix in 1 cup of the mini chocolate chips.  Now, you are going to make the cookie balls.  You want to take about 1 scant tablespoon of dough and roll it into a ball.  Take a measuring tablespoon and barely fill it.  You will get a general idea of what size they will be and make them as uniform as possible.  I laid a silicon baking mat on a 13 x 18 cookie sheet and put my cookie balls on there, but you can also use foil or parchment paper.  It will look like this when you are done.  Now take the cookie sheet and slide it into the freezer for about 30 minutes.

photo (3)

If you don’t have a wide enough freezer for that big of a cookie sheet, just use 2 smaller cookie sheets.  No biggie.

Ok now once the cookie balls are frozen and your brownies are cooled, you are ready for step two.  Cut your brownies into 1 inch squares.  You don’t want them much bigger because you will be flattening them out and wrapping the brownie around the frozen cookie ball.  Mine were too big at first and they looked like cookie dough brownie monstrosities.  Trust me.  Ok so take each 1 inch square of brownie and flatten it between your hands.  Now gently roll the brownie around the frozen cookie ball.  It will seem strange at first but you will get the hang of it.  Don’t worry about making it perfect.  Remember this will be coated with candiquik and they are not meant to look perfect.  This is how it will look…photo (7)

And then continue to work the dough around the cookie ball until it is as covered in brownie dough as possible.  The brownie dough will become more pliable as you continue to work it around the cookie ball.

See…photo (4)

That is how it will end up looking all the way around.  Lay them back down on the silicone baking mat/foil/parchment paper cookie sheet.

Now, you want to put the brownie covered cookie balls back into the freezer for about 45 minutes to an hour.  Calm down, the time the will pass quickly.  You are so close my friend.  So close.  And there will be some left over cookie dough balls…so nibble on that to get your sugar fix.  You can do this.

Ok now when you are about to pull the brownie covered cookie dough balls from the freezer, melt your chocolate Candiquik according to package directions.  This is much easier and involves less clean up than if you melt chocolate almond bark in a double boiler or a pot, but if that is what you feel more comfortable doing than feel free.  Knock yourself out.  I am assuming if you are following my blog you are like minded and think “ain’t nobody got time for that!” but we still love you and you are still welcome here.  🙂  Alright, compose yourself and pull the balls from the freezer.   You will need a large piece of parchment paper at this point.   Now using a fork, roll each brownie covered cookie dough ball around in the chocolate Candiquik until it is well coated.  Let the excess drip off and then put it on the parchment paper.  Sprinkle some of the remaining chocolate chips over the top of the chocolate covered cookie dough ball.  And let it sit there will you do the same thing to the remaining brownie covered cookie dough balls.  Get ready to slap little (and big) hands away because husbands and children will be begging you for just one.  This will make about 18 cookie dough balls, maybe more depending how big you make your  cookie dough balls.  Also, it depends how many brownie squares you cut your brownies into.  But about 15-18 is what you can expect if you follow these directions.  Give or take a few.  Ok, after you are done rolling all of the balls in the chocolate and have sprinkled them with chocolate chips they will look like this…IMG_6773.


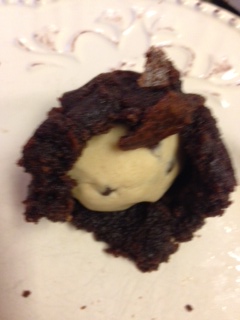
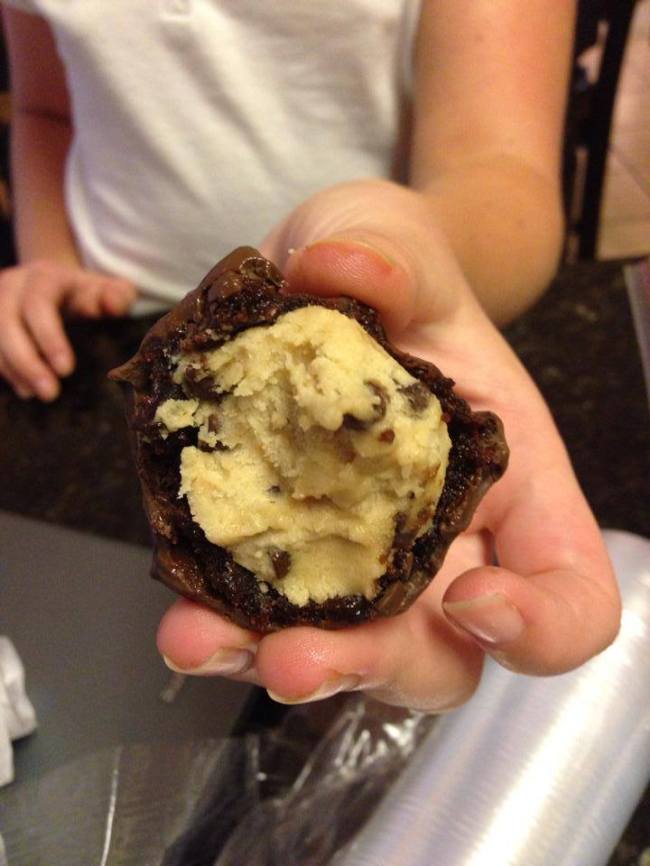
Wipe your face…you’re drooling.  And when you bite into them, they will look like this…598850_535987716481800_1543053785_n.

You’re welcome.  Enjoy your Saturday!!!  Let me know how you and your family like them.  Or love them.


Copycat OG’s Zuppa Toscano soup

I am pretty sure I continue to make soup and post about soup because I love soup (I have already copped to my soup obsession, so I won’t bore you with that whole song and dance again) and I am trying to bring on Fall.  It has been so hot and so dry here I just about can’t stand it anymore and I know we are all ready for a change in atmosphere.  Low and behold, I made this zuppa toscana and it rained.  And it may not get out of the 80’s today, so…I am not saying this soup has magical powers…maybe the rain and no more 100 degree weather coming after I made it is a coincidence…maybe not.  One thing I am positive about is that this copycat Olive Garden Zuppa Toscana recipe is amazing!! Image

  O.M.G.  Sweet Mother of pearl, this stuff is awesome.  i will be honest and say I have never order the zuppa toscana when I eat at the OG.  I have always been a minestrone girl.  And then a chicken gnocchi girl.  Oh the chicken gnocchi.  I could write a song about my love for chicken gnocchi.  That is a blog post for another time.  That WILL be a blog post for another time in the very near future.  But back to the fabulous zuppa toscana (come on say it with me…zuppa toscana…don’t you feel fancy?)  This soup is hearty, a little spicy and just so good.  Oh and let me add, it is so flipping easy to prepare.  I started it earlier in the day and then finished it after I picked the kids up from school before going to a PTA meeting.  It fit right in there.  My hubby loved it.  And he is not as fond of soups as I am, so that is saying a lot.  I hope you will give it a try and let me know what you think.  I will be having the leftovers for lunch today…I honestly cannot wait. 

Copycat Olive Garden Zuppa Toscana (adapted from Mom on time out blog)

Ingredients:

1 lb. mild Italian sausage, the actual sausage removed from the casing

6 slices of bacon 

5 medium size russet potatoes or red potatoes (i used red because that is what I had and I really liked the color it added to the soup and they tasted wonderful)

2 cups of kale, chopped 

1 cup heavy whipping cream

1 quart water

2 14 oz. cans of chicken broth (I used reduced sodium)

1/2 large onion, diced 

3 cloves of garlic, chopped or minced 

1-2 tsp. red pepper flakes*

kosher salt and black pepper to taste

Directions

Ok…you can brown the italian sausage in a skillet like normal.  Trish (mom on time out blog) suggested you crumble the sausage (again…removed from its casing) on to a baking sheet and bake it at 300 degrees for 30 minutes.   I did this and let me tell you…that is the way to go.  After it is no longer pink, remove the sausage from the baking sheet with a spatula and drain on paper towels.  At the same time the sausage was baking, I placed my 6 slices of bacon on a rack in a baking pan and cooked it too. The bacon took longer than the sausage, probably 30 minutes longer.  Watch it carefully though.  I had no problems cooking either in the oven, but of course, you would want to keep an eye on it.  Again,  you can pan fry both if you feel more comfortable doing it that way.  

While that is cooking, dice your onion.  Then slice your potatoes.  Just make sure the slices are uniform.  1/8 ” to 1/4 ” is about right.  Again, you are looking for uniformity here so the potato slices cook evenly and mince your garlic.  Add your chicken broth and water to your soup pot or dutch oven.  Throw in your sliced potatoes, onion and garlic.  Cook on medium heat until the potatoes are fork tender.  Chop the kale by chopping into bite sized pieces.  Kale holds up to heat very well, much better than spinach I must say.  It is so good for you too!!  Super food and super yum!! Score!! Add the sausage, bacon, red pepper flakes, and salt and pepper to taste. *Now I will tell you this, add the red pepper flakes sparingly.  My good friend Betsy turned me on to red pepper flakes a few years ago and I am definitely a fan, but they pack a punch so use sparingly.  I probably used 1 tsp. and that was plenty of heat for us.  

Simmer this on low for about 10 minutes, stirring occasionally.  The potatoes will start to fall about this time.  Turn the heat down to low and add in the kale and heavy cream.  Continue to let this simmer until heated through.  Then ladle that delicious stuff into soup bowls and if you are so inclined, grate a little fresh Parmesan on top and enjoy.  

Creamy Crockpot Tortellini Soup

Ok so something has happened to me since I hit my 30’s…I have become a major soup lover.  Soups, stews and chilis are all my best friends.  I love them.  Cooked in my crock pot or on the stove…L-O-V-E me some soup.  So you will excuse me if I post at least one soup recipe a week.  When I was younger, I could take or leave soup.  Sure if it was baked potato soup I might take someone up on a bowl.  Now, I will go out and actually seek out soup.  My friends and I all know when Newk’s has their baked potato soup on the menu (Tuesdays, Thursdays and Saturdays thank you very much) and I will go there only then.  Otherwise, what’s the point?  My soup adoration carries over into stews, chili, and frankly I consider red beans and rice to be in the same category.  So of course, when I pin a soup recipe on pinterest (say that 3 times fast!), I feel driven to make it.  QUICK!!  This soup was the same way.  It looked fantastic and was made in the crockpot so I was sold!  

Creamy Crockpot Tortellini Soup (loosely adapted from My Favorite Things blog)

Ingredients

1 envelope white gravy mix 

4 cups water

1 14 ounce can vegetable broth

1 1/2 cups sliced fresh mushrooms

1/2 cup onion, finely chopped

3 cloves garlic, minced

1/2 tsp. dried basil, crushed

1/4 tsp. salt

1/2 tsp. dried oregano, crushed

1/8 tsp. cayenne pepper

1 7 or 8 ounce package dried cheese tortellini (about 2 cups)

1 12 ounce can evaporated milk

4 cups fresh baby spinach, washed, stems removed chopped

ground black pepper to taste

fresh shredded Parmesan cheese, to taste

Image

Directions:

Pour dry white sauce mix in a 4-5 qt. slow cooker.  Whisk in the water slowly until smooth.  Stir in broth, mushrooms, onion, garlic, basil, salt, oregano, and cayenne pepper.  

Cover and cook on low for 5 to 6 hours (5 hours should be plenty in a newer slow cooker) or on high for 2 1/2-3 hours.

Stir in dried tortellini.  Cover and cook on low for an hour more or high for 45 minutes.  

Stir in evaporated milk and washed and torn spinach.  Sprinkle each bowlful with black pepper and fresh shredded Parmesan cheese.  

Makes 4 nice size servings

Image


White Chicken Enchiladas

So a while back, there was this recipe floating around Facebook.  Everyone was sharing it and commenting on it.  I prefer not to comment, I just prefer to cook it.  And I did.  This is THE white chicken enchilada recipe to beat all white chicken enchilada recipes.  They are so fabulous.  They are so easy.  That makes them Cajun mama style.  If it is easy to yield delicious results, sign this girl up!!!  I am pretty sure you feel the same way so I wanted to share.  I have made them for several friends, and they all loved them just the same.  My mother in law also loved them.  And so did my father in law.  That my dear friends, says it all.  I am not saying that they are hard to please, but they are hard to impress.  And they were impressed.  Especially my one heck of a cook mother in law.  She runs a lodge in Arkansas and she said she wanted to cook them for her hunters.  That is all the compliment I need!!!  These are really delicious and if you are craving Mexican but don’t feel like spending the money (for us it means taking 6 people to dinner…4 of them being kids!) or just don’t feel like going out…this is a definite alternative.  So give them a try and let me know what you think!

White Chicken Enchiladas (adapted from Witchin’ in the Kitchen food blog)

What you will need aka Ingredients:

10 soft taco size flour tortillas (I love the mission bell soft and fluffy ones)

2 cups cooked shredded chicken (you can use rotisserie chicken or bake or boil 2  seasoned chicken breasts until done throughout and then shred them)

2 cups shredded Monterey Jack cheese, divided

3 T. real butter

3 T. flour

2 cups chicken broth

1 cup sour cream

1 4 oz. can diced green chilies

Preheat your oven to 350 degrees.  Spray a 9 x 13 baking dish with cooking spray.

Mix your shredded chicken and 1 cup of the cheese.  Spread about 1/4 cup of the chicken/cheese mixture on each tortilla.  Roll up and place seam side down in prepared baking dish.

In a medium size saucepan, melt butter.  Whisk in flour and cook for a minute.  It will be quite think like peanut butter.  That is what you want.  Now whisk in broth slowly and stir with whisk until smooth.  Continue to whisk over medium heat until thick and bubbly.  Stir in sour cream and green chilies.  You don’t want to bring mixture to a boil because it could scorch and stick and the sour cream could curdle.  Nobody wants that.

Pour thickened mixture over your pan of enchiladas.  Top with remaining 1 cup of cheese.  Bake for 20-25 minutes  at 350 degrees and then switch broiler on hi and cook them for about 3 minutes or until cheese is good and bubbly and there is a little brown on the cheese.  YUM!!!!!!!

I serve this dish with cilantro lime rice you can find in the Mexican food aisle at Target.  It is Archer Farms I believe.  Also, if you love a side of beans, I use Frijoles Mexicana from Bush’s beans.  It is a new line they have and they are in the bean aisle of many supermarkets.  (kroger and Wal-mart carry them here).  Hope you enjoy!  Ole!

559727_533176410096264_1450022361_n


Cinnamon Toast Pioneer Woman style

Morning everyone!!!  So this morning I went on a walk/run and it was wonderful.  Geez it is better than any medication I could ever take.  And then I came home and made some Pioneer Woman cinnamon toast.  Not sure if my walk/run did anything other than make me feel awesome, but oh well.  This cinnamon toast is totally worth it.

Image

When I say worth it, it is worth it.  So worth it.  Now, some of you may be wondering what kind of cajun mama needs a recipe for cinnamon toast?  Well…me.  I came across this recipe earlier in the year on the food blog, A Feast for the Eyes.  I had been making cinnamon toast here and there for breakfast and it was ok.  It really was.  But you must understand, my standard for cinnamon toast was pretty high.  My Momou used to make the BEST cinnamon toast (with cheesy eggs) for me when I would spend the night with her.  And I tried to duplicate it, but never could quite do it.  Well, now I know why and I have been able to recreate her cinnamon toast perfection.  The only thing missing is her.  She is still alive, but lives a little ways from me so that is not always possible on a Sunday morning.  Ok…so for those of you who love cinnamon toast.  Or love toast. Or even if you don’t, trust me, you should try this.  This is not ordinary, plain old cinnamon toast.  The key here ya’ll is REAL butter.  Not the tub stuff, not the stick “margarine”…the real deal people.  That is all I use anymore.  So do as I say and get the good stuff.  You can thank me later.  Or call me and sing me a song about your new love PW’s cinnamon toast.

Cinnamon Toast Pioneer Woman style (adapted from A Feast for the Eyes food blog)

You will need:

8 slices of bread (wheat or white is fine.  I have used both and it was divine)

A stick of real salted butter, softened (I usually pull my stick out and unwrap it and set it on the counter in a bowl when I get up and make my coffee.  After my first cup, it is usually good and soft.)

1/2 cup of sugar

1 1/2 tsp. ground cinnamon (I use roasted saigon cinnamon and it is ah-mazing!!  But the regular stuff is great too)

1 tsp.  vanilla extract

1/4 tsp. ground nutmeg (optional)

Directions:

Preheat your oven to 350 degress.

Mush softened butter with a fork.  Add sugar, cinnamon, vanilla and nutmeg if you are using it.  Stir until it is all mixed together.  Stop licking it off of the fork.  You won’t have enough for the toast if you eat it all.  (not that I speak from experience…ha ha)

Spread evenly on each slice of bread.  You want to cover each piece from one edge to the other.  Place each piece on a cookie sheet.  Bake in preheated oven for about 10 minutes.  Then turn your broiler on lo and until it is a beautiful brown and it is bubbling slightly.  Watch it carefully so it doesn’t burn and you won’t cry because you have to start all over.  About 1-2 minutes.

Remove from oven, slice diagonally, and try to let it cool a bit before sinking your teeth into cinnamon toast heaven.  Try to share some with your family.  They would most likely like a piece too.  🙂

Ritz Cracker Chicken casserole

Once upon a time, a cajun mama found a recipe called poppyseed chicken aka Ritz cracker chicken in a magical place called Pinterest.  She made it for her cajun family and they all lived happily ever after.  Ok…so not quite but when I tell you that there is a reason Ritz cracker chicken is a classic Southern recipe that is delicious, easy to make, and makes up in a snap, I tell you no lies.  This stuff is amazing and I had been missing out.  Like, how did I live without this dish for all the years before?  It is seriously fantastic.  

Image


So let’s get down to the brass tacks here.  The nuts and bolts of it all.  The nitty gritty.  I know ya’ll didn’t come here to read my witty repartee.  Some call this Poppy seed chicken casserole and some call this Ritz cracker chicken.  Just make it and I am pretty dang sure ya’ll will just call it GOOD.  

Ritz Cracker Chicken/Poppy seed Chicken casserole  (adapted from The Girl Who Ate Everything)

Ingredients

5 cups chicken breasts, cooked and cubed

1 cup sour cream

2 (14.5 ounce) cans cream of chicken soup

2 cups crushed Ritz crackers (about 1 1/2 rolls of crackers)

*I crush mine by putting them in a gallon ziploc bag, closing it tightly, and then rolling a rolling pin over the bag until they are crushed…or you can use your food processor.  I am not that industrious.)

1/2 cup melted butter

1 Tablespoon poppy seeds (in the seasoning aisle of the grocery store usually)

1 tsp. Worcesterchire sauce 

1 tsp. celery salt

1 tsp. minced garlic

1 T. lemon juice

1/4 tsp. pepper 

Instructions:

Preheat your oven to 350 degrees. Boil uncooked chicken breasts with salt and pepper until done.  Remove from the water and let them cool a bit and then cube it up.  

In a medium sized bowl, stir together the soup, sour cream, Worcesterchire, celery salt, garlic, lemon juice, and pepper.  Pour over the chicken.  

In a separate bowl, stir together crushed crackers, poppy seeds and melted butter.  Sprinkle over the chicken and sauce.

Pop that baby into your preheated oven for about 30 minutes, or until the top is a nice toasty brown and the sauce is all bubbly.  (my mouth is watering)  You can serve over rice or noodles.  Or just eat it straight out of a bowl.  This stuff is seriously DIVINE.  

Copycat White Castle burger recipe

Image

My son is a notorious burger lover. He makes the hamburglar look like a lightweight. He turned 10 last week and we had a little soirée at the house for him over the weekend. A few weeks ago, I had found recipe for cheeseburger sliders on South Your Mouth blog and I knew they would be perfect!! So a few Fridays ago I made them to see how they would go over and boy did they ever! My whole family LOVED them. They were so easy to make it was almost ridiculous. Perfect party food!! So this weekend I made a batch for our party guests and they cleared them out! We have enjoyed them so much, I knew I had to share them with ya’ll!! If you have ever had a White Castle burger and loved them…get ready because these are pretty darn close.  Make up a batch or 2 for your family and friends. 

Cheeseburger Sliders (adapted from South Your Mouth)

1/2 onion, diced fine

2 1/2 pounds ground meat

kosher salt 

pepper 

garlic powder 

American cheese slices (my kids rather thestheory out cheese but the original recipe calls for it)

24 white dinner rolls (I find them in the grocery store bakery department and they typically come in packs of 12) 

preheat your oven to 400 degrees. Dice the onion really fine. In a 13 x 18  cookie sheet (or irregular sized ones) sprinkle the onion evenly on the cookie sheet.  Press the ground meat into the cookie sheet until it is evenly distributed and covers the entire cookie sheet. Bake in the preheated oven for about 20-35 minutes. There will be some pink when you cut the meat into patties, but you don’t want them overlooked. Feel free to cook the meat a little longer. 

after you take the cooked hamburger meat out of the oven, place your cheese slices on the meat if you are using it. I used a pizza cutter to cut the meat into patties.  Using a bread knife, slice the buns horizontally in half. Place patties between the buns. Pile those babies up on a plate, put them out and get ready to watch them disappear!!!! My son loves pickles on his and my other kids love ketchup. Don’t be afraid the kids won’t like them because of the onions…9/10 of the kiddos here for the party gobbled them up!!! Enjoy!