Category Archives: desserts

Keto lemon cheesecake mousse and I’m like a butterfly 🦋

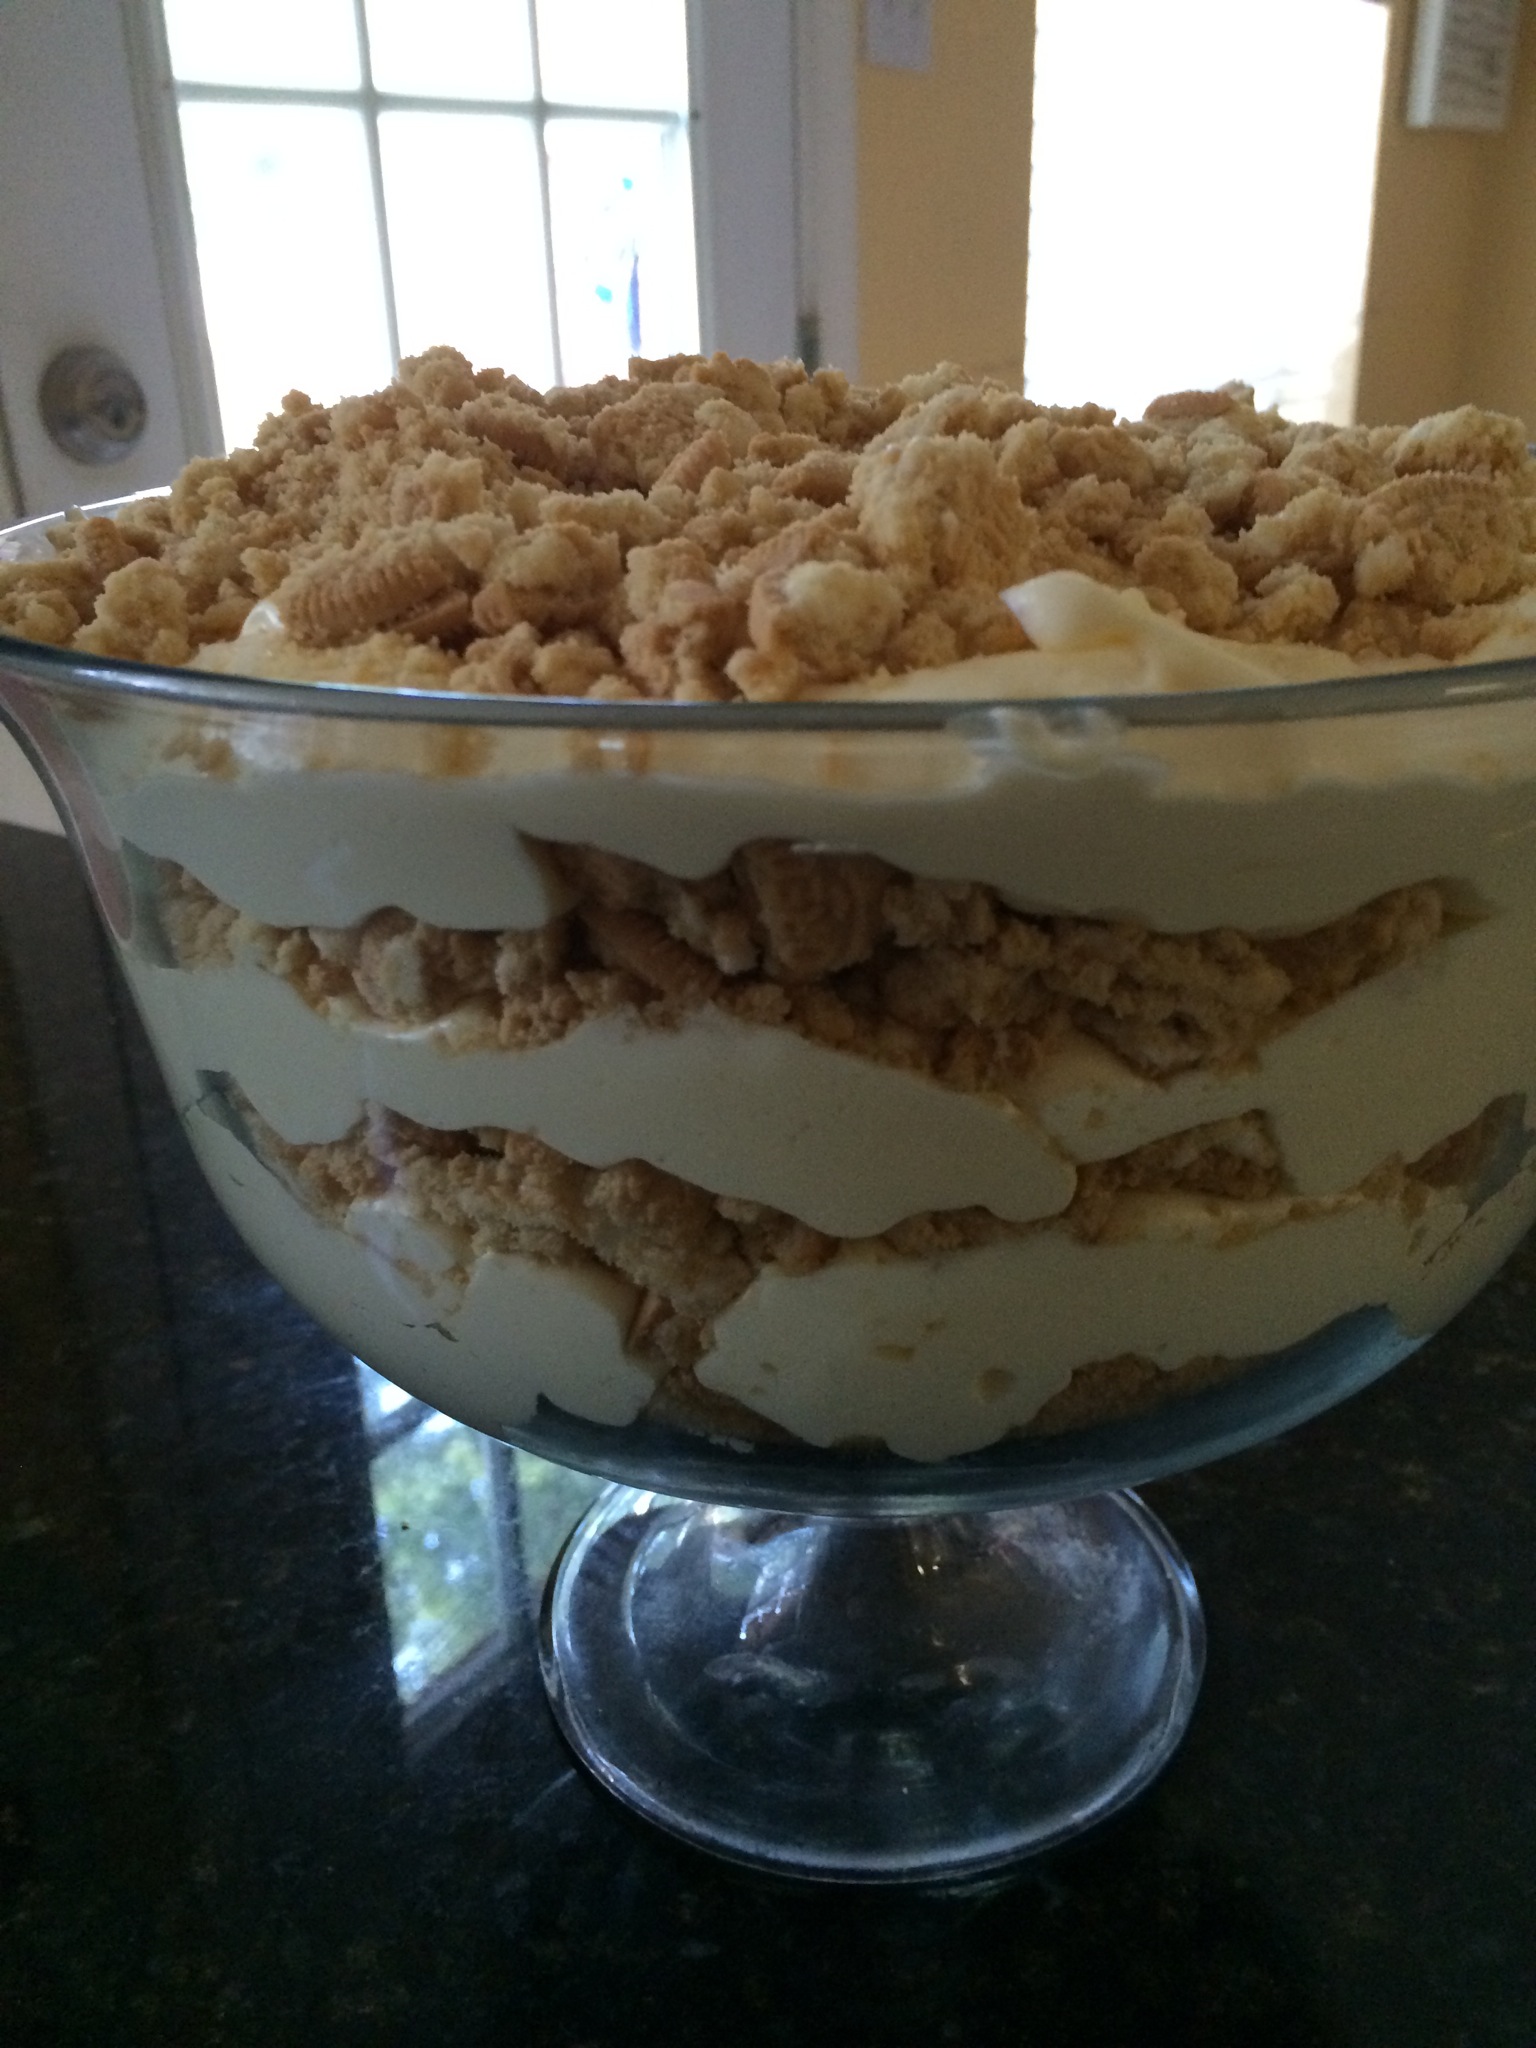
So if you know me or follow me, you know I’ve been following the keto way of eating for about a year now. It has been amazing and I just feel so good. Granted, this summer I’ve loosened the reigns with all the traveling we have been doing. I have stayed keto-ish for the most part but I realize how much better I feel when I keep my carbs under a certain amount and eating keto is a choice for me. That’s a beautiful thing when I can say ” I choose this.” Sure, I’ll have carb ups here and there. I think it’s necessary (and I’m not open to argument…I’ve done the research. You do you, I’ll do me. After a year of doing this, I’ve done lots of trial and error and I know what works for me. 😊) So I’m about to head back to work as the school year is about to start and I’m kicking my keto mode back into high gear. I’m never super strict keto (again not wanting to argue) but I’m definitely looking to keep my carbs low and my healthy fat intake up to stay full and satisfied. I operate in the real world. And in the real world, we crave something sweet. As much as I love meat, cheese, so on…sometimes you just want something creamy and sweet. Something decadent. And this lemon cheesecake mousse fits the bill!! You can leave the lemon juice out and add some cocoa powder. You can add some vanilla. You can make it fit your cravings. My friend Dana gave me this recipe and she calls it keto cheesecake. It is cheesecake-ish but there are actual keto cheesecake recipes out there. With a crust and the whole nine yards. We eat this more like a mousse and I have always loved chocolate mousse so voila! This is a great mousse recipe. Dana loves her to taste like a lemon icebox pie!

You can just get spoonfuls our the bowl or divvy it up into separate serving containers (I use our Pampered Chef one cup prep bowls). Dana is my keto leader. Lol 😂. Last year when my blood-work showed my triglycerides to be super high (like insanely high and no wonder I was very overweight…I mean I’m still overweight but I’ve come a long way and it’s a journey. One step at a time!) anyway, my doctor advised I go on a low fat diet and I bought tofu, wheat bread and the whole nine yards. I was talking about how I was going to try to make tofu taste like cheese and in her typical Dana fashion…she said “but why though?” She had great success with keto and is a firm believer in that way of eating. And that day I started…and never looked back. I jumped in head first. And she showed me the way. Some days you just need someone to do that. Just take your hand and gently lead you or shove you in the door (ha!) and she has done just that. I’m forever grateful. Yesterday I was at her house and she was making this and I came home and made some and figured I would share. It’s crazy easy.

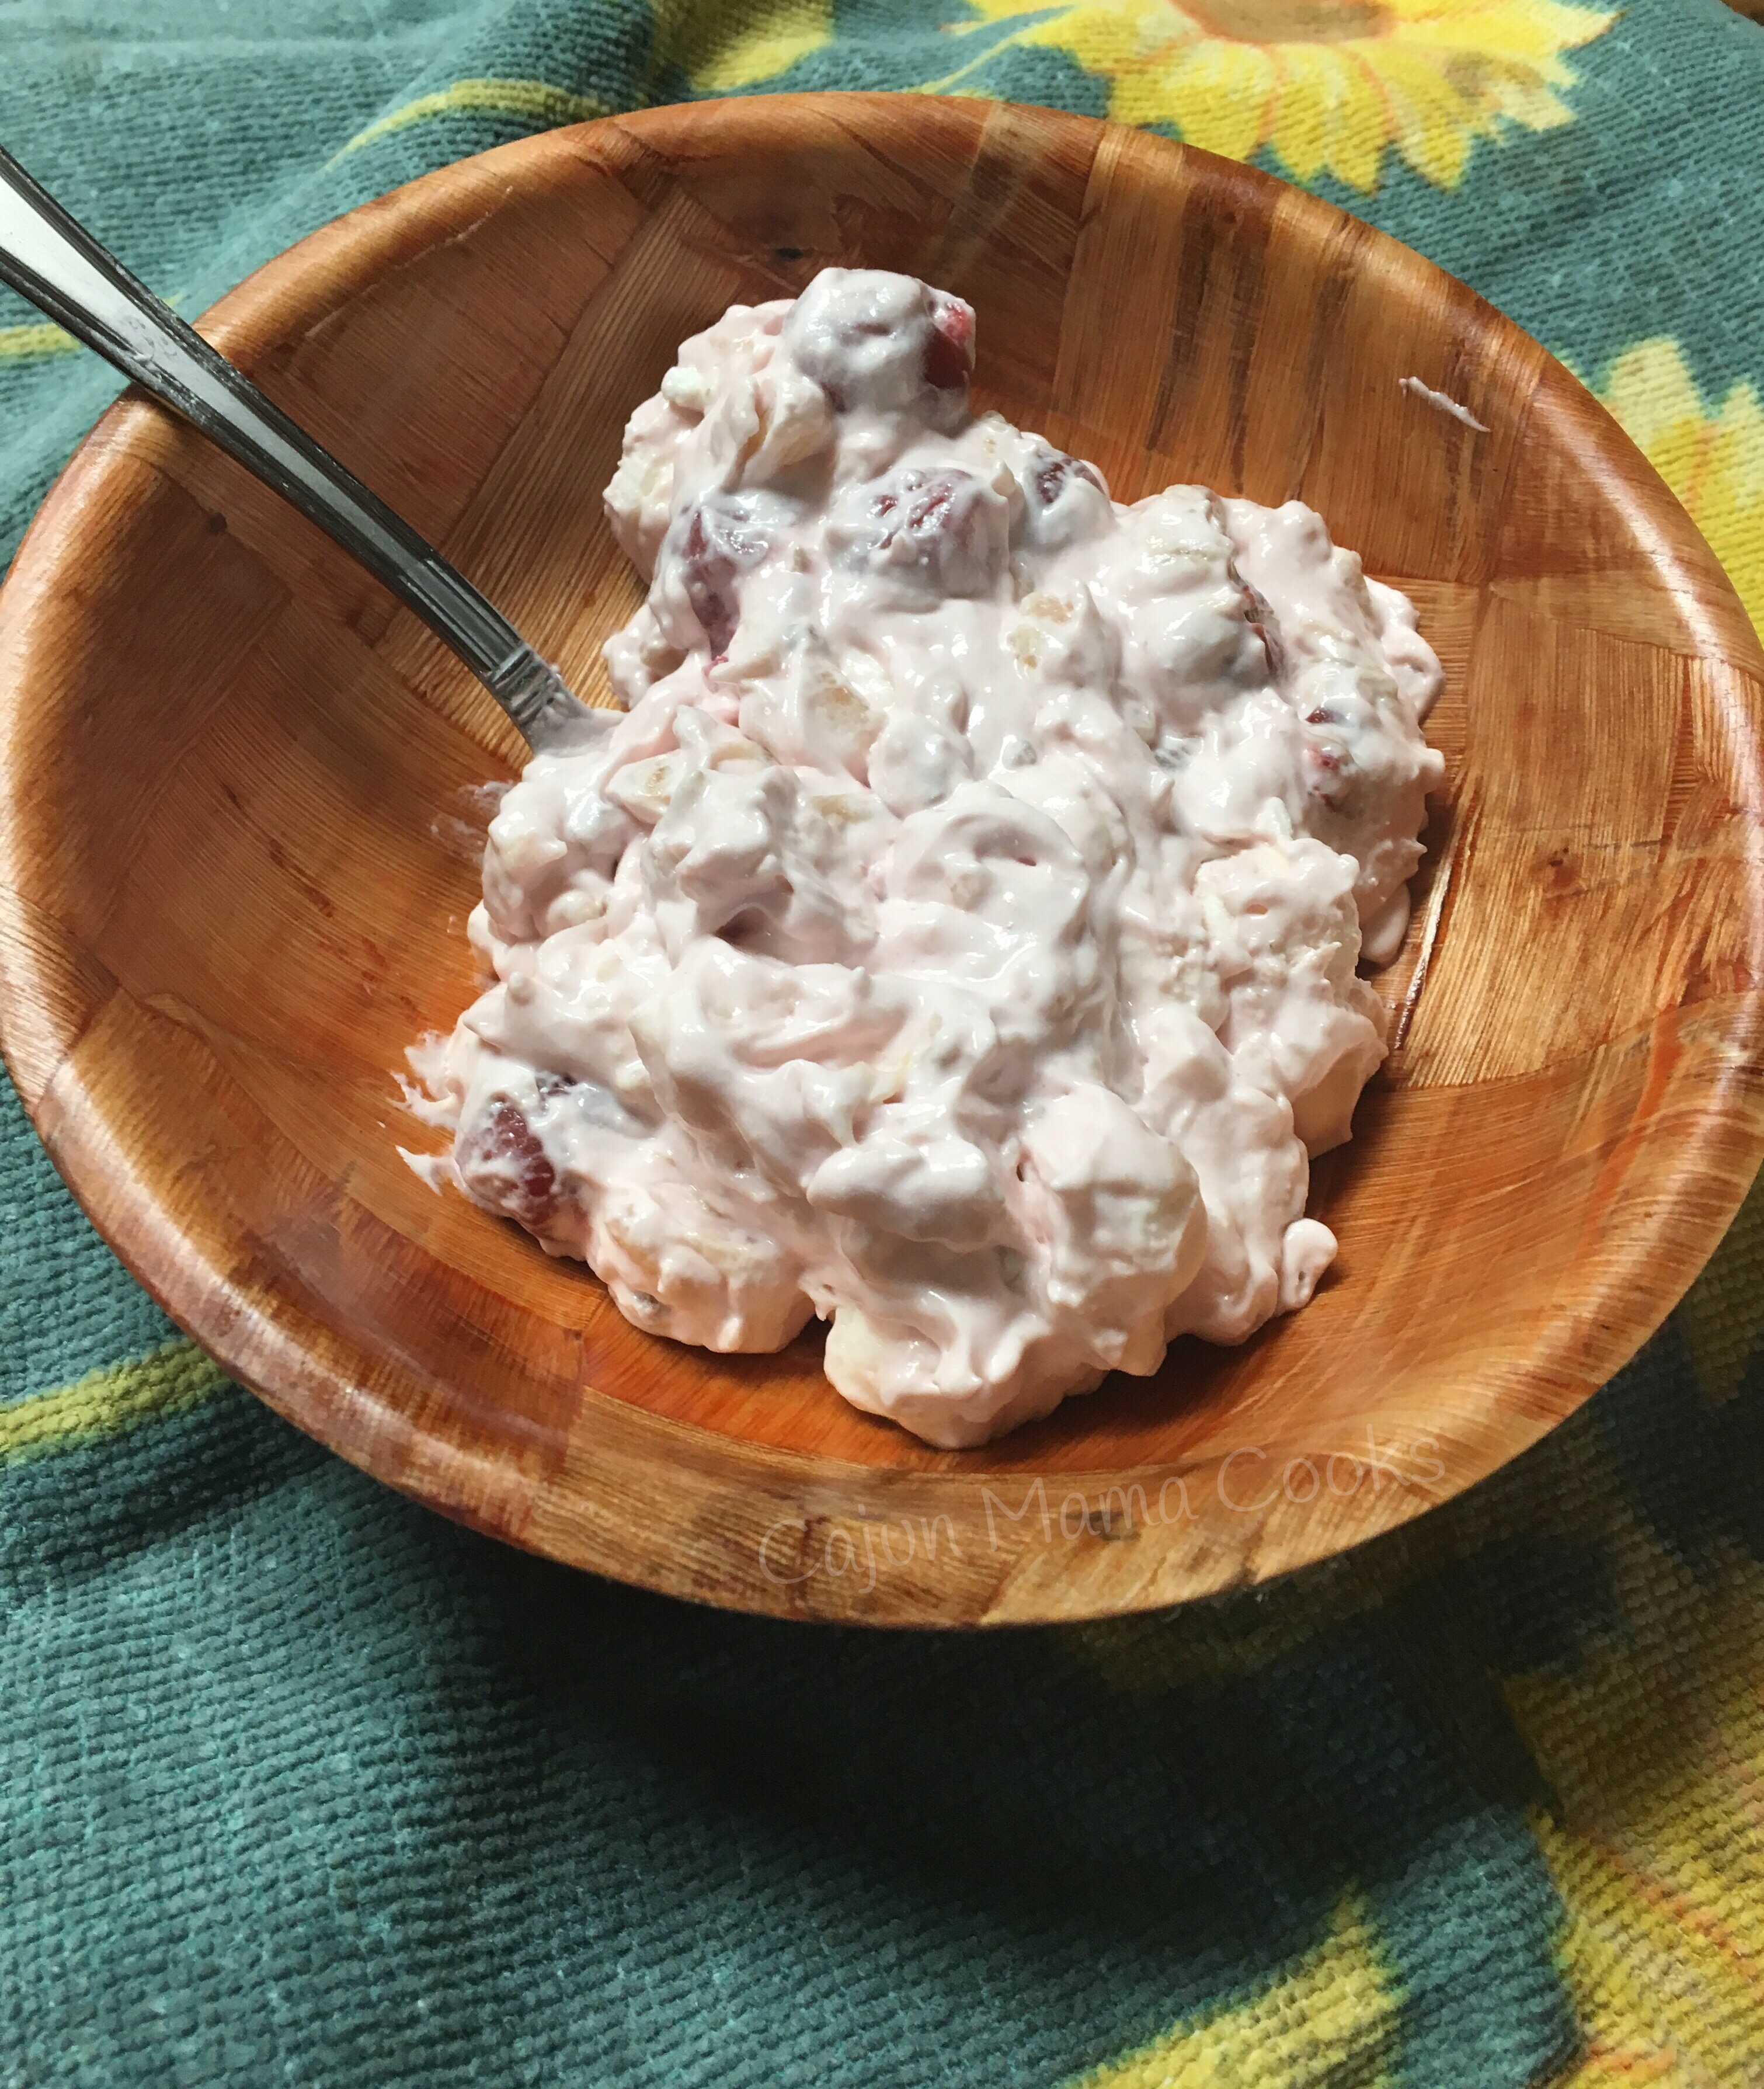
I’ve definitely come a long way in the past year. I’m sort of evolving all over again and I’m ok with that. I’ve let my hair grow, I’ve gone back to work full time…I try to imagine myself as a butterfly…I’m in a state of metamorphosis. The above picture was so to show how much my hair has grown over the last year, but I also noticed a few other changes. At 43, I’m learning all over again. It’s my second act. And I’m loving every minute. I’ve been knocked off my behind, I’ve lost a lot (weight, people, other things) but I’ve gained so much more. And what’s here is so special. Sorry to wax and wane about this, but being a year out of my evolution…I’m proud of where I am and I figured I’d share. Wherever you are…you are not stuck. You can begin again. You can learn new things and be whoever you want to be. But you have to have the courage to start! Start now! I hope above all you get that message today. And you make up this delicious keto cheesecake filling/lemon icebox mousse. It’s great to have a few spoonfuls when you are having cravings. It’s low carb and will keep you in your macros. It’s a decadent treat you can feel good about.

Keto lemon cheesecake mousse

Stuff you need~

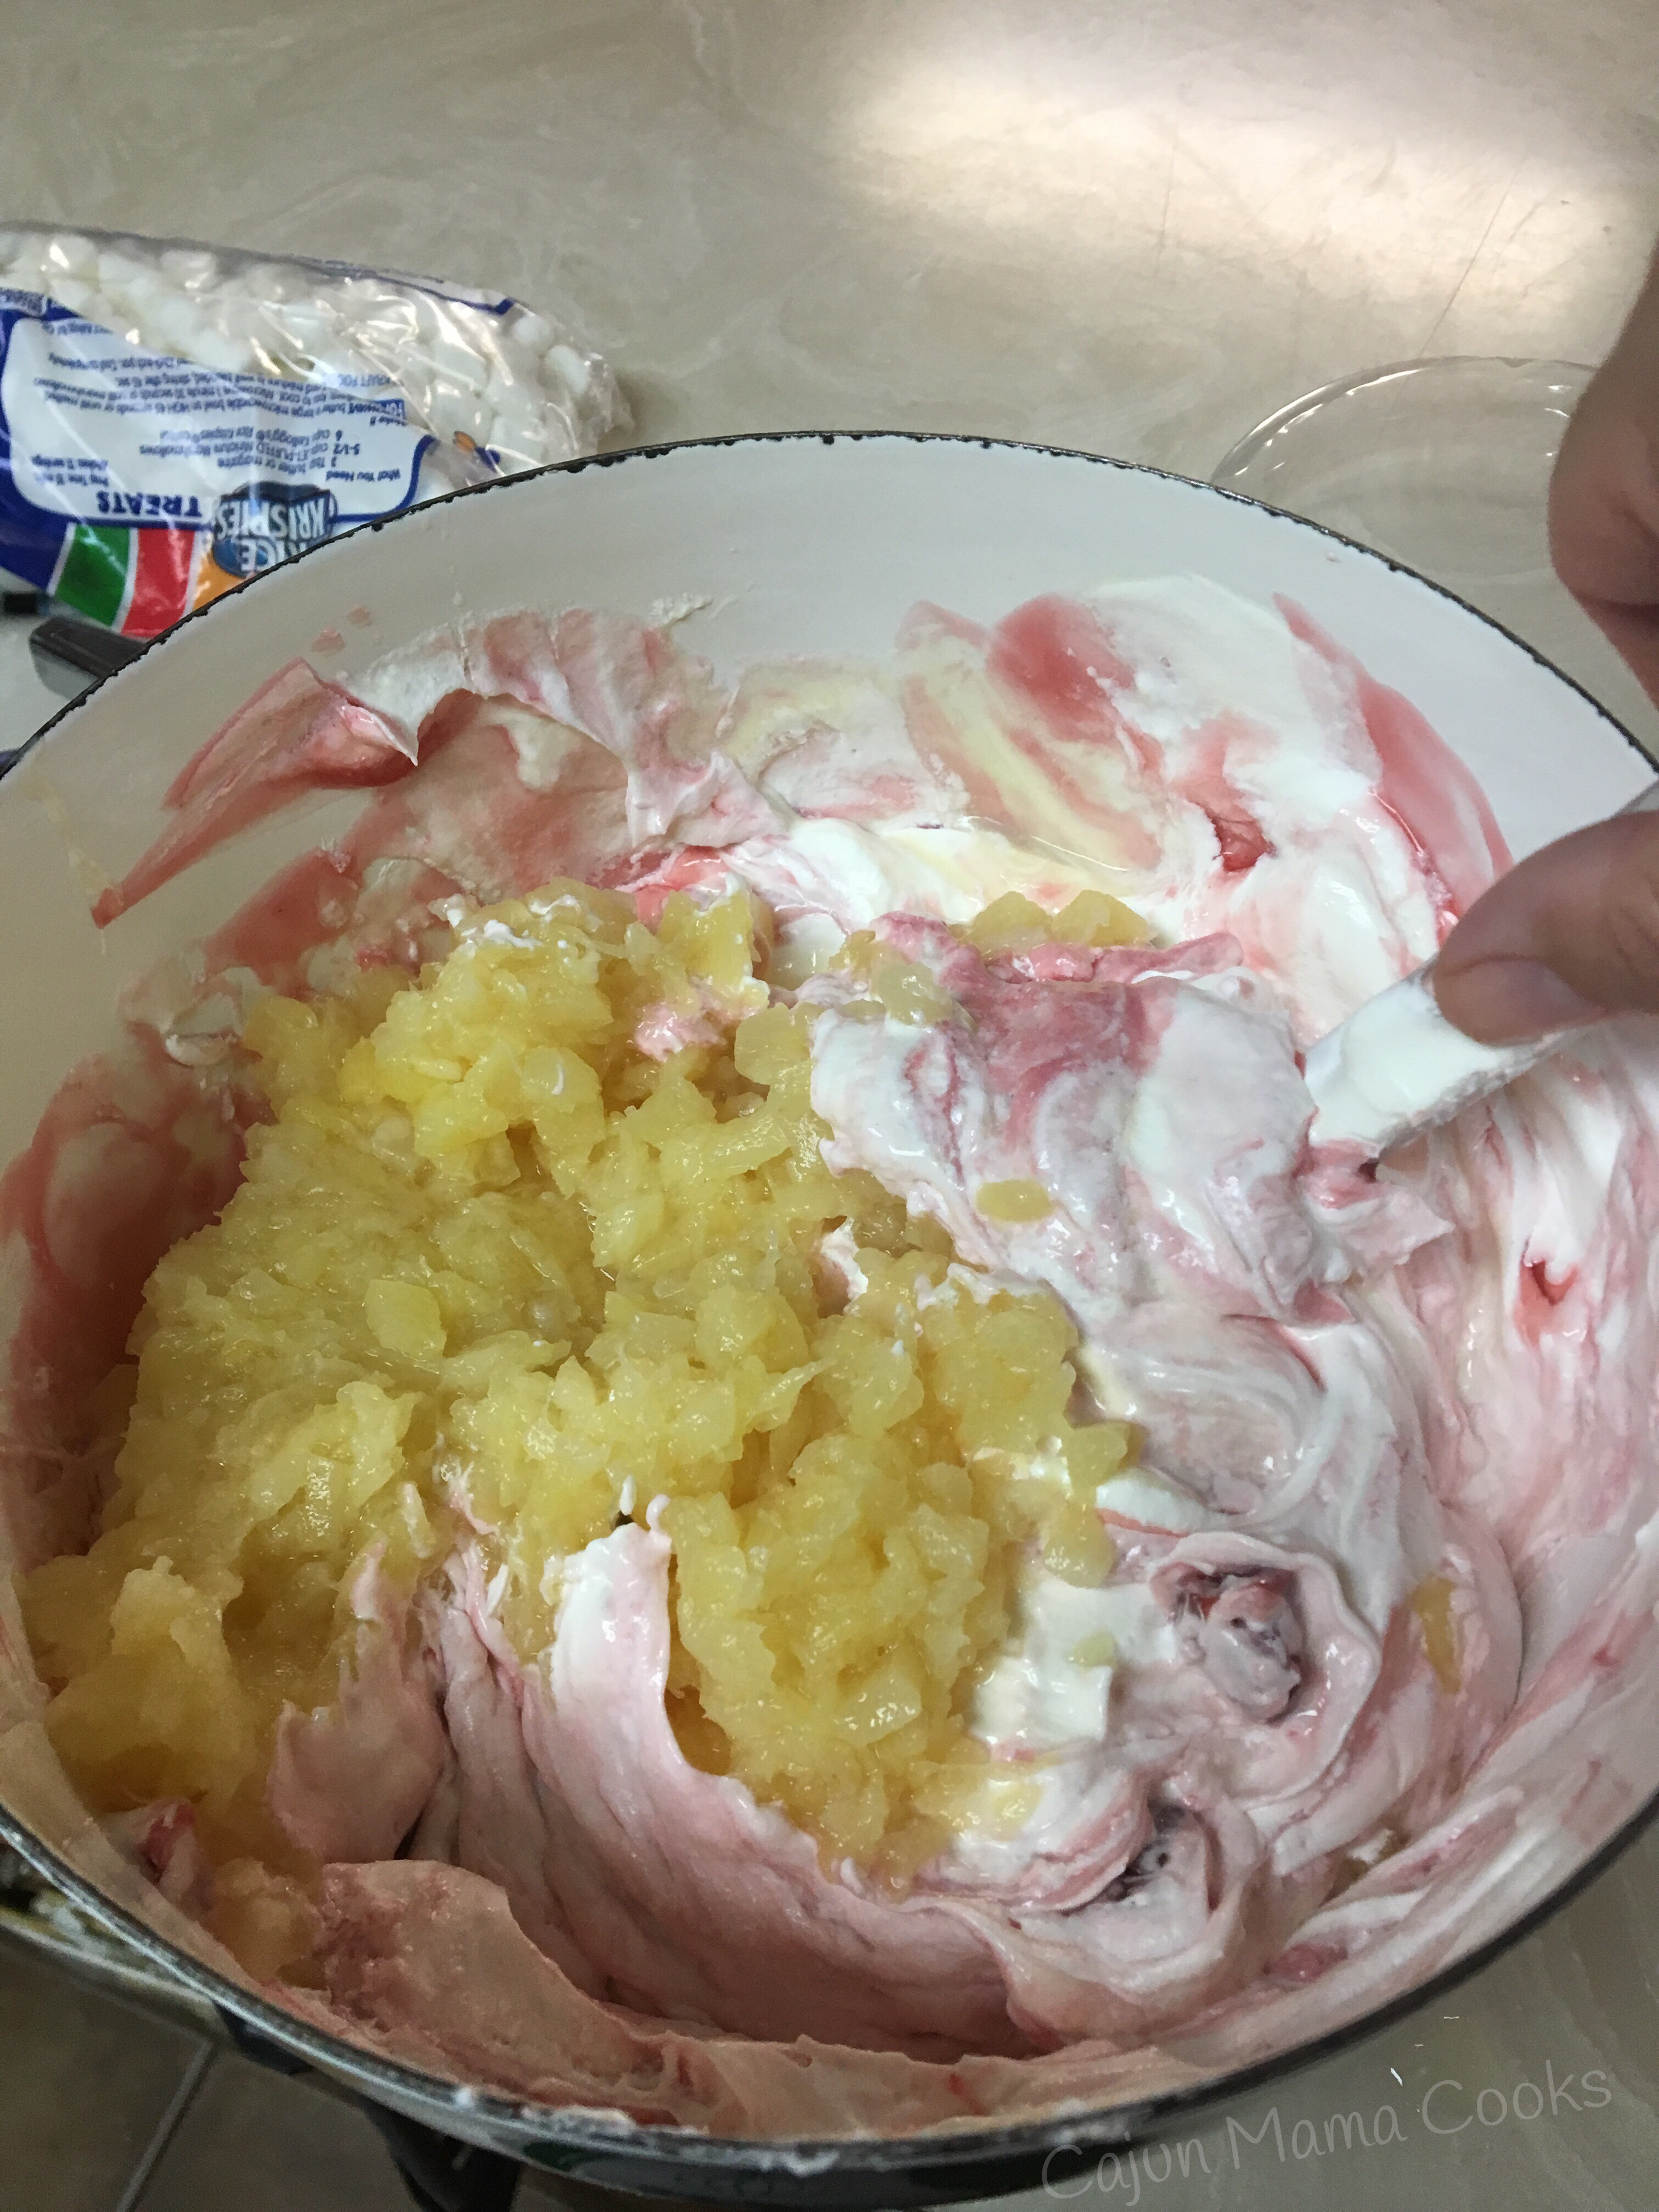
8 ounce block cream cheese (softened)

1 cup heavy cream

1/4 cup of lemon juice (more if you want a more lemony taste or less if you want a less lemony taste)

Splenda or swerve to taste *

*Dana uses Splenda. I do not like Splenda. I find it makes my joints ache and I just don’t feel good when I consume it. I like Swerve. You might to use Stevia. I use the Sweet Drops in my coffee. So whatever low carb sweetener you want to use is fine here. There are lots of options.

What to do with the stuff~

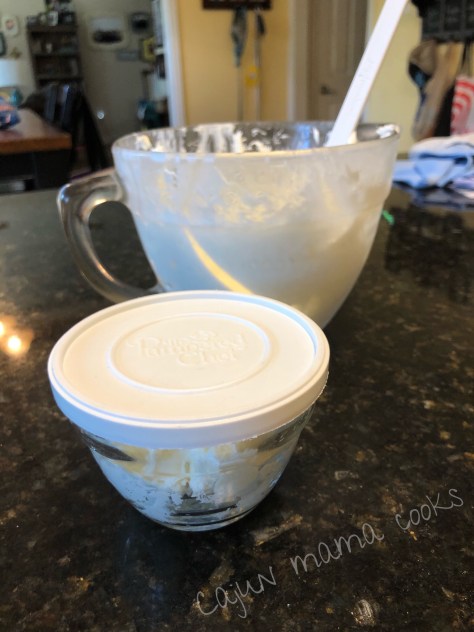
-Add your cream cheese to a mixing bowl. Of course, I’m a Pampered Chef consultant and I am a lover of our batter bowl. I’ve had this one since college 👀!! Their stuff lasts forever. If you need a great mixing bowl or some prep bowls, we have 2 sizes and you can order one from my Pampered Chef website!

So add your softened cream cheese to your bowl. If it is not softened and you just need a keto fix, you can pop it in the microwave for a 30 seconds or so. That’s what Dana did yesterday. Our Pampered Chef batter bowls are microwave safe!

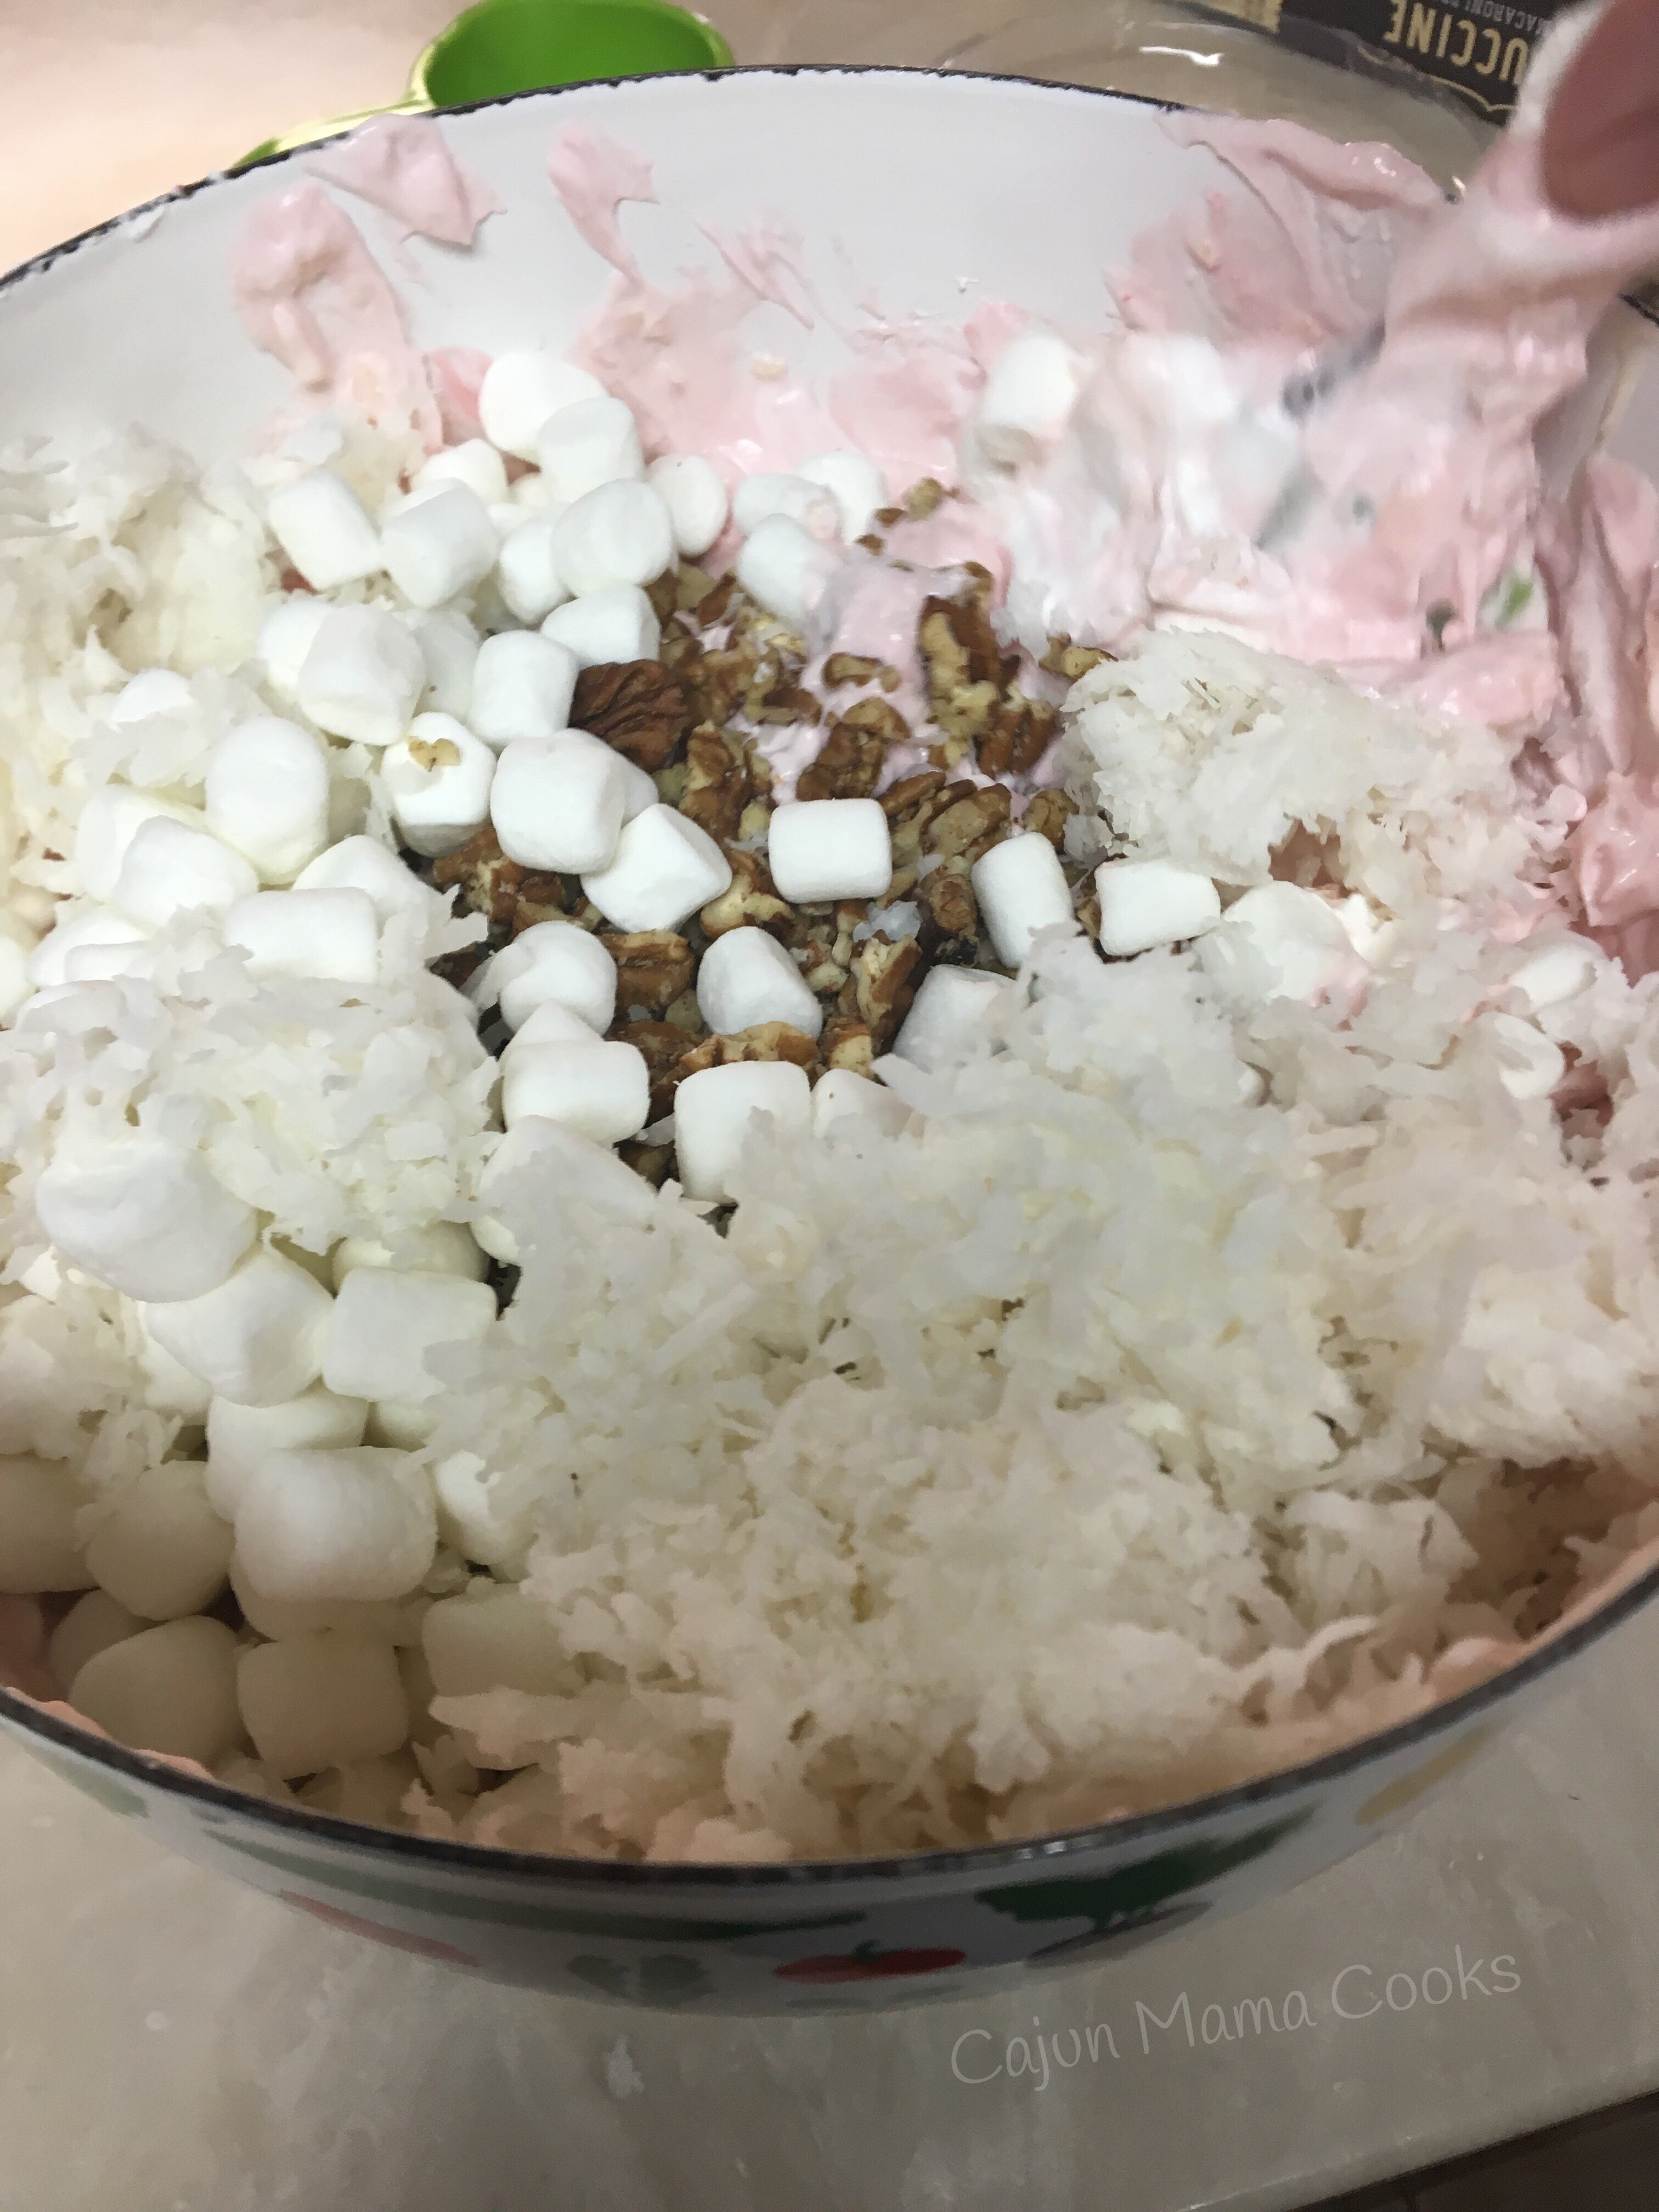
-After your cream cheese is softened, whip it up with your mixer. Let it get good and stirred up. Add in your heavy cream a little at a time. Mix it until you have a good creamy consistency. Add your lemon juice, mix it up. Add in some of your sweetener of choice. Whip it some more. Whip it real good!

– Add more sweetener until you have it like you like it. You can add more lemon juice if you need a more 🍋 lemony flavor. Now refrigerate until it is a little more set. Or have a few spoonfuls right away and then stick it in the fridge. Do you! Our batter bowl goes from microwave to the fridge and even has a nice lid that pops right on! You can divvy this up into separate containers. Our Pampered Chef 1 cup prep bowls are PERFECT for this. They come with lids that fit perfectly. And our mini mix in scrape is great for getting all the cheesecake mousse goodness out of the bowl!

Keep some of these prep bowls full of the lemon cheesecake mousse for when sweet cravings hit and you can stay on track to the ketosis and your fat adapted state. What a wonderful thing!!

Be a butterfly and let yourself evolve. Thanks for reading! I appreciate you all.

Advertisement

 Cherry 🍒 fluff and my happy place 

Ok so my mother in law, Deb, is a native of DeWitt, Arkansas. I am pretty sure before Big Daddy and I started dating, I’d never been to Arkansas, much less DeWitt. So it’s pretty funny for me to say the words “Dewitt is my favorite place on Earth.” Well, it likely rivals Perdido Key, Florida as my favorite place, but it is right up there at the top of my list. She and my father in law, Scott, run a hunting lodge, Bayou LaGrue. I’ve likely told y’all this before, but maybe you missed that so I’m saying it again. So technically Bayou LaGrue is one of my 2 favorite places on Earth. We love coming here. Last night when we arrived, Deb aka Granny had prepared a ham, fried potatoes, corn and peas with some rolls. My kids oohed and Aahed like they had not eaten in years. I could not blame them…everything tastes better at the camp! We all agreed on this. Forget Disney, for Cajun mama and family, Bayou LaGrue is the happiest place on Earth! 

Pappy’s favorite thing to do is catch fish in the pond

Now that I’ve been around for over two decades, Deb aka Granny sometimes gives me carte blanche in the lodge kitchen. Only sometimes though. Cajun Mama or not, that’s her lodge kitchen and she is the queen of it. I’ve been wanting to make Mr. Scott some of my mom’s dirty rice, so before coming up I grabbed the stuff I knew they would not carry in the Piggly or Kroger in DeWitt (it’s pretty small) and then I saw this recipe on Facebook and decided to make this “cherry fluff” while I was at it, here is original recipe link. Mr. Scott LOVES ambrosia and this dessert seemed like a pretty good fit. And I told Deb I would be commandeering the kitchen. She allowed it. This time.  Haha! 
Anyhow, I made up batch of this cherry fluff aka unicorn fluff and I cannot wait to get his take on it. My Madame toot (10 year old girly girl with a love of all things unicorn) said given its pink color, it’s fluffy texture, and that it has marshmallows in it, should be dubbed “Unicorn Fluff” so unicorn fluff it is!! This recipe is super simple to throw together and it is different than your regular cakes or pies, so it’s a fun, unexpected treat. Also, given that it is 9000 degrees outside anywhere in the South, this dessert is NO BAKE, possibly making it the perfect summer dessert! Can I get a whoop whoop?!! 

La ingredients


Unicorn Fluff 🦄/Cherry Fluff 🍒 

Stuff you need~

1 (14 ounce) can sweetened condensed milk 

1 (8 ounce) container Cool Whip

1 (20 ounce) can of crushed pineapple, very well drained  

1 (21 ounce) can cherry pie filling 

2 cups mini marshmallows 

1 cup shredded coconut (sweetened or unsweetened works)

1/2 cup chopped pecans 

What to do with the stuff~

Combine the Cool Whip, cherry pie filling, crushed pineapple in a large mixing bowl.


 Stir in marshmallows, pecans, and shredded coconut.


  Now, cover and pop in fridge. Let chill until ready to enjoy! It will thicken up as it chills. Be sure to take in the lovely pink hue of this sweet concoction sure to add a bright dose of color to your next meal!! Madame Toot would insist on this! 


I hope you enjoy this luscious pink dessert in your happy place! 

This is a luscious dessert!
Papa and Madame Toot at BLL

Chicken and rice soup, banana bars, and all that matters is family 

It seems lately that life has taken on a frantic pace that since becoming a mom I SWORE I would never allow for my family. It’s amazing how innocent new motherhood can be, but that’s a story for another day. Back then, looking at my sweet baby boy’s face, I said I would never allow myself to lose focus on what really matters. Togetherness, family, downtime, blocking the rest of the world out. Yeah, yeah, I know it’s important to teach my kids to let the world in and to be a big part of their community, but I want to make sure they always remember what really counts at the end of the day. For instance, I agreed this year to be the ptsa president for my son’s middle school. I am really enjoying it now that the ball is rolling (shhh don’t tell anyone) but I have to be very careful to not let it take over what I hold dear to me. My family, togetherness, you know the drill. My kids are more involved than they ever have been and that’s to be expected now that they are all getting older. So mostly the weekdays  belong to everyone else. Or it feels that way. It’s a crazy, frenetic pace that exhausts me by Thursday evening. It is hustle and bustle and go go go. And I don’t even have a job outside the home. So come Friday evening I am ready for DOWNTIME!!! The weekends belong to our family!!!  It looks like this…


My kids running around PLAYING without time limits.

 Big Daddy watering his garden while I drink wine on the back porch. No mention of homework, no uniform washing (well I still do that because Monday comes too fast and I am slightly neurotic about laundry but the point is I don’t have to wash uniforms if I don’t want to. There’s joy in that).

I get to sit down and do all of this I want…


Now that’s a relaxing Friday. I went to bed at 8:55 last night. It was that relaxing. Last week was absolutely crazy but the bad thing is that almost every since school started has been that way. I worry this is going to become our norm. After holding on to peace and family time for so long, I am not going to succumb to it. I am willing to let the weekdays be a little wild. But the weekends for the most part, belong to us. Cut to I have been up since 5, the guys are hunting (it’s youth hunt weekend) and the girls are sleeping in (God bless the weekend!). So I am in the process of taking back our weekend. That means making one of my favorite soup recipes and one of Big Daddy’s favorite childhood treats…Mrs. Sandra’s banana bars. I absolutely believe good ole comfort food is a vital part of keeping our weekends sacred. Well, I’m Cajun, I actually believe good food is a vital part of everything. Nonetheless, soup and a sweet (and lots of coffee) go a long way in making our weekends something special. A respit from all of the hustle and bustle of the week, an safe harbor in a sea of madness. No really.

So now for a little back story on these recipes I am sharing. This chicken and rice soup is a Pioneer Woman recipe. It is to die for. I think the first time I made it one of my kids was sick and I was overcome with a sense of motherly domesticity and found this recipe via Google. I always love PW’s recipes and this was a big hit! I am excited to share it with those of you who might not have found it yet. She does apologize in her post for using chicken bouillon cubes and yellow food coloring, so read her post if you want to get the full effect. http://thepioneerwoman.com/cooking/simple-hearty-chicken-rice-soup-itll-keep-ya-honest/     As for me, I offer no apologies for such transgressions.  None. The soup is fantastic and if bouillon cubes and food coloring are the worst of my offenses, then God bless. But trust me, they are not. If the guilt from my bouillon and food coloring use gets too heavy, I will just go confess to Father Mark and say some Hail Marys. This soup is abso-flipping-lutely mouthwatering and full of flavor. It’s one of our favorites. It makes your kitchen smell like heaven.

PW’s chicken and rice soup 

Stuff you need~

2 chicken breasts with bone in and skin on (the bone and fat are necessary to make the chicken stock…those two things make it extra fantastic!)

8 chicken boullion cubes

1/4 cup diced onion

1/4 cup diced green bell pepper

1/4 diced pimentos (from a jar)

1/4 cup chopped celery

1 cup cooked rice

6 tablespoons butter, divided

4 tablespoons flour

Few drops of Yellow food coloring

What to do with the stuff~

First of all, go one and get  your your rice cooking either on the stovetop or in the rice cooker. 

Wash your chicken breasts and cover them with about 2 quarts of water, give or take a little. Drop in those boullion cubes. 


Bring to a slow boil and then reduce heat and allow chicken to cook for about 20 minutes  or so. When cooked through, remove chicken from water and set aside. Keep the lovely  chicken stock that you made boiling those chicken breasts at a low slow simmer on the stove. 

Now dice up your veggies. Now we will make a little roux.  Melt 4 tablespoons of butter in a skillet. Whisk in the 4 tablespoons of flour and stir until thickened. Pour this into your barely simmering chicken stock.


Now melt the remaining 2 tablespoons of butter in a skillet. (I just wash the skillet I just used and use it again) Add your diced veggies to the melted butter.


Cook until tender and then add the chopped up chicken. Mmmmmm


Give it all a good stir and then add to the simmering stock that is quickly turning into a bonefied soup.

sooouuup

Now, you are in the homestretch. Almost there. Get ready. You are going to add the cooked rice to the soup.

Yes yes yes. Now you have oh so savory chicken and rice soup. Perfect if you have a sick person to nurse back to health (this plus essential oils can work wonders to heal a sick body). This soup is a wonderful dish to cook if your spirits are waning and you are taking respite from the world. Either way, you are golden. Now for the final touch…yep, the yellow food coloring. This is really not necessary but to preserve the authenticity of PW’s recipe, I follow her instructions.


Let this all simmer a bit longer, maybe 20 minutes to let it all blend and mingle. And then you have this…

so much love…

Now for the banana bars!!!

his reminder to me…since we had some bananas that were super ripe

Now these banana bars are the bomb. Big Daddy lived in Broussard/Youngsville for a long while when his daddy ran the co-op there. Of course his mama, Mrs. Dianne, was a. social butterfly and lovely lady, so she  made some good friends where ever they lived. In Broussard, Mrs. Sandra, Mrs. Linda, and Mrs. Peggy were her top gals. They all had kids (a bunch of boys mostly) and they hung out like a posse. Of course they are all fabulous cooks and swapped recipes. Mrs. Sandra made these banana bars that made Big Daddy swoon. I heard about them from the time we started dating until she finally gave me the recipe a few years later. Back then, I had no idea what a jelly roll pan was so I used a 9 x 13 inch pan. BD said they were a little thicker than he remembered but they were good anyway. So if you do not have a jelly roll pan, don’t fret!!! It’s the weekend and we don’t worry on the weekend! If you want to buy one, here is a link …Chicago Metallic Non-Stick True Jelly Roll Pan, 15 by 10-Inch https://www.amazon.com/dp/B003YKGRVO/ref=cm_sw_r_awd_SEqgwbY3FK75S. If you have Amazon prime,  2 days and you will be all set! I picked up one at Walmart and it worked great. The dimensions you are looking for in a true jelly roll pan are 10x 15 x 1.

I love that even though BD’s mom is no longer with us, I can still make one of his favorite childhood treats for him. That’s the power of good friend…they keep you alive in many ways. ❤️ That’s  also the power in recipes and passing them on.

Banana bars 

Stuff you need~

For the bars~

1/2 cup butter, softened

1 1/2 cup sugar

1 cup sour cream

3 large eggs

1 1/2 cup mashed ripe banana (about 3 bananas)

2 cups of flour

2 teaspoons vanilla extract *

1 teaspoon baking soda

3/4 teaspoon salt

*I do use vanilla extract but a new favorite of mine is vanilla bean paste, which you use exactly like extract. It tastes so pure and full of that vanilla perfection. I order it from amazon. I heart Amazon if you cannot tell. Just my two cents on a product that I love. 

for the Icing~

1/2 cup butter (1 stick)

3-4 cups powdered sugar

1 1/2 teaspoons vanilla

3 tablespoons (or more) milk for thinning the icing

For the bars:
Preheat oven to 350. Grease your jelly roll pan.

In a large mixing bowl or the bowl of your standing mixer, cream together the butter, sugar, sour cream and eggs. Blend in the bananas and vanilla. In a smaller bowl, combine the dry ingredients. Add this to the other mixture and stir until just combined. Pour into your prepared jelly roll pan.


Now bake 20-25 minutes until golden brown. And the kitchen smells like Christmas. No really…Christmas.

While that is baking, get your icing ready.

For the icing~

Melt butter in a large saucepan and let it brown just a bit. Just until it is a lovely light brown color. Not dark!! It takes a minute or 2. Stir in a cup of powdered sugar at a time. Add more as needed. I only  use about 3 cups. Now stir in Vanilla. Add your milk to make the icing the consistency you want. You want thicker than a glaze but thinner than a frosting.

a href=”https://cajunmamacookinblog.files.wordpress.com/2015/10/img_6973.jpg”> see that consistency (and powdered sugar lumps ?) [

Now once your bars are out of the oven, pour the luscious icing over the “cake” and ice it.


Then you get…


And everyone shouts hooray!!!!! Banana bars…my man’s favorite and they are gaining popularity!

a href=”https://cajunmamacookinblog.files.wordpress.com/2015/10/final-13.jpg”> my baby snacking on banana bars in the deer stand during a youth hunt. thank God for banana bars and weekends!!![

 E

a href=”https://cajunmamacookinblog.files.wordpress.com/2015/10/img_6928.jpg”> Mrs. Sandra giving BD a big mama bear hug at our wedding. so much love! [

Now we all just wait for another weekend to roll around! God save the weekend!! Hope everyone has a great week.

Frozen hot chocolate 

I know! It’s in the 40’s here and my crazy behind is making frozen hot chocolate. Yep that’s me. I am breaking away from the fray, I am stepping out , I am my own woman. I like my hot chocolate frozen. Really, I have always been intrigued by the idea of a frozen hot chocolate since the movie Serendipity with one Mr. John Cusack and one Mrs. Kate Beckinsdale. 


Yeah that movie. I love it. Probably one of my favorites. And I love New York. I despise travel but I would go to New York in a…well…New York minute. I love it there. When we visited a few years ago, Serendipity (the restaurant) was on my list of places to visit but my list was really long. So we never made it. I have pinned numerous recipes for this and never tried a one. Not sure why. But since we are  still iced in and I have some time and I have the ingredients in my over crowded pantry, I figured why not? So I did. I used this recipe I found on Pinterest on http://www.wishesndishes.com for Mexican Frozen hot chocolate and it did not disappoint. I assume what makes it a Mexican variation is the cinnamon and vanilla? Either way…awesome sauce. I added a little Godiva chocolate liqueur to sass it up for me but left it plain so the kiddos could indulge. If there was any left. And I felt like sharing. I did share..for the record. Because I love em. And they are my babies. And the state mandates I have to feed them. And mostly because a little of this goes a long way and I needed to leave room in my liquid diet for a Bloody Mary later. Can you tell the lack of adult contact and outside interaction with others is making me a little nuts? Ok…so though it did not look like this when we drank our frozen hot chocolates…


Nor did I expect us to look like that (I mean we have 4 kids all home and ice everywhere…it’s mayhem people. Mayhem. I drank my frozen hot chocolate standing and hoping none of my little beasts would come and jank it from my hands…that’s how we roll. Fast and in fear…ha ha ha!!! So now for the recipe you have been waiting for…here we go. Make it today. Thank me later.  You’re welcome. 

Mexican frozen hot chocolate 

Stuff you need ~

Serves about 3 

1/2 cup chocolate syrup (like Hershey’s)

1 cup sweetened condensed milk (that is almost a standard size can) 

1/2-1 teaspoon vanilla (I had some Mexican vanilla and used that…regular old vanilla will do)

1/4 teaspoon cinnamon 

3 cups of ice

What to do with the stuff~

Ok for a lovely asthetic effect, squirt some chocolate sauce into a clear glass. Swirl it around. 


Next, add the ingredients to a blender. 


Next blend it, grind it, or pulse it until the luscious concoction is smooth and creamy and free of all ice chunks (blech!! 😝). 


Next pour into your prepared glasses. 


Stir in some chocolate liqueur if you are serving to adults. Add a lovely dollop of whipped cream and a drizzle of chocolate syrup and it’s time to indulge, baby. You gonna love me for this. Happy iced in day to all my homies! And you people in lovely warm climates…you too. Even if I am jealous of you. Hugs, warmth and chocolate~AMB 


chocolate heaven


my girl KAB approves…that’s my baby


Big Daddy’s request: Lemon blueberry layered pie and I aim to please

The other day Big Daddy, love of my life, man who drives me bananas, my partner in crime and my babies’ daddy was thumbing through my All Recipes Magazine and came across a recipe that looked good to him. He rarely does this and just gladly eats whatever I make. Now in the past he has mentioned in passing that he had the envie for a blackberry cobbler, I make it and he forgets to eat it. Yeah that has happened. But still, he’s big daddy and I aim to please my man. Sometimes. When he is not annoying me. Which really could depend on the day or hour, because we are married and I am tired and we don’t live in a bubble. Ha ha!!! Truthfully I do aim to please when I can and he does not usually ask for much. He works so hard and takes good care of us and he deserves a pie if that is what he wants. So of course I was all over making him that pie asap. He cut that recipe out and I stuck it in my purse so I could get the ingredients on my weekly (ok triweekly…ok dang it sometimes daily) trip to Target. I collected the stuff I needed and a few days later (there was a delay called life) I set out to make my man a pie!! It was a success and he LOVED it! He raved about it. If the way to a man’s heart is through his stomach, he is mine all mine forever.
It was super easy to put together and the colors make it a shoe in for your upcoming spring soirees. So make someone happy today and make them a really effortless pie that will yield high praise for you. Also you make someone feel loved and valued. And that’s how you stay married. Lol! I wish it was all that easy but it dang sure cannot hurt.

2015/01/img_2126.jpg
we kiss and it amuses or disgusts our kids. I am just glad to have him as a partner on this journey through life.

Lemony blueberry layered pie

Stuff you need~

1 (8 ounce) package cream cheese, softened
2 teaspoon lemon zest
1/4 cup fresh squeezed lemon juice
1 (3.4 ounce) package instant lemon pudding mix
1 (14 ounce) can sweetened condensed milk
1/4 cup powdered sugar
1 (21 ounce) can blueberry pie filling
1 (9 inch) graham cracker pie crust

What to do with the stuff~

In a large mixing bowl, combine the cream cheese, condensed milk and powdered sugar. Mix in with your standing mixer or electric mixer for 1-2 minutes, until smooth and creamy.
Blend in pudding mix, lemon zest and lemon juice.
Spread half of the blueberry pie filling into the bottom of the pie crust. Spoon the lemon cream cheese filling on top and spread to cover the pie filling. Speed the rest of the pie filling over the lemon cream cheese mixture. Cover and chill for at least an hour. Overnight is best. Enjoy!!!

Processed with Rookie
the way to a man’s heart…

Thin mint crackers

The recipe I have for you today is a fast easy treat you can make in a flash for incoming guests or package in a festive treat bag for a last minute homemade gift for someone.

/home/wpcom/public_html/wp-content/blogs.dir/0c5/52714823/files/2014/12/img_1253.jpg
see what I mean? I got these treat bags from target. Easy breezy beautiful cover girl.

Ok so this sweet and salty concoction is my friend Alayna’s brainchild, as far as I know. As a matter a fact, there are some parallels between Alayna and these crackers. Funny but true! Alayna has a dry wit that can slice through the wind, but she has the kindest most loyal heart of nearly anyone I know. I am definitely better for having her in my life. She is the same Alayna that gave me my favorite cornbread recipe.

One year, the kids and I went over to her house for a play date and Christmas treat making session. She taught me how to make these and I pretty much make them every year. Big Daddy loves these and calls them homemade thin mints. It’s crazy how much a salty cracker dipped in melted chocolate tastes so good. These also make really good treats to have on hand for any Christmas festivities you host in your home. Keep them in the fridge and set out when you need them. I am telling you, they make any occasion just that much more festive. Like yesterday, a few good friends came over for an impromptu ornament exchange. I set these out and they were very well received. Most of all, we just laughed a lot. That was the best part.

/home/wpcom/public_html/wp-content/blogs.dir/0c5/52714823/files/2014/12/img_1257.jpg
I love these ladies. They keep me laughing. Our kids all go to school together and I am so blessed to know them.

Ok so now down to the business of making these sweet and salty treats. These chocolate chips are easy to find at this time of year, but any other time you will not likely find them. Alayna taught me to buy a few bags and freeze what I did not use. It’s the smart thing to do. That chick knows her stuff. ~AMB

/home/wpcom/public_html/wp-content/blogs.dir/0c5/52714823/files/2014/12/img_1246.jpg
this is what the package looks like

Thin mint crackers

Stuff you need~

1 package of dark chocolate and mint morsels
2 sleeves Ritz crackers
Parchment paper (not to eat…but this is crucial to the process)

What to do with the stuff~

Pour the morsels into a microwave safe container. I heat mine in 30 second increments and stir in between to prevent scorching.

/home/wpcom/public_html/wp-content/blogs.dir/0c5/52714823/files/2014/12/img_1247.jpg

Line an 11 x 18 ” baking sheet with parchment paper. Set aside. Using a pair of tongs, take a cracker and just kind of set it into the chocolate. Push down gently and then flip over. Same thing.

/home/wpcom/public_html/wp-content/blogs.dir/0c5/52714823/files/2014/12/img_1248.jpg

/home/wpcom/public_html/wp-content/blogs.dir/0c5/52714823/files/2014/12/img_1249.jpg

As you finish with each cracker, completely coating both sides, set each one on the parchment paper lined baking sheet. The chocolate hardens fairly quickly so you can move them into a container or just lay another piece of parchment paper on top and make a second layer.

/home/wpcom/public_html/wp-content/blogs.dir/0c5/52714823/files/2014/12/img_1250.jpg

Put them to cool in the fridge and then enjoy. Merry Christmas to one and all!! I hope you love them as much as we do. Drop me a line and tell me what you think!!

/home/wpcom/public_html/wp-content/blogs.dir/0c5/52714823/files/2014/12/img_1251.jpg
done and done! Oh so yummy!!

S’mores pie and winning

So lately I have been trying hard to come back from a few bad weeks. Losing our dog has been a hard hit to come back after and it seems like the tidal wave of crap just kept coming. I kept trying to maintain a positive attitude and thinking to myself “oh i will come back from this. Next week…that’s my week.” Yeah. No. It has not happened. It seems like life has been an uphill battle and frankly ya’ll, my legs were getting tired. A few of my kids have been struggling in school, in different ways. It has been emotionally exhausting for me (and them). There have been days where I have been like “come on!! You are kidding me right?!” But no kidding. Totally serious. It has been jacked up. I have been praying and trusting in God’s plan and then worrying some and then praying more. Luckily, as I have said before and it bears repeating, my kids go to an excellent school. More than that, they go to a school where they are loved, their individual personalities are respected and even coaxed out and praised. Everyone there is loving and kind and does their best to meet the needs of each and every child. Even with that assurance, which usually is enough for me, I was struggling. How can I help? What can I do?
But today ya’ll…today was a good day. It just was. Even with one kid calling for me to come get her because she was not feeling well, it has been a good day. It felt like I got to coast some. No biking uphill. Just riding along. I am aware that not every day can be this way. I am aware that with 4 kids so close in age, I kind of sent calm and serene days packing a few years ago. But I wonder if my friends with 1,2 or 3 kids or kids well spread out with the recommended 2 1/2 years between kids, have it any easier more often than me? I don’t think so. Because being a parent is hard, no matter how many kids you have. And no matter how many you have, some days are rewarding. You pick them up and they are smiling. A teacher gives you a thumbs up (they are awesome teachers I tell you) and all is well for a little while. Because some days you really need that win. We all do. Today I had mine. Hoping tomorrow might be half as good.
Now, speaking of wins today…this s’mores pie can definitely be considered a win. Major win folks. MAJOR! It is a ooey, gooey, melty delight and takes exactly like a s’more…only better because every bite has some marshmallow, graham cracker and melted chocolate in it. Yes. S’more perfection. Everyone in our house loved it, even my picky boy. He tried to resist but I got him to try a bite. He then at two servings . Enough said. So no matter the bad days, no matter the epic fails, when you make this pie…you are winning. And you count the little wins along the way…those matter too. But s’more good days please, if I may!!! ~AMB

IMG_0563.JPG
sinus infection, feeling cruddy but looking sassy. Tiny win.

IMG_0564.JPG
my baby loves
To read…win

IMG_0562.JPG
he tried it. He liked it. No loved it. Win.

S’more pie (adapted from http://www.tastykitchen.com)

Stuff you need~

1 stick real butter , softened
1/2 cup sugar
1 large egg
1 teaspoon vanilla
1 cup flour
1 cup graham cracker crumbs (I used Keebler brand)
1 teaspoon baking powder
1 (7 ounce) container marshmallow fluff
8 Hershey chocolate bars, broken into pieces
1 cup marshmallows
1/4 -1/2 cup chocolate chips

What to do with the stuff~

Preheat oven to 350 degrees. Cream together butter and sugar. Beat in egg. Now, add in vanilla. Next, stir in flour, graham cracker crumbs, and baking powder. It will be a crumbly sticky mess. That’s ok.

Now spray a 9 inch pie plate with cooking spray.
Divide the crumbly sticky mess. Take one half and press into greased pie plate. Press it all over the bottom and up the sides of the pie plate. I used my roller thingy (dough roller I think) to help it press more easily. You could also flour your hands well when working with this dough. I would recommend that. This is the hardest part of this journey.

IMG_0566.JPG

Next smooth the jar of marshmallow fluff all over the dough layer. The whole jar. You heard me.

IMG_0567.JPG
the whole jar baby. Oh yeah.

Now, lay the chocolate bar pieces all over the fluff layer. Pay special attention to neatness and perfect patterning here. (I am so kidding. Nobody cares.)

IMG_0568.JPG
it’s all very precise. Not.

Now, sprinkle marshmallows over
the chocolate pieces.

IMG_0569.JPG

Now, press the remaining half of the dough over the marshmallows. This is not an exact process and the marshmallows will poke through. It’s all good ya’ll. Sprinkle the chocolate chips all over the top. Bake in your preheated oven for 20 minutes or until the marshmallows have a slightly browned look to them (I baked mine about 25 minutes.) Yum. Wow. Get the milk. It’s rich and hard to resist. You’re welcome. Tanya at Tasty Kitchen is a genius. Enjoy!!!

IMG_0571-0.JPG
WIN

Christmas cookie baking for lazy chicks

So it seems everywhere I go, the stores, around town, on Facebook…signs of Christmas coming are everywhere. Just last week, Big Daddy and I took the kiddos to the lighting of the Louisiana Boardwalk Christmas tree. It marks the beginning of the holiday season for us and the weather made it that much more festive. It’s been a wee bit chilly around here…will all over the country. Mother Nature is showing her powers off in a major way lately. Go for it sister. But all of this cold and Christmas everywhere (not to mention always being a month ahead cooking wise due to writing the food column for Red River Moms) puts a gal in a Christmas cookie baking mood a little
earlier than normal.
I have told ya’ll before that I am a cook, but not so much a baker. So when my editor for RRM asked me for Christmas cookie recipes for the December column, my first instinct was to panic! Then I recalled these recipes that I had pulled off in the past with rave reviews and I calmed down. Of course these are no Martha Stewart recipes but that is one of their main selling points. I have no time for fancy cookie baking ya’ll. If I actually get to attend a cookie exchange (BD is out of town a good bit this time of year) I certainly don’t have time to bake complicated cookie recipes. These are fun, easy, and come out delicious!! I hope you will be inspired to branch out and try these if you have not already. They will be a hit with your family, at the next cookie exchange and especially with the big man dressed in red on Christmas Eve. If I can bake these, you definitely can!! ~AMB

IMG_0496.JPG
all bundled up

IMG_0548.JPG

even T-Roy is getting in the spirit (ha ha!)

IMG_0546.JPG

never gets old

Andes mint cookies

Makes about 15-20 cookies

stuff you need~
1 box devil’s food cake mix
1 egg
1/3 cup vegetable oil
1 package Andes mints (1 per cookie)

What to do with the stuff~
Add cake mix, egg, and oil to a large mixing bowl. Stir until combined. Roll dough into walnut sized balls. Place on a silicone lined or parchment paper lined cookie sheet. Bake at 350 for about 8-9 minutes. Do not over bake. Take a large cooking spoon and gently smash the cooked balls down. It will just flatten them. Place an unwrapped Andes mint on each cookie. Kind of swirl it around with the back of a table spoon as it melts to sort of ice each cookie. Allow to cool completely before transferring.

IMG_0543.JPG
don’t they look delectable?

Rollo stuffed snickerdoodles

Makes about 24 cookies

Stuff you need~

1 package snickerdoodle precut dough (break and bake) or 1 recipe of your favorite snickerdoodle dough (show off!!)
1 package rollos (need one for each piece of dough)

What to do with the stuff~

Preheat oven to 350 degrees. Break dough into individual squares. On a floured surface, flatten a square of dough until it is about 2 inches wide. Place an unwrapped rollo in the center. Fold the snickerdoodle dough around the rollo. Place on baking sheet lined with parchment paper or silicone baking mat. Do this with each square. Work quickly because once you flatten the dough it gets hard to work with quickly. Place in preheated oven and bake about 8-10 minutes.
TIP–allow the cookies to cool completely before you transfer them. Once cool, carefully transfer from the baking sheet to a plate. I turn them over where the bottom is facing up because the caramel is melted and ooey gooey and can make a hole in the bottom of the cookie.

IMG_0544.JPG
that’s some cookie perfection right there

Peanut butter blossoms

Stuff you need~

1 (14 ounce) can sweetened condensed milk
3/4 cup creamy peanut butter
1 teaspoon vanilla extract
2 cups baking mix
Sugar
Package of milk chocolate Hershey kisses

What to do with the stuff~

Preheat oven to 375 degrees. In a large mixing bowl combine the sweetened condensed milk and peanut butter and mix until well combined. Stir in vanilla extract. Add in baking mix and blend well. Using a medium cookie scoop or a spoon, roll dough into 1 inch balls. Add some sugar to a plate and roll each ball of dough in the sugar. Place on silicone mat or parchment paper lined baking sheet. Using your thumb (or your kiddos can do this part), make an indention in the dough. Bake for about 8-10 minutes or until lightly browned. Once you remove the cookies from the oven, place an unwrapped Hershey kiss in the indention.

IMG_0542.JPG
old school but so easy and delicious

Bread Pudding with brandy butter sauce

So more than a few years ago, Big Daddy introduced me to his mama’s posse of Broussard/Youngsville friends. You see, Big Papa used to run coops and after they left the Bayou Rapides coop, he was moved to the coop in Youngsville. Now, I had met Mrs. Linda and Mrs. Sandra and Mrs. Peggy (the Broussard posse) but when Big Daddy and I started dating, they kind of took me under their wing and told me all the things that Mrs. Dianne would have told me. For instance, Big Daddy’s favorite dessert since childhood (banana bars…recipe will come), memories from his years in Broussard and so on. They kind of filled in the gaps because though I had always known him, I had missed out on his day to day life and some things a mama only knows…well her and her posse. Mrs. Linda taught me how to make sausage gravy for Big daddy’s biscuits, Mrs. Sandra taught me all about jelly roll pans and banana bars, so on and so forth. They are some lovely ladies but that comes as no surprise. Mrs. Dianne was a pretty fabulous lady herself and was smart enough to surround herself with equally fabulous friends. My mama is one of them…so it’s only fair to say. She also had her Keithville posse…the woman had some good friends. So one day as we are discussing recipes, Mrs. Sandra whips out this recipe for bread pudding. It comes from Pascal’s Manal Restaurant in Nola. I have never been there and I cannot remember if Mrs. Sandra had but she raved about this bread pudding and it sounded just fine to me. At this point I was in college and I fail to remember if I summoned the courage to try to make it (I think I did) but several years later when I started preparing Christmas dinner, I made this for dessert. It is a sumptuous dessert worthy of a holiday meal. It draws oohs and aahs and will make you a star. Well maybe not a star but you will be loved by your family even more than before. That’s never bad. Even my friend Tim who I say is fairly hard to impress could not resist this bread pudding. It’s pretty dang fabulous. It does make a quite a bit of bread pudding, but if you are making it for a holiday meal, I promise it will not go to waste. The recipe is not hard but it requires large amounts of staple ingredients. That’s the beauty of it…it is so simple and requires basic ingredients and turns them into this out of this world dessert. You’ll see.

Bread Pudding

Serves 15 or more

Stuff you need~

3 loaves of French bread
1/2 gallon or 8 cups of whole milk
10 eggs
2 sticks of butter, melted
3 ounces vanilla extract

What to do with the stuff~

Cut French bread into cubes.

IMG_0332.JPG

Toss french bread cubes into a big ole bowl. Pour the milk all over the French bread cubes. Let the milk soak into the bread. I usually let it soak an hour or two.

IMG_0335.JPG

Add the remaining ingredients to the bowl.

IMG_0338.JPG

Mix with your hands until blended. Pour into baking pan (not greased). I use two 9 x 13 baking dishes as I do not have a baking dish big enough to hold all this deliciousness. Bake for 45 minutes to an hour or until the bread pudding is no longer soupy in the middle.

IMG_0344.JPG

for the topping

stuff you need~

3 ounces brandy
4 sticks of butter (or 1 pound), softened
1 cup sugar
2 ounces vanilla extract

Add butter and remaining ingredients to a large mixing bowl or the bowl of your standing mixer. Mix until smooth. Pour over bread pudding. *side note…big daddy likes his brandy butter sauce melted a little before pouring. If the bread pudding is warm enough it will melt the topping quite nicely for you. So delicious ya’ll. Just. So. Delicious.

IMG_0343.JPG

IMG_0342.JPG

Golden Oreo dirt cake

At some point in my childhood Momou discovered dirt cake. Such a novel idea at the time and she was the queen of the dirt cake. It’s funny because now dirt cake is far from a novel or creative idea. Since the invention of Pinterest, it’s hard these days to really come up with inventive ideas since it seems as if everything has been done. But back in 1990, when Momou discovered dirt cake, it was the bomb. I can recall either her or one of my aunts making it for a family gathering and serving the dirt cake in a clean flower pot with gummy worms sticking out of the top. Talk about impressive. I bet money that Momou would be a Pinterest queen if she was shown how to use it. And I bet if given the chance, she would whip up a mean dirt cake for her fellow nursing home residents. Sister can work it!! So this dirt cake is just a slight variation on the typical dirt cake. It uses golden Oreos instead of regular ones. With the recent introduction of caramel apple Oreos and pumpkin spice Oreos (which I still can’t find)…you could make this a Halloween dirt cake and really take it over the top. I am thinking food coloring, tiny tomb stones and little skeleton heads all over the top. The possibilities are endless!! This dirt cake is an excellent birthday cake alternative for my friends who have kiddos who don’t do regular cake/chocolate (I am still not sure that is at all normal…lol. But I have several friends whose kids do not eat cake or chocolate.) One of my kiddos is a real vanilla lover so I figured she would enjoy it. She did. It is such a smooth dessert with a good crunch from those cookies. It tastes better after it sits for a few hours in the fridge. So if you have never made dirt cake, here is your chance. It is a breeze to whip up and it makes a good bit! You can serve a bunch of party goers when this dessert. Whip up a batch today!!

Golden Oreo dirt cake adapted from http://www.thecardswedrew.com

Stuff you need~

2 (8 ounce) small tubs cool whip
2 (8 ounce) packages cream cheese , softened
2 (5.9 ounce) packages of instant vanilla pudding
4 cups milk
2 packages of golden Oreos

What to do with the stuff~

In a large mixing bowl, or the bowl of your standing mixer, add your softened cream cheese and cool whip. Mix until well combined. Now add the pudding mix and a little of the milk at the time, mixing after each addition (trust me it will slosh all over the place if you add it all at once). Mix until smooth and well blended.
IMG_8977.JPG
Ok now for the fun part! We are gonna crush some Oreos! It’s a mini arm workout and an aggression reliever at the same time. Not that I have any er aggression. No, not me. I have 4 kids between the ages of 6 and 11 but I am as a calm as can be. If you know me well you know I am lying, but if you believe me then let’s just continue that for now. 😜
Add a package of Oreos to a gallon size ziploc. Close tightly. Take a rolling pin or a hammer and get after crushing those Oreos. It’s good fun! Flip the bag over and crush some more. Do the same thing for the second package.
IMG_8978.JPG
Now, I made this in a trifle bowl. If you don’t have one, you can buy one as they are pretty cheap and you will get some good use out of it, or you can use a plain ole big bowl. Whatever you want. Do your thing.
Add half of the first bag of crushed Oreos (or 1/4 of the crushed Oreos) to the bottom of your serving bowl. Now, smooth 1/4 of the pudding mixture over the top of the Oreos. Now, sprinkle the other half of the first package of the crushed Oreos over this. Then another 1/4 of the pudding. Continue 2 more times. Oreos then pudding. You should end with crushed Oreos on the top. It should look like this…

IMG_8983.JPG
ain’t it perty?! Yum!!