Tag Archives: pioneer woman

Chicken and rice soup, banana bars, and all that matters is family 

It seems lately that life has taken on a frantic pace that since becoming a mom I SWORE I would never allow for my family. It’s amazing how innocent new motherhood can be, but that’s a story for another day. Back then, looking at my sweet baby boy’s face, I said I would never allow myself to lose focus on what really matters. Togetherness, family, downtime, blocking the rest of the world out. Yeah, yeah, I know it’s important to teach my kids to let the world in and to be a big part of their community, but I want to make sure they always remember what really counts at the end of the day. For instance, I agreed this year to be the ptsa president for my son’s middle school. I am really enjoying it now that the ball is rolling (shhh don’t tell anyone) but I have to be very careful to not let it take over what I hold dear to me. My family, togetherness, you know the drill. My kids are more involved than they ever have been and that’s to be expected now that they are all getting older. So mostly the weekdays  belong to everyone else. Or it feels that way. It’s a crazy, frenetic pace that exhausts me by Thursday evening. It is hustle and bustle and go go go. And I don’t even have a job outside the home. So come Friday evening I am ready for DOWNTIME!!! The weekends belong to our family!!!  It looks like this…


My kids running around PLAYING without time limits.

 Big Daddy watering his garden while I drink wine on the back porch. No mention of homework, no uniform washing (well I still do that because Monday comes too fast and I am slightly neurotic about laundry but the point is I don’t have to wash uniforms if I don’t want to. There’s joy in that).

I get to sit down and do all of this I want…


Now that’s a relaxing Friday. I went to bed at 8:55 last night. It was that relaxing. Last week was absolutely crazy but the bad thing is that almost every since school started has been that way. I worry this is going to become our norm. After holding on to peace and family time for so long, I am not going to succumb to it. I am willing to let the weekdays be a little wild. But the weekends for the most part, belong to us. Cut to I have been up since 5, the guys are hunting (it’s youth hunt weekend) and the girls are sleeping in (God bless the weekend!). So I am in the process of taking back our weekend. That means making one of my favorite soup recipes and one of Big Daddy’s favorite childhood treats…Mrs. Sandra’s banana bars. I absolutely believe good ole comfort food is a vital part of keeping our weekends sacred. Well, I’m Cajun, I actually believe good food is a vital part of everything. Nonetheless, soup and a sweet (and lots of coffee) go a long way in making our weekends something special. A respit from all of the hustle and bustle of the week, an safe harbor in a sea of madness. No really.

So now for a little back story on these recipes I am sharing. This chicken and rice soup is a Pioneer Woman recipe. It is to die for. I think the first time I made it one of my kids was sick and I was overcome with a sense of motherly domesticity and found this recipe via Google. I always love PW’s recipes and this was a big hit! I am excited to share it with those of you who might not have found it yet. She does apologize in her post for using chicken bouillon cubes and yellow food coloring, so read her post if you want to get the full effect. http://thepioneerwoman.com/cooking/simple-hearty-chicken-rice-soup-itll-keep-ya-honest/     As for me, I offer no apologies for such transgressions.  None. The soup is fantastic and if bouillon cubes and food coloring are the worst of my offenses, then God bless. But trust me, they are not. If the guilt from my bouillon and food coloring use gets too heavy, I will just go confess to Father Mark and say some Hail Marys. This soup is abso-flipping-lutely mouthwatering and full of flavor. It’s one of our favorites. It makes your kitchen smell like heaven.

PW’s chicken and rice soup 
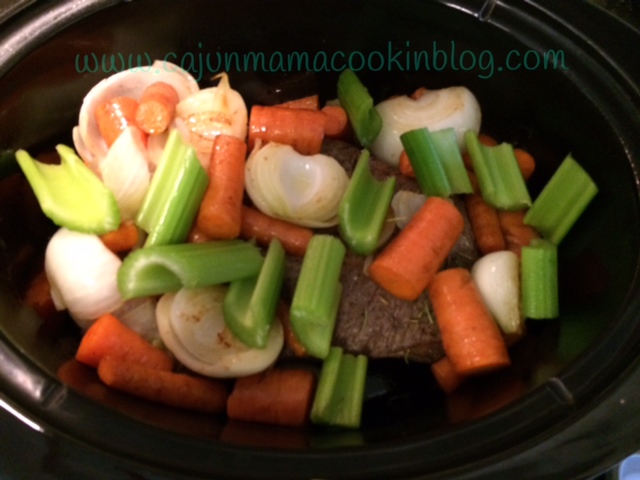
Stuff you need~

2 chicken breasts with bone in and skin on (the bone and fat are necessary to make the chicken stock…those two things make it extra fantastic!)

8 chicken boullion cubes
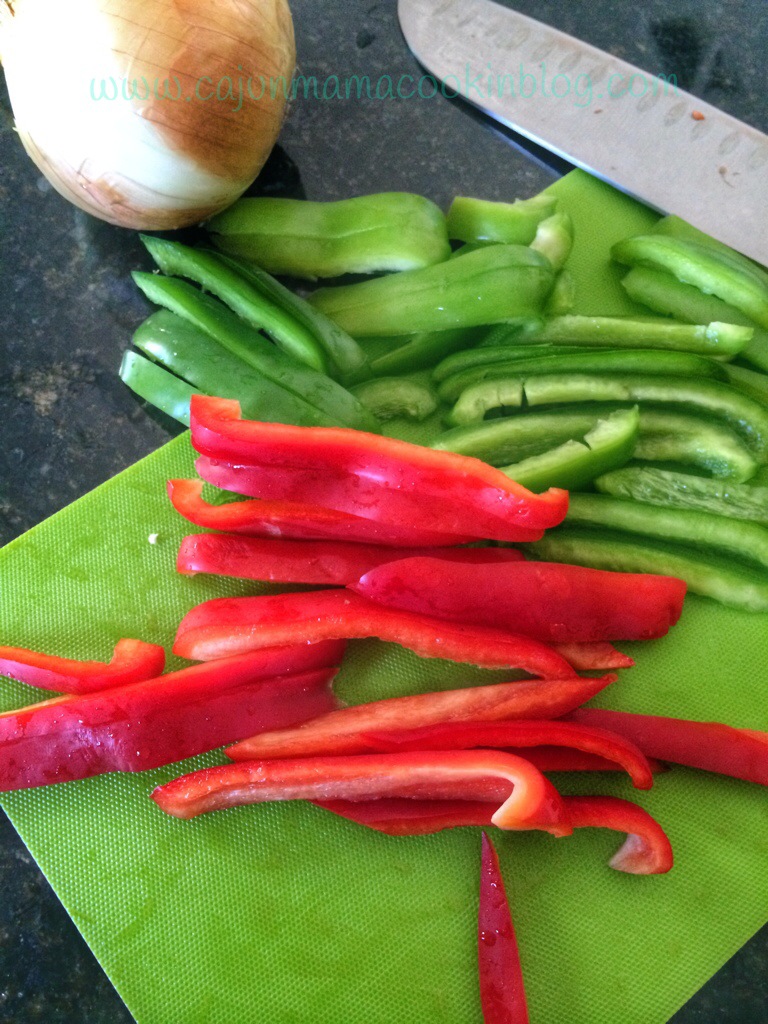
1/4 cup diced onion

1/4 cup diced green bell pepper

1/4 diced pimentos (from a jar)

1/4 cup chopped celery

1 cup cooked rice

6 tablespoons butter, divided

4 tablespoons flour

Few drops of Yellow food coloring

What to do with the stuff~

First of all, go one and get  your your rice cooking either on the stovetop or in the rice cooker. 

Wash your chicken breasts and cover them with about 2 quarts of water, give or take a little. Drop in those boullion cubes. 


Bring to a slow boil and then reduce heat and allow chicken to cook for about 20 minutes  or so. When cooked through, remove chicken from water and set aside. Keep the lovely  chicken stock that you made boiling those chicken breasts at a low slow simmer on the stove. 

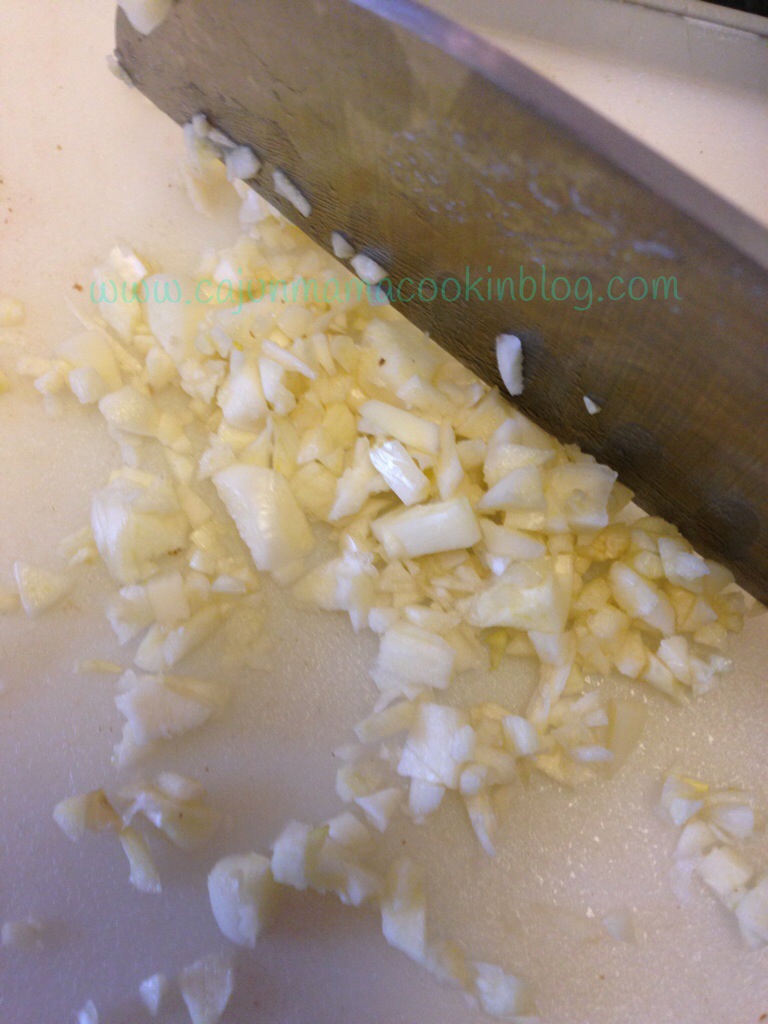
Now dice up your veggies. Now we will make a little roux.  Melt 4 tablespoons of butter in a skillet. Whisk in the 4 tablespoons of flour and stir until thickened. Pour this into your barely simmering chicken stock.


Now melt the remaining 2 tablespoons of butter in a skillet. (I just wash the skillet I just used and use it again) Add your diced veggies to the melted butter.


Cook until tender and then add the chopped up chicken. Mmmmmm


Give it all a good stir and then add to the simmering stock that is quickly turning into a bonefied soup.

sooouuup

Now, you are in the homestretch. Almost there. Get ready. You are going to add the cooked rice to the soup.

Yes yes yes. Now you have oh so savory chicken and rice soup. Perfect if you have a sick person to nurse back to health (this plus essential oils can work wonders to heal a sick body). This soup is a wonderful dish to cook if your spirits are waning and you are taking respite from the world. Either way, you are golden. Now for the final touch…yep, the yellow food coloring. This is really not necessary but to preserve the authenticity of PW’s recipe, I follow her instructions.


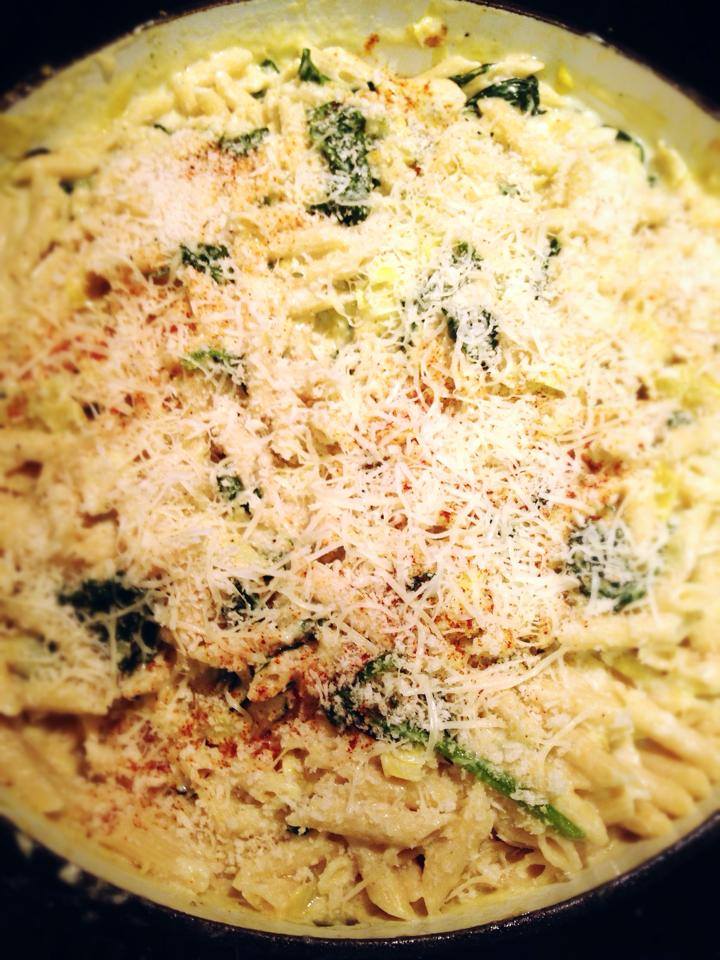
Let this all simmer a bit longer, maybe 20 minutes to let it all blend and mingle. And then you have this…

so much love…

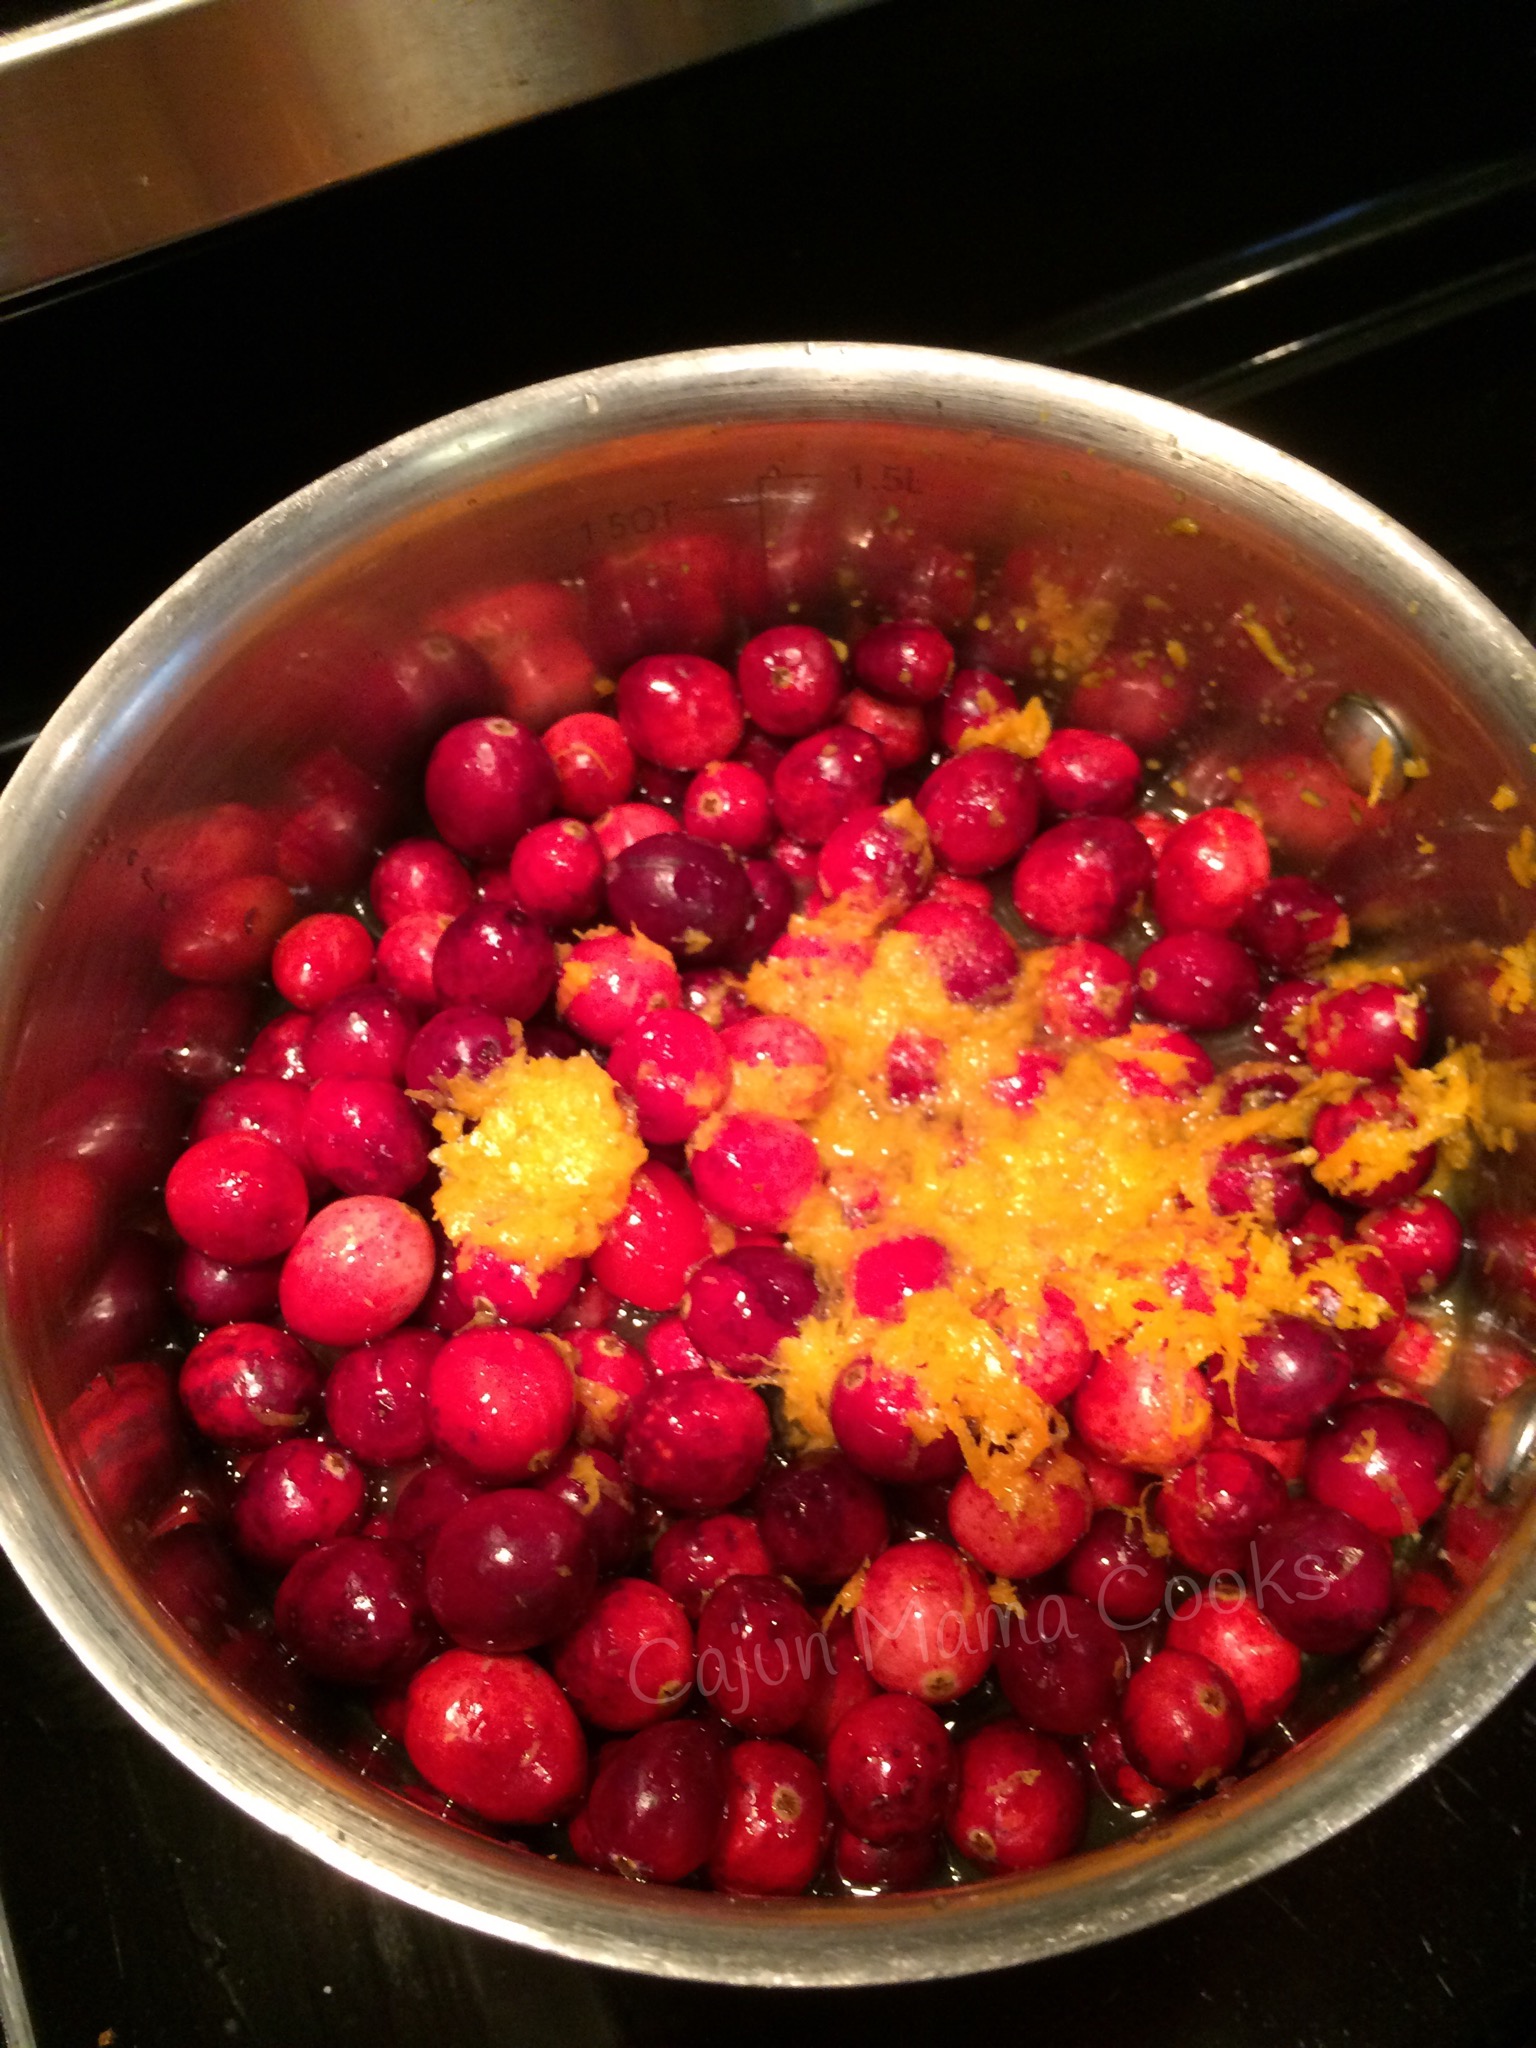
Now for the banana bars!!!

his reminder to me…since we had some bananas that were super ripe

Now these banana bars are the bomb. Big Daddy lived in Broussard/Youngsville for a long while when his daddy ran the co-op there. Of course his mama, Mrs. Dianne, was a. social butterfly and lovely lady, so she  made some good friends where ever they lived. In Broussard, Mrs. Sandra, Mrs. Linda, and Mrs. Peggy were her top gals. They all had kids (a bunch of boys mostly) and they hung out like a posse. Of course they are all fabulous cooks and swapped recipes. Mrs. Sandra made these banana bars that made Big Daddy swoon. I heard about them from the time we started dating until she finally gave me the recipe a few years later. Back then, I had no idea what a jelly roll pan was so I used a 9 x 13 inch pan. BD said they were a little thicker than he remembered but they were good anyway. So if you do not have a jelly roll pan, don’t fret!!! It’s the weekend and we don’t worry on the weekend! If you want to buy one, here is a link …Chicago Metallic Non-Stick True Jelly Roll Pan, 15 by 10-Inch https://www.amazon.com/dp/B003YKGRVO/ref=cm_sw_r_awd_SEqgwbY3FK75S. If you have Amazon prime,  2 days and you will be all set! I picked up one at Walmart and it worked great. The dimensions you are looking for in a true jelly roll pan are 10x 15 x 1.

I love that even though BD’s mom is no longer with us, I can still make one of his favorite childhood treats for him. That’s the power of good friend…they keep you alive in many ways. ❤️ That’s  also the power in recipes and passing them on.

Banana bars 

Stuff you need~

For the bars~

1/2 cup butter, softened

1 1/2 cup sugar

1 cup sour cream

3 large eggs

1 1/2 cup mashed ripe banana (about 3 bananas)

2 cups of flour

2 teaspoons vanilla extract *

1 teaspoon baking soda

3/4 teaspoon salt

*I do use vanilla extract but a new favorite of mine is vanilla bean paste, which you use exactly like extract. It tastes so pure and full of that vanilla perfection. I order it from amazon. I heart Amazon if you cannot tell. Just my two cents on a product that I love. 

for the Icing~

1/2 cup butter (1 stick)

3-4 cups powdered sugar

1 1/2 teaspoons vanilla

3 tablespoons (or more) milk for thinning the icing

For the bars:
Preheat oven to 350. Grease your jelly roll pan.

In a large mixing bowl or the bowl of your standing mixer, cream together the butter, sugar, sour cream and eggs. Blend in the bananas and vanilla. In a smaller bowl, combine the dry ingredients. Add this to the other mixture and stir until just combined. Pour into your prepared jelly roll pan.


Now bake 20-25 minutes until golden brown. And the kitchen smells like Christmas. No really…Christmas.

While that is baking, get your icing ready.

For the icing~

Melt butter in a large saucepan and let it brown just a bit. Just until it is a lovely light brown color. Not dark!! It takes a minute or 2. Stir in a cup of powdered sugar at a time. Add more as needed. I only  use about 3 cups. Now stir in Vanilla. Add your milk to make the icing the consistency you want. You want thicker than a glaze but thinner than a frosting.

a href=”https://cajunmamacookinblog.files.wordpress.com/2015/10/img_6973.jpg”> see that consistency (and powdered sugar lumps ?) [

Now once your bars are out of the oven, pour the luscious icing over the “cake” and ice it.


Then you get…


And everyone shouts hooray!!!!! Banana bars…my man’s favorite and they are gaining popularity!

a href=”https://cajunmamacookinblog.files.wordpress.com/2015/10/final-13.jpg”> my baby snacking on banana bars in the deer stand during a youth hunt. thank God for banana bars and weekends!!![

 E

a href=”https://cajunmamacookinblog.files.wordpress.com/2015/10/img_6928.jpg”> Mrs. Sandra giving BD a big mama bear hug at our wedding. so much love! [

Now we all just wait for another weekend to roll around! God save the weekend!! Hope everyone has a great week.

Advertisement

Homemade cranberry sauce

So…I know Thanksgiving was nearly 2 weeks ago and I am here posting about cranberry sauce…”what the what woman!?” But where I come from, we have turkey and dressing on Christmas Day and back when Momee was in charge, on New Year’s Day too!! So we had cranberry sauce from the can and we liked it. Now for this year for Thanksgiving, my mom and dad (aka BB and Poppy) joined us! It was such a treat to have them spend the day with us. And my best friend (we are talking elementary school) and her boys joined us as well. It was a lovely day that I will look back on fondly for years to come. It was pretty chaotic but the food was delicious and the company was wonderful. We ate so much yummy food and laughed a bunch. Of course there were pictures…taken by me.

Here are some of my faves…

IMG_1050.JPG
holding our glorious bird…cooked in a roasting bag like Momee did it (and my Mama too)

IMG_1047.JPG
me and my parents with my baby

IMG_1046.JPG
me and my best friend…Nicole I ❤️ Her

IMG_1048.JPG
Nicole and her 3 beautiful boys…my pseudo nephews

IMG_1049.JPG
a little post dinner nap…

I have been wanting to make the Pioneer Woman’s cranberry sauce recipe since I bought her holiday cookbook last year. Actually, I have always wanted to attempt homemade cranberry sauce, yet somehow each year I succumb to the can. I just have so much other stuff to do, I just cannot fathom making one more thing from scratch. But this year, I changed my mindset and I did it. And I am so glad. I will never ever go back to the can if I can avoid it. This stuff is stupid easy to make and can be made ahead of time to boot. It is FABULOUS!!! Even my daddy who is not always forthcoming with the compliments (he is the strong silent type…) said how good it was. High praise I know. It really is so tasty and compliments the turkey just perfectly. If your family loves cranberry sauce like mine does, this is definitely worth your time. So if you are looking forward to a Christmas turkey just like we are…this post is right on time. Enjoy!!!

Pioneer Woman’s Cranberry sauce

Stuff you need~

1 bag of cranberries
1 cup pure maple syrup (not pancake syrup)
Juice and zest of 2 oranges

What to do with the stuff~

Wash the cranberries in a colander under cool water. Dump them into a medium size saucepan. Add maple syrup, orange zest and juice. Bring to a rolling boil, then reduce heat to a simmer.

IMG_1051.JPG

Allow the mixture to continue to simmer until the juice thickens. You will know when the time is right. Trust yourself friends. Ommmmmm…

IMG_1052.JPG

Remove from heat and allow to cool. This can be stored in an airtight container for up to 2
days. Practical and delicious and one less processed food item on your menu. Score!!

IMG_1053-1.JPG
cranberry sauce perfection!!

Keep calm and make macaroni salad

So I like to fancy myself a Southern girl at heart. Everything looks better with a monogram on it, I love my hydrangeas, and Gone with the Wind is a wonderful movie. None of that may truly make me Southern (though I am by birth and I am proud of it!) but there is such a thing as being Southern at heart. Which I imagine if you follow my blog or Facebook page, you are Southern at heart simply because the majority of recipes I serve up on here are good ole fashioned Southern delights and you probably like to eat some good food!!)
Well, the lovely recipe I have for y’all today is a true Southern dish. Macaroni salad! Oh yes. But friends, not your grandmama’s macaroni salad. No siree Bob. This is macaroni salad for today’s sophisticated Southern palates. It is sweet, creamy and has a little kick. I have always wanted to like macaroni salad. Something about it just draws me in. It is just so…Southern….sitting there in the grocery store deli case alongside the fried chicken (we love the fried chicken at our local Brookshires…it’s fab). It is simply perfect at a potluck and is just always a great summertime side dish. I have to admit I have bought some macaroni salad from our local grocery store. Now, it was not horrible but it just always left me wanting…more. That I can recall, macaroni salad is not a dish my family made often, if ever at all, so I really have no way to gauge what really good macaroni salad is. But I knew that there had to be a great recipe for it somewhere. I have tried several recipes for it, but again, they just left me wanting more. Well friends, I do believe I have found…more. I googled best macaroni salad and first result was a macaroni salad recipe from none other than the lovely Pioneer Woman…y’all know it’s good. Here is a link to that post http://thepioneerwoman.com/cooking/2012/06/the-best-macaroni-salad-ever/. Of course, it was crucial to me that I share it with my peeps, my homies, my friends on my blog. So that is what I am doing today. I hope you will give it a go. Keep calm and make good macaroni salad. Ha ha!!! I need a Tshirt that says that! ~AMB

20140606-101710-37030598.jpg
that’s all I’m saying lol!

Be all end all Macaroni Salad (my name for it…)

serves a bunch of folks

4 cups of macaroni noodles, cooked al dente
1/2 cup diced sweet and spicy pickles *
4 roasted red bell peppers (the jarred kind)
Black olives, chopped fine**
3 green onions, sliced (green parts)
1/2 cup mayonnaise (Duke’s…always, at least in my kitchen)
1 tablespoon Red wine vinegar
3 teaspoons sugar
1/4 Milk
Plenty of black pepper
1/4 teaspoon kosher salt, more to taste
Pickle juice (secret ingredient!)
aside.
*(you can buy some or make my recipe for them https://cajunmamacookinblog.com/2013/10/23/cajun-mamas-candied-pickles/) I bought some from target because I was trying to make this last night but I will be making a fresh batch of those babies soon!)
** (to save time, I bought a small can of the chopped black olives and it worked great! Excellent time saver!)

What to do with the stuff

Boil your macaroni noodles. Drain them in a colander and then run cold water over them. You want them cool when you add the rest of this stuff.
Chop the roasted bell peppers, green onion, olives (if you didn’t buy the already chopped ones, show off! :)), and pickles. Set aside.
To a medium size bowl, add your mayo. Whisk in the red wine vinegar, sugar and a sprinkle of kosher salt. Add a little black pepper for good measure. Now add a little milk and whisk. Ok now, add a healthy splash of pickle juice to this mixture. Mmmmm. Whisk it good. When a problem comes along, you must whisk it. Oh sorry I got lost in my 80’s music.
Now, add your cold macaroni noodles to a large bowl. Now stir in 3/4 of that sweet and tangy mayo mixture. Give it a nice stir to coat those darling noodles with that sauce. Mmmmm. You can add the rest later if you desire.
Now stir in the chopped olives, red peppers, green onions, and pickles. Give it a good stir. Now splash in a little more pickle juice if you are so inclined (and I was) and stir gently until well combined. Make adjustments according to your taste. Now, naturally this is better if you let it sit in fridge covered overnight but feel free to have some almost immediately. It’s all good. Literally…all so good!! We served this with some magnificent grilled chicken breasts (that recipe will be coming up soon) and grilled corn on the cob. Oh and baked beans. Because my kids and BD are southern too and they likes them some baked beans. It was yum-my!!!!! Enjoy!!!

20140606-103138-37898265.jpg
ready for that macaroni salad

20140606-134519-49519235.jpg
I found these Wickles at Target. Quite tasty!

Perfect Potatoes Au Gratin ala Pioneer Woman

I love potatoes.  I love baked potatoes.  I love boiled new potatoes.  I love garlic mashed potatoes.  Need I go on?  No?  Ok.  I am pretty sure by making this statement, I lose just a little more standing in my family. Growing up we had potatoes every once in a while.  My daddy liked his rice and gravy with his meat.  Period.  Now, when my mom fried chicken she would make “creamed” potatoes as she calls them. And of course the obligatory French fries with the fried fish on
Fridays, especially during Lent. For the most part, potatoes were a stranger at my mama’s dinner table in straight up potato form. I can distinctly remember declaring at some point in high school that I would NEVER, EVER God as my witness make rice and gravy once I left home. (It was all very dramatic and full of southern teen angst at the least). Luckily that is not true and I got some sense as I got older. Rice and gravy has its lovely place on our table because it for dang sure deserves a spot.  I mean…Cajun Mama…duh.  Rice and gravy.  Also, it is good to remember that we ate a lot of potato salad so I guess potatoes would be redundant on the side of your meal.  But when I say l love potatoes, I mean I like potatoes with my cheese.  Lol!!!  Cause me likes my cheese.  Creamy, cheesy, decadent potatoes.  Those are my favorite.  This recipe I am posting today is exactly that.  Oh my.  Just potato perfection my friends.  Equally at home along side a grilled rib eye or a plate of barbecued chicken or ribs.  This au gratin potato recipe requires minimal ingredients and you probably have the majority of them in the pantry or fridge.  It is super simple and quick to whip together.  Versatile, easy to make, and just a few ingredients are all things that make a recipe perfect.  Oh it has to be delicious. This one is it!!  You and your family will absolutely love these.  Trust me on this one.  I found this recipe one day when reading through one of my Pioneer Woman cookbooks…it is her second one I do believe.  When I read through the recipe I felt like I had won the recipe jackpot!!  I made them over and over again for a few weeks. Yes they are carbs and they are worth every bit of the indulgence. I hope you feel the same when you try them. In fact, next to my special potatoes, which you can find here https://cajunmamacookinblog.com/2013/11/12/cajun-mama-special-potatoes/ ..this is probably my favorite potato side dish.


Potatoes Au Gratin

Serves 8

Stuff you need~


4 russet potatoes, scrubbed clean
2 tablespoons butter, softened
1 1/2 cups heavy whipping cream
1/2 cup whole milk
2 tablespoons flour
4 cloves of garlic, minced or 2 tsp. of the jarred garlic (I am not above this)
1 teaspoon kosher salt
Fresh cracked black pepper, to taste
1 cup grated cheddar cheese (recipe calls for sharp, but I encourage you to use what you have)

What to do with the stuff~

Preheat oven to 400 degrees. Smear the softened butter all over the bottom of an 9 x 13 baking dish. Next start out by slicing the potatoes, then cutting into strips and then dicing them into cubes.

Now, in a medium size bowl, whisk together the heavy cream, milk, flour, minced garlic, salt and pepper.
Layer 1/3 at the bottom of the buttered baking dish. Next, pour about 1/3 of the milk mixture over the potatoes. Give that a good stir. Next, layer some more potatoes and then more milk, about 1/3 of each. Do this until the potatoes and milk are all used up. Cover tightly with foil. Bake in preheated oven for about 20-25 minutes. Remove foil, sprinkle shredded cheese over the piping hot potatoes. Return dish to oven, uncovered and bake until cheese is all bubbly and yummy looking. Heaven in a baking dish I tell you right now.

20140525-194737-71257818.jpg

20140525-194737-71257438.jpg
this is the hardest part and it isn’t hard

20140525-200840-72520156.jpg
glorious shredded cheddar…get in my potatoes!

20140525-200937-72577300.jpg
this is what makes this dish the creamy perfection that it is

20140525-201051-72651977.jpg
I minced my own garlic this time

20140525-201125-72685278.jpg
getting ready to go into the oven

Shrimp Quesadillas, chopping down trees, and a google search

So a week or so ago, I had some “rat killing” (as Clay’s Pappaw used to call it) to do around town after I dropped the kiddos off at school. Knowing my days flying solo are numbered with summer coming, I am trying to pack it all in. He had a meeting in town and we were able to meet up for lunch at one of our favorite restaurants that we rarely get to frequent because of the kids always have somewhere they want to go when we do treat ourselves to dinner at a restaurant (a rare treat since it is expensive with 4 kids and frankly, I prefer to cook). We both love Superior Grille (who doesn’t?). It is a Shreveport landmark as far as I am concerned with it’s laid back yet fun vibe not to mention the food is spectacular. We will not discuss the margaritas that will knock you on your behind after you drink half of it. They are so good. So, when he called me and told me he was near by where I was, I said meet me at Superior. I didn’t have to ask him twice. We were hungry but not starving so we decided to split an order of something. I suggested the shrimp quesadillas. I usually order the crawfish enchiladas (shocking right? Ha ha ha) and they are delicious, but I didn’t want something that heavy. On a side note, if you have never had their crawfish enchiladas, you are missing out. Anyway, he was game for whatever and let me say…we were not disappointed. Those shrimp quesadillas were full of melty, savory goodness. They were a hit!!

So cut to today, BD took the boys to our rent house to trim some bushes and start the process of cutting down a tree (yes, that’s what you get when you marry a country boy. He cuts down trees in his spare time, if he decides that needs to be done. At 8:30 in morning no less. Sigh) so the girls and I kind of hung around the house chilling. Bare with me, I am getting somewhere here. The girls have been wanting to see Legends of Oz:Dorothy’s Return. Ben said he was not interested because he had read the reviews and it was a total rip off (yes, my 10 year reads movie reviews, restaurant reviews, etc.). So I am in the movies with my girls and I will admit, I was a little bored. They loved it (which is what counts) but my mind started to wander. “What am I going to cook for supper? What is a good meal to bring to a grieving family? Red beans and rice are always good but what if they don’t like red beans?” There was no one behind us, so I will admit that I turned my phone on and immediately googled a recipe for shrimp quesadillas. Second one was PW’s quesadillas de camerones! I have her cookbooks and the recipe is in one of them (first one) but the link to the post I found via Google is here~ http://thepioneerwoman.com/cooking/2011/01/quesadillas-de-camarones/. Bingo!!! So after the movie, the girls and I stopped at the store to get the few ingredients we needed for what I hoped were the shrimp quesadillas of my dreams. Shrimp quesadillas that were close to the fabulous Superior ones. Maybe. Did I dare hope? Oh I dared. BD was so excited when I texted him this. Ok actually, he didn’t care that much. He was still high from his tree trimming and plotting tomorrow’s “operation river burch down” with the boys to really care. BUT…when I decided to execute my make shrimp quesadilla mission…and he came inside and smelled the aroma that came very close to that coming from the kitchens in Mexican restaurants…oh he cared then. And I quote “mama. It smells like superior in here. Dang it smells GOOD!!” Yeah…that’s the stuff. Y’all. They were so good! Full of creamy, melty cheese and those savory shrimp with just a hint of spice. Sweet baby Jesus, they were divine. BD is still talking about them this morning.

So if you love shrimp, you love Mexican food, you love cheese, you adore quesadillas…these are for you. Try them. I promise. Oh I promise you…you will love them.

PW’s quesadillas de camerones or shrimp quesadillas
Makes 6 quesadillas
20140518-081524.jpg
oh the deliciousness of it all

Stuff you need~

2 tablespoons olive oil, divided
12 medium size flour tortillas
2 cups shredded Monterey Jack (I used a mixture of shredded Monterey Jack and these new Velveeta Queso Blanco shreds….this was perfect!!!)
12 large shrimp, peeled and deveined
7 ounces of Mexican tomato sauce or red enchilada sauce
1 red bell pepper, sliced into strips
1 green bell pepper, ditto
1 onion, cut in half and then sliced
Butter
Kosher salt and black pepper

What to do with the stuff~

In a skillet, heat 1 tablespoon of the olive oil over medium heat. Add your little shrimpies once you have some heat. Cook them until they are opaque and pinkish. Sprinkle them with a little salt and pepper. Stir in the Mexican tomato sauce or enchilada sauce, reduce heat and let the shrimp simmer in that yummy sauce for about 2 to 3 minutes. Yeah that’s the stuff. Now, using a slotted spoon, remove the shrimp from the skillet. Once they have cooled some, chop them up with a sharp knife. Let them alone for now (this is the hard part…BD came in a snuck several as I was in the throws of cooking, but they are scrumptious little shrimpies I cannot blame him.)
Ok in a separate skillet, heat the remaining 1 tablespoon of olive oil. Add the bell peppers and onion and sauté until they are tender and have a slight brown around the edges. When the veggies are done, remove them from the skillet, place them on a plate, and set aside. Now, take about 1/2 teaspoon of butter and plop it into the skillet. Melt it over medium low heat. Add one tortilla to the skillet. Take a handful of cheese and layer it on top of the tortilla. Now, add some of the sautéed veggies on top of the cheese. Take some of the chopped up shrimp and put them on top of the veggies. Take another tortilla and lay it in top of the whole shebang. Ok…this is the hardest part (other than not eating all the shrimp)…take a big spatula and flip the whole quesadilla over once the bottom tortilla is nice and brown. Don’t panic and just do it. If some stuff falls out, just stuff it back in. You’ve got it. Let that tortilla brown and then remove and cut into 4 pieces. Keep repeating the process until they are all cooked. Just add another 1/2 teaspoon of butter, add your bottom tortilla and go. Enjoy!!! Serve with sour cream, guacamole and some pico de gallo if you want, but to be honest…you won’t miss it. These babies are built to stand alone.

20140518-082514.jpg
olive oil getting ready to cook those shrimp to delicious doneness

20140518-093934-34774535.jpg
this is my favorite red enchilada sauce…found it at Brookshires

20140518-094035-34835702.jpg
sweet babies peeled and deveined…you have been chosen to be a part of something greater than yourself

20140518-094245-34965516.jpg
this what the shrimp look like when they are opaque and pinkish aka ready

20140518-094337-35017509.jpg
veggies ready to be chopped

20140518-094419-35059487.jpg

20140518-094419-35059052.jpg

so pretty and soon to be tasty

20140518-104550-38750247.jpg
and the tree comes down. Ben watches it. I have pics of him growing up by that tree. I choose to not think of that now. It needed to come down as the roots caused lots of plumbing issues. Still…

Heavenly Balsamic pot roast


 So this here’s a story a little pot roast that could.  It was a good little pot roast.  It had dreams of being more.  And it was.  It had dreams of being all dressed up in a balsamic sauce and being cooked in a crock pot along with his friends carrots, onions, and celery.  Ok, kidding aside, because I am pretty sure that joking around about balsamic anything is a capital crime.  Because balsamic anything is awesome and should be revered and coddled and loved and praised.  I have posted my mother in law’s excellent pot roast recipe before and that is my go to recipe.  If you have never made it, check it out here~https://cajunmamacookinblog.com/2013/06/17/tonight-is-a-roast-night/.  Making that recipe is like putting on a comfortable pair of jeans, which ironically I find rather hard to do after eating a serving of pot roast and rice and gravy.  ha ha!  But the other day, I was scanning Pinterest and came across a recipe for their balsamic pot roast and thought, “oh my.  that is a super idea.  Big Daddy would love that.”  You can see that post here~ http://www.sixsistersstuff.com/2013/09/slow-cooker-balsamic-pot-roast-recipe.html.   Well, continuing to scan Pinterest (see how I do that?  I scan it.  That makes me feel like I am not wasting time and I am not on Pinterest…just scanning, ya’ll…scanning.  I can quit at anytime I want.  Wait, I think that is what addicts say…oh my.) and I saw another recipe for regular pot roast by PW about her perfect pot roast.  You can check that out here…http://thepioneerwoman.com/cooking/2011/09/2008_the_year_of_the_pot_roast/.  I could not decide which one to make.  Pioneer Woman is always a safe bet because she knows her stuff.  But I love those six sisters too.  And, their pot roast had balsamic vinegar in theirs’, which kind of amps up the yummy a couple of notches.  Plus, theirs was made in the slow cooker.  I know you peeps love a good slow cooker recipe, so I took what I loved about both and combined them into one delightful, fantabulous, knock your socks off pot roast.  You are welcome friends.  I made a batch of mashed potatoes to go with that heavenly thick balsamic flavored gravy and also warmed up some of those Sister Schubert rolls aka they are worth it carbs.  My baby boy can eat nearly the whole pan.  I will add this…use one of those rolls to sop up that ridiculously good gravy and you will be in hog heaven.  But I don’t have to tell ya’ll that, do I?  No.  Because if you are following my blog, you know all about the good stuff in life.  Wink Wink!  See what I did there?  I gave you a compliment and me a compliment at the same.  Because let’s face it.   We both rock!!  Now, on to this pot roast that I have been yammering on and on about.  Is your mouth watering yet?  Let’s get to it baby!!

Heavenly Balsamic Pot Roast 

Stuff you need~

4-5 pound beef chuck roast

2 or 3 small onions (peeled and then cut in half from root to tip)

5 or 6 carrots, not peeled (PW says to maintain their rustic quality and I agree…damn good. Give it a try), just cut them into about 2 inch pieces, discarding the ends

3 stalks of celery, cut into 2 inch pieces

olive oil and a pat of butter

kosher salt and black pepper

2 tsp. dried rosemary

1/2 cup balsamic vinegar (I used 1/4 cup balsamic vinegar and  1/4 cup balsamic glaze my mother in law gave me but I also saw it at World Market aka my mothership the other day just FYI)

1 cup tomato juice

1 can beef broth (reduced sodium)

1 1/2 teaspoons minced garlic or 3 cloves if you are going the “I chop my own garlic here me roar!!” route

3 tablespoons cornstarch

3 tablespoons warm water

What to do with the stuff~

Turn the heat under a big ole skillet to medium.  Now, melt the pat of butter (about a Tablespoon if you need that measurement…you little control freak…that’s why we get along because I am one too so I get it!) and about 2 Tablespoons olive oil nice and warm.  Now, add in only your onion .  You want to get the onion lightly browned on one side and then with a pair of tongs, flip it to the other side and do the same thing…a minute or so on each side will do.  Remove them from the skillet.  Add in your carrots and give them a good toss in the olive oil/butter combo.  About a minute or so is perfection.  Good girl.  Or boy.  Now, put the little browned unpeeled, so rustic and lovely carrots in the plate with the onions and tell them to hang tight.  Wait, what?  You don’t talk to your food.  Is that weird?  Then I don’t either.  Now, back to this lovely pot roast.  Yes, yes, I am getting to that.  Now, take that hunk of meat and rub it down with olive oil.  Give it a good rub down on both sides. Now, season the mess out of that thing with good old kosher salt and black pepper on both sides. Now, I took some dried rosemary and sprinkled some of that on each side.  Ok, now if your skillet needs more olive oil, add some because we are going to brown our roast.  With a pair of tongs, place it in the still medium hot oil.  Brown it on every side, about a minute or so each side.  Flip, brown, flip, brown, got it?  Ok.  Remove that roast from the skillet and set it on a plate.  Whisk in the beef broth and make sure to remove any little brown bits from the bottom of the skillet, pan, what have you.  This is your gremille and it makes your gravy richer and just better.  Let this kind of simmer a few minutes and then whisk in the tomato juice, garlic, and balsamic vinegar.  Continue to let this luscious mixture simmer for a few minutes so the flavors can hang out and get comfortable with one another.  They can make friends.  When you are going to hang out in a crock pot for 6 or 7 hours, you want to get to know your tomato juice.  Just saying.  

Ok, now you are going to spray a 6 quart crock pot lightly with some cooking spray.  Put your lovely browned roast in there.  Toss the carrots, onions, and celery in there.  Now, using caution so you don’t burn yourself, slowly pour the balsamic magic liquid on top of the meat and veggies.  Now, cook on low for 7-8 hours.  Your slow cooker may take longer, so add time accordingly. When you can stick a fork in the roast and twist and it falls apart, you are ready.  

Now for the luscious gravy…yes you will want to do this.  Skim as much of the fat off the top of the liquid as you can.  Now, pour about 2 cups of the balsamic magic liquid into a medium sized sauce pan.  Bring it to a low boil over medium low heat.  In a bowl, whisk together the cornstarch and water until well combined.  Whisk this into the balsamic liquid.  Let it simmer for a few minutes until it thickens a bit.  You will have some fabulous gravy ya’ll.  Roll soppin worthy gravy.  Spoon this liberally over the meat and the mashed potatoes.  So.  Dang.  Good.  Enjoy.  Take a bow.  Enjoy your moment in the spotlight because YOU are AWESOME!!!~AMB


Image


Oh sweet little onions, I have big plans for you.

Image


Carrots, unpeeled…carrots gone wild.

Image


Sit there and look pretty my darlings


Image


Giving my roast a lovely little seasoning rubdown. 

Image


Remember…brown, flip, brown, flip

Image


Balsamic magic liquid 

Image

Ready to be more…ready to become a balsamic pot roast.  MMMMMM


Image


Ready to be covered in that lovely gravy.  Mouth watering. 


Pioneer Woman’s Eggberts Sunriser

Ok, first of all, it may seem like I have a slight fixation with the Pioneer Woman aka Ree Drummond.  I admit, that may be a little true.  I think she is beautiful, witty, smart, and I love her recipes.  She has 4 kids just like me and she was a city girl who married a country boy and learned to adapt and bloomed where she was planted.  I got to say, that is a lot like my story.  So I guess I identify with her and I love to cook and her recipes seem to be the ones I gravitate to.  So, I showcase many of her recipes on my blog and all of this is amounts to a hill of beans except you get the benefit of my take on her recipes and I share them with you.  Do ya’ll remember this pic…Image

Yeah…I guess I have a little fan obsessed when it comes to PW.  That’s ok…we all have our thang, right?  So, naturally I follow her on Facebook and the other day a picture popped up on my newsfeed that made me drool.  A recipe that I knew I could not walk on this Earth much longer without making.  It practically cried and begged me to make it.  Bless its little heart…I had to answer its cries.

So,  a little back story here.  Big Daddy loves him some breakfast.  I grew up in a household that did not make breakfast except for rare occasions and on vacation.  He grew up in a family of pancakes or french toast every morning.  Breakfast was a must and for him it still is.  I have certainly developed a deeper appreciation for the most important meal of the day and now that we have our kiddos, they of course eat breakfast every morning.  It stands to reason that seeing a recipe for a wonderful concoction called an Eggberts Sunriser would drive me to drop it all and make one ASAP.  Well, it just so happened that the perfect occasion presented itself almost immediately.  Our 13th anniversary.  What?  You say, a breakfast recipe for your anniversary.  Well…yes.  Let me tell you, Saturday my youngest starts complaining of a sore throat.  When I tell you my easy going baby boy does not complain often, I mean that.  So I knew something was up.  Then Sunday, when some friends were over to celebrate our oldest daughter’s birthday, started running fever and it was downhill from there.  The writing was on the wall…our anniversary was the next day and going out to dinner was probably not going to happen that day.  BUT I could make him a delicious anniversary breakfast.  Eggberts Sunriser seemed appropriate.  So I made it.  Ya’ll…it was so perfect.  I looked so tasty when I put his together that I followed right in there and fixed myself one.  OH.  MY.  WORD.  All I can say is, if you are a breakfast lover or like me a brunch fanatic, you have to get in there and try this.  You can read all about PW’s take on this recipe here…http://thepioneerwoman.com/cooking/2009/12/the-eggberts-sunriser.  For now, here is my take on this fabulousness. Oh and after a trip to our pediatrician’s office, it has been confirmed that my baby has strep throat and a double ear infection.  Yeah, fancy dinner out for 13th anniversary was not in the cards.  That’s ok…plenty of time for that.

Image

Happy 13 years of wedded bliss/craziness to us!!  I love this man so.  He makes me happy.  And nuts.  But mostly happy.  

Eggberts Sunriser 

Serves:4

Stuff you need~

8 cups frozen hash browns

20 whole frozen mini potato wedges (I used some leftover baked potatoes that I had from Sunday lunch.  I cut those up into wedges and then did the same thing)

Canola oil for frying

Salt and pepper, to taste

1 whole medium onion, diced

1 whole green bell pepper, diced

1 whole red bell pepper, diced

1 jalapeno, seeded and diced (optional)

1 1/2 cups diced ham

1 1/2 cups sharp cheddar cheese, grated

4 Tablespoons butter

8 whole eggs

Salsa for topping, optional

What to do with the stuff~

Now, I will start by telling you that I halved this recipe because I knew it would be only Big Daddy and I eating this, but next time I will probably make extra because you could easily reuse this stuff together for breakfast burritos.  We love breakfast burritos in this house and also like to use up what we cook, so for us this is a win win.  Also, I think next time I will omit the hashbrowns and mini wedges and just use all cut up baked potatoes.  What my mother in law (the great and wonderful Deb) calls country fried potatoes.  Mmmmm.

Ok…Now, to start off…grab a big cast iron skillet and really douse it well with canola oil.  Cover the bottom and then add some more.  Trust me.  I tried to use my oil sparingly and it resulted in the frozen hash browns sticking to the bottom of the pan.  You don’t want to deep fry them, but you want them crispy and browned well.  Not stuck to the bottom.  Got it?  Good.  Heat the oil over medium heat and then cover the bottom of the pan with the hash browns.  Now, season them really well as they cook and don’t turn them much.  Ideally, you want to let them brown and then flip them maybe once.  Let them be, precious little darlings.  Let them become crispy and brown.  Again…don’t let them burn.  If you need more oil, add some to the pan.  I did and it was all good.

Now, if you are going the frozen wedge route, you will add considerably more canola oil to your skillet so you can kind of deep fry the wedges.  I just added the baked potato wedges to the pan at the end of frying the hash browns and let them brown some.  Or you can bake the frozen wedges.  It is really up to you.  I HATE to deep fry.  It is just so messy and makes the house smell.  To each his or her own though so do your thing!  In another skillet, add some canola oil and warm it over medium heat.  Not a lot of oil, but enough to just grease the skillet.  Now, stir in the diced veggies and ham.  You want to stir it around just let the raw veggies get a little tender and take the rawness away.  Unless you like all that stuff raw, then, well skip this step I guess.  I probably cooked mine for about 8 or 10 minutes, stirring several times.

Now, in a bowl, layer a some of the hash browns, then wedges, then the veggie and ham combo.  Now, sprinkle some cheese over this.  While the cheese is doing its melting thing, get out a small skillet and add your butter to it.  Turn on the heat on medium low and let the butter melt.  Crack your eggs into the skillet and cook them to taste.  Big Daddy likes his sunny side up but I am an over medium gal.  The pic I took is of mine so it is not as pretty as his was.  Or PW’s picture on her’s.  But mine still had the yellow juice and it dripped down over the potatoes and…oh just writing about this is making my mouth absolutely water.  Sweet Maria, that was an excellent breakfast.  Definitely put a fresh start on our 13th anniversary and if this next year of our marriage is as good as Eggberts Sunriser…well we are in for one wonderful year.  I am pretty dang sure we have started a new anniversary tradition…or a once a week tradition.  Yeah, this dish is that good.

Image

Happy, happy, happy!


Pioneer Woman’s Sunday Night Stew aka Perfection in a pot

Me oh my.  Growing up, my mom loved to make Mulligan Stew.  I truly detested that stuff.  Not sure why…it just didn’t flip my switch I guess.  As a result, I rejected stew for many years.  Of course, as we grow up, thankfully our tastes change and we expand our palette.  Now, before you read the ingredients list for this recipe, let me go on ahead and tell you…this recipe calls for turnips.  Go on…ewww…gag…gross…I don’t eat those.  Trust Cajun Mama, you will eat them in this stew.  Unless you are allergic to them…then I don’t know what to tell you.  They give this stew a sweet flavor that is unlike any other and this stew is absolutely perfect.  I promise.  Big Daddy loves him some turnips.  Remember he is country as all get out.  His theory is…”if there are turnips in it, I know I am gonna like it”.  He LOVES turnips.  He wants to grow turnips in his garden.  So, when I came across this recipe, I figured I would give it a try, knowing he would love it.  Oh he loved it alright.  And so did I.  It is one of my favorite dishes to make during the winter.  I really hope you won’t let your dislike of turnips turn you away.  It is almost like they are potatoes in this recipe.  So flipping good.

Image

Perfection in a pot I tell you.

Pioneer Woman’s Sunday Night Stew

Ingredients

3 tablespoons olive oil

1 tablespoon real butter

2 pounds stew meat or a 2 pound chuck roast cut into chunks

1 medium onion, diced

2 turnips, peeled and diced

3 cloves of garlic, minced

4 carrots, peeled and sliced

4 cups of beef stock or beef broth

a few dashes of Worcestershire

4 oz. of tomato paste

1/2 teaspoon sugar

chopped parsley, optional

Directions:

Salt and pepper your stew meat.  Heat olive oil in a dutch oven or heavy pot over medium high heat.  Add your pat of butter and let it melt.  When it is melted, put add half of your stew meat to the pot.  Brown it until the outside get nice and brown or about 2 minutes or so.  Make sure you stir it to turn as it browns.  Once it is nicely browned, remove it from the pot with a slotted spoon and  put  it on a plate. Do the same thing with the other half.  Remove from the pot and set aside.  Now, add the onion and garlic to the pot.  Stir to coat in all the brown bits in the bottom of the pot…my daddy calls that the gremille.  Cook for about 2 minutes, then stir in the tomato paste.  Stirring constantly, let this cook for another 2 minutes or so.

Pour in your beef stock, stirring constantly.  Add a few dashes or splashes of Worcestershire and sprinkle in the sugar.  Give it a nice stir to let all the flavors combine.  Now, add the beef back to the pot.  Cover and reduce the heat to low.  Simmer for 1 1/2 to 2 hours.  After the time is up,stir in the diced carrots and turnips to the simmering stew.  Let this simmer for about 30 more minutes.  The sauce will be rather thick, but if you think it is too thick, you can add a little more broth or stock until it is thin enough for your liking.  Once the turnips and carrots are fork tender, you can add some parsley if you like.  I do this once I serve the stew in bowls.  My kids tend to ask “Ewww what is that green stuff?!!” and the inspections begin.  So I try to not raise any red flags early on.  Sigh.  Anyway, ladle some of this absolute utter deliciousness into bowls over mashed potatoes (how I like it) or cooked rice (how Big Daddy likes it…yes, we are a couple divided…again…sigh).  If you make up a pan of cornbread, you will be golden and loved forever.  You will be hailed as queen of your castle and you will get a crown.  Oh wait, no, that was a dream I had.  Never the less, this is a WONDERFUL meal, especially on a cold windy and rainy day.  Hope you love this recipe as much as we do in Cajun Mama’s kitchen.  Cest bon ma chere!!  Joyeaux Noel!  Thank you for being a part of this journey so far.  You are a blessing to me!!!

PW’s meatloaf and BB’s honey carrots

I love meatloaf.  I love meatloaf sandwiches.  I am speaking out today on behalf of meatloaf lovers everywhere.  This post is for you. My mama always made cheese stuffed meatloaf and I always loved it but when I moved out, I could never quite make it as well so I found other recipes and tried them out.  They just didn’t hit the spot.  Then I had kids and meatloaf making kind of went by the way side for a few years.  Then they got a little older and my oldest and my pickiest eater loved meatballs, burgers, and hamburger steak so I had a hunch he might like meatloaf.  I found a Paula Deen recipe and he loved it.  Definite winner.  Sadly, when we moved last year, I lost the magazine that the recipe was in and I have tried to find it again but I can’t.  I have googled it, searched pinterest for it.  Nothing.  To be honest, he loved that recipe, but I could go either way on it so I figured it wouldn’t hurt to branch out and find some new meatloaf recipes.  Boy did I find a good one.  Oddly enough, I have Pioneer Woman’s cookbooks and I know I have seen this recipe but I never made it until Big Daddy told me he had a hankering for meatloaf the other day.  So I set out and sure enough…this recipe came up when I googled best meatloaf recipes.  Yep, apparently google knows good meatloaf.  Big Daddy almost made himself sick on this meatloaf.  I am not lying.  It went so well with some mac and cheese and BB’s honey carrots (as my kids call them and BB is what they call her).  Now, my oldest did not try it.  He decided to pass, which is not unusual for him with a new dish.  The majority of the fam liked it so I considered it a win.  I think he found the bacon on top off putting.  None the less, whether or not you or your family care for meatloaf, if you are just wanting to experiment and are wanting an awesome meatloaf in your repertoire, this is a great place to start.  Oh and the leftovers make a delicious sandwich for lunch the next day.  Can’t beat that.

I made a few additions to this recipe and I have a few suggestions for what I will do next time, but this recipe can be found on The Pioneer Woman’s website/blog and in her cookbook.

Pioneer Woman’s favorite meatloaf 

2 lbs. ground chuck

1 cup whole milk

6 slices of white sandwich bread

1 cup freshly grated Parmesan cheese

1/4 tsp. seasoned salt

3/4 tsp. Kosher salt

Freshly ground black pepper

1/3 cup flat leaf parsley (I omitted this as my kids tend to find any “green stuff” in their meat off putting)

*I add some Mexi-cajun seasoning to mine.  My friend Shelley makes it and it is so good.  I put about 1/2 tsp. in my meat

4 whole eggs, beaten

10 slices thin (not thick cut or center cut) bacon

1 1/2 cup ketchup

1/3 brown sugar

1 tsp. dry mustard

a few shakes of Tabasco or LA hot sauce or to taste

Instructions

Preheat your oven to 350 degrees.  In a medium size bowl, pour milk over the bread slices.  Allow the milk to soak in for a few minutes.  Prepare your 9 x 13 baking dish by covering the bottom and sides with aluminum foil. Trust me on this. If you have a rack that fits in your baking dish or pan, use it.  It will allow the fat to drip down.  Again…trust me.

In a separate bowl, add your ground chuck, Parm, seasonings and milk soaked bread.  Pour in the beaten eggs.  With clean hands, mix the ingredients until well combined.

Lay bacon slices over the top.  Tuck the ends of the slices under the meatloaf.

Make the sauce:  add ketchup, brown sugar, dry mustard,and hot sauce in a mixing bowl.  Whisk this together.  Pour 1/3 of this mixture over the top of the bacon.  Spread with a spoon.

Bake the meatloaf for 45 minutes and then pour another 1/3 of the sauce over the top.  Bake for another 15 minutes.  Slice and serve with the remaining sauce on the side.

BB’s Honey carrots (an all star side if there ever was one.  Tasty and sweet, but still carrots and your kids are eating carrots so that makes them healthy…ish…healthier than say french fries…so score one for you!!  And they have honey for the main ingredient and how can that be bad?)

Stuff you need~

1 pound bag of carrots, peeled and sliced

1/2-1/3 cup of honey

2-3 Tablespoons sugar

1 Tablespoon butter, optional (this just makes them a little richer but not necessary at all)

Add carrots to a medium sauce pan.  Cover with water plus a little more.  Add honey and sugar and butter if you are using it.  Bring to a boil uncovered.  Reduce to a simmer, cover and let them cook until fork tender and some of the water has evaporated out.  Perfect.  These goes great with baked chicken and rice and gravy as well.  Just saying.  Enjoy.


Image

Is your mouth watering?  Mine is and i just ate the rest last night.  You won’t be disappointed.

PW’s Spinach Artichoke Pasta

Now I told ya’ll that I love Pioneer Woman’s recipes.  They are scrumptious (her word) and realistic and please a crowd.  With my crew over here, we are a crowd so that is definitely important.  This recipe makes a big ole skillet full and will please your crowd (or a few hungry Cajuns as they say ha ha!!).  This is a meatless dish but you can totally add some roasted shrimp or some grilled chicken if you want to make it a full meal.  Then it becomes a one pot wonder and who doesn’t love that?  I think next time I make this I will add the shrimp and I will substitute the spinach with kale.  It is so creamy and so dreamy and just mmmm…mmmm…can’t talk because my mouth is full GOOD!  Now that Fall is here, this is a great dish to make for friends who come over to watch the game or for a girls’ night in.

563998_540027792744459_1699713540_n

Spinach Artichoke Pasta (Adapted from the Pioneer Woman) 

Makes about 10 servings 

Ingredients

12 oz. penne pasta, cooked al dente

6 Tablespoons butter, divided

4 cloves garlic, finely minced

2 cans artichoke hearts, drained and halved (they do carry them already halved if you want to get those)

2 bags of baby spinach (I used one of those plastic containers of baby spinach they have in the store now and that was plenty)

3 T. flour

3 cups whole milk

1/4 t. cayenne pepper

salt and pepper to taste

1/2 cup freshly grated Parmesan cheese

4 ounces cream cheese (optional…but yeah…its good)

1 1/2 cup Monterey Jack cheese, grated

1/2 cup reduced sodium chicken broth (less or more, depending on you )

1/2 seasoned panko breadcrumbs

crushed red pepper, according to taste

Instructions

Melt 2 T. of butter in a large skillet.  Over medium heat, add minced garlic and give it a good stir.  Now it is time to simply wilt your spinach.  It will seem like way too much but I promise, it cooks down quickly.  Stir it around until it is wilted or about a minute…then remove from the skillet and then set aside.

Add 2 T. butter to the same skillet and raise the heat to high.  Toss in those artichoke hearts and stir around until they get a little color to them, about 1 to 2 minutes.  Remove the artichokes from the skillet and set them aside.

Reduce the heat to low.  A the last 2 T. of butter to the skillet.  When it is melted, whisk the flour into the butter.  Gradually pour in milk and whisk it in.  Let this cook for 3 to 4 minutes, until it starts to thicken.  Take care to stir frequently and not let the mixture scorch.  Add the cheeses, salt and pepper, and cayenne pepper.  Stir frequently to melt the cheeses and if it is overly thick, stir in a little chicken broth.

Add artichokes and cooked pasta, tossing gently to combine.  Gently fold in the spinach.  Sprinkle the top with those pretty red pepper flakes (use sparingly…those babies pack some heat!), plenty of Panko breadcrumbs, and an extra sprinkling of Parmesan cheese.  Now, stop eating it out of the skillet.  Its good right?  Now, dish it up and sit down and enjoy this bowl full of pasta perfection.