Tag Archives: desserts

 Cherry 🍒 fluff and my happy place 

Ok so my mother in law, Deb, is a native of DeWitt, Arkansas. I am pretty sure before Big Daddy and I started dating, I’d never been to Arkansas, much less DeWitt. So it’s pretty funny for me to say the words “Dewitt is my favorite place on Earth.” Well, it likely rivals Perdido Key, Florida as my favorite place, but it is right up there at the top of my list. She and my father in law, Scott, run a hunting lodge, Bayou LaGrue. I’ve likely told y’all this before, but maybe you missed that so I’m saying it again. So technically Bayou LaGrue is one of my 2 favorite places on Earth. We love coming here. Last night when we arrived, Deb aka Granny had prepared a ham, fried potatoes, corn and peas with some rolls. My kids oohed and Aahed like they had not eaten in years. I could not blame them…everything tastes better at the camp! We all agreed on this. Forget Disney, for Cajun mama and family, Bayou LaGrue is the happiest place on Earth! 

Pappy’s favorite thing to do is catch fish in the pond

Now that I’ve been around for over two decades, Deb aka Granny sometimes gives me carte blanche in the lodge kitchen. Only sometimes though. Cajun Mama or not, that’s her lodge kitchen and she is the queen of it. I’ve been wanting to make Mr. Scott some of my mom’s dirty rice, so before coming up I grabbed the stuff I knew they would not carry in the Piggly or Kroger in DeWitt (it’s pretty small) and then I saw this recipe on Facebook and decided to make this “cherry fluff” while I was at it, here is original recipe link. Mr. Scott LOVES ambrosia and this dessert seemed like a pretty good fit. And I told Deb I would be commandeering the kitchen. She allowed it. This time.  Haha! 
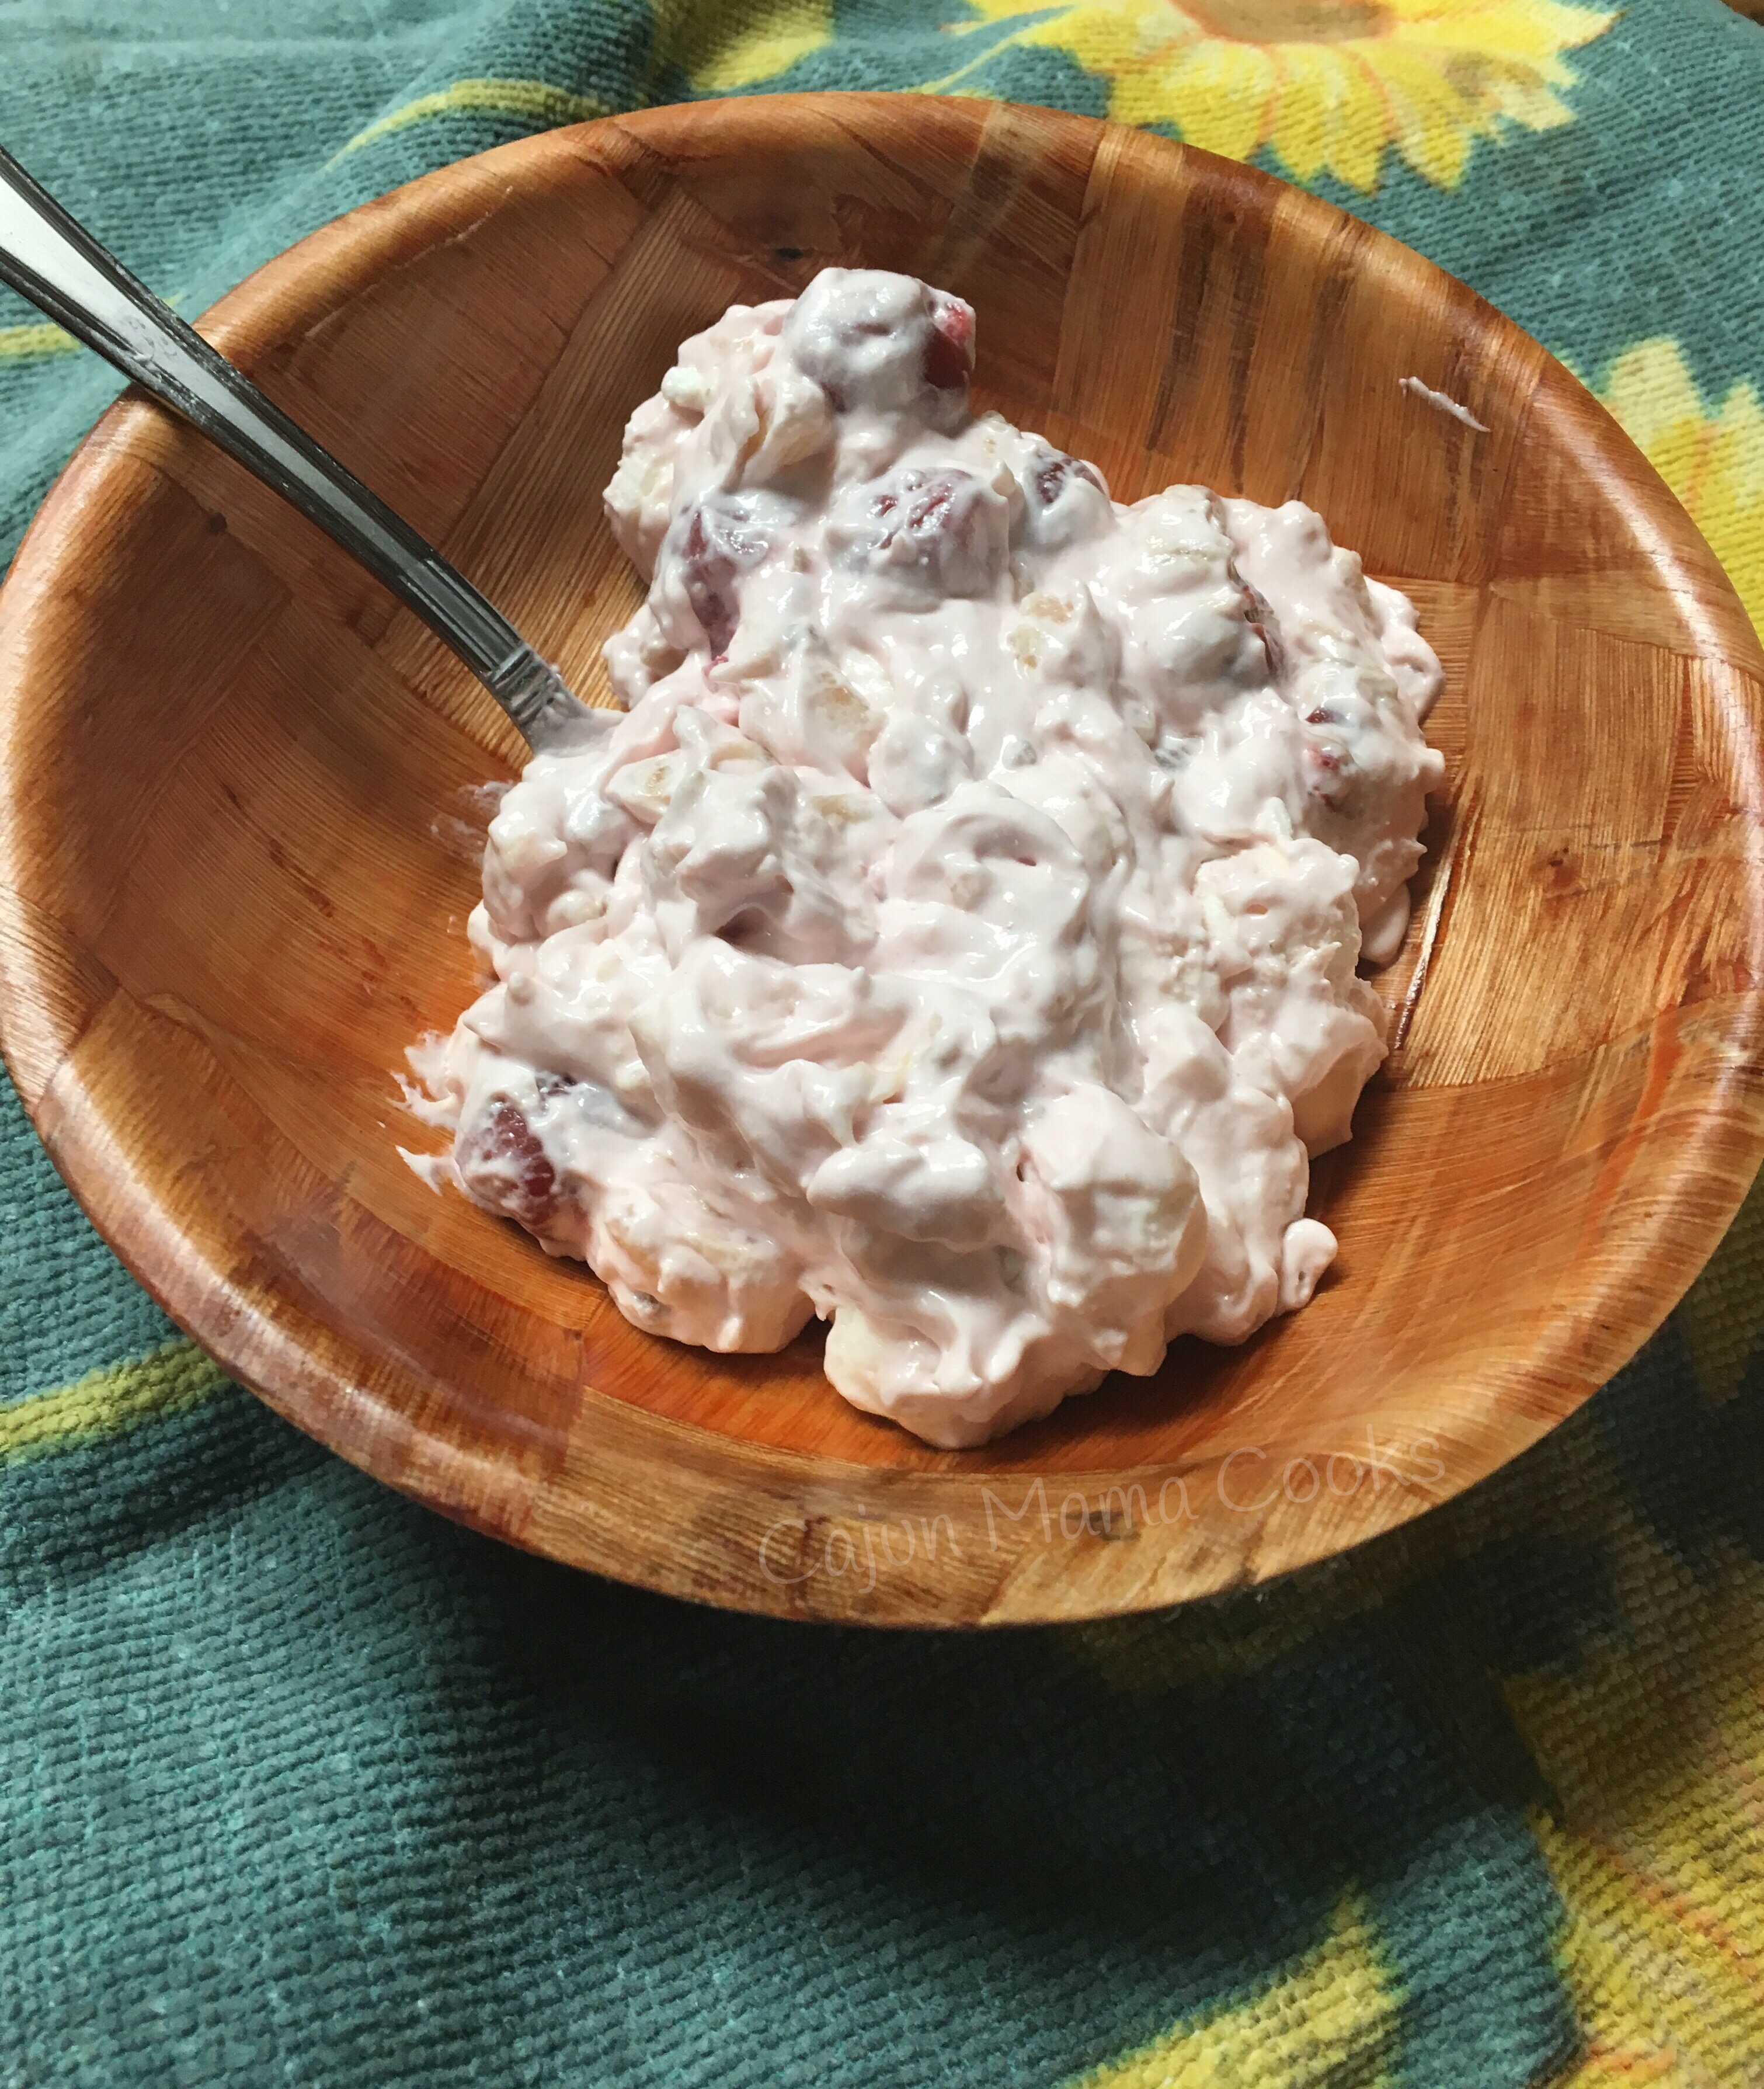
Anyhow, I made up batch of this cherry fluff aka unicorn fluff and I cannot wait to get his take on it. My Madame toot (10 year old girly girl with a love of all things unicorn) said given its pink color, it’s fluffy texture, and that it has marshmallows in it, should be dubbed “Unicorn Fluff” so unicorn fluff it is!! This recipe is super simple to throw together and it is different than your regular cakes or pies, so it’s a fun, unexpected treat. Also, given that it is 9000 degrees outside anywhere in the South, this dessert is NO BAKE, possibly making it the perfect summer dessert! Can I get a whoop whoop?!! 

La ingredients


Unicorn Fluff 🦄/Cherry Fluff 🍒 

Stuff you need~

1 (14 ounce) can sweetened condensed milk 

1 (8 ounce) container Cool Whip

1 (20 ounce) can of crushed pineapple, very well drained  

1 (21 ounce) can cherry pie filling 

2 cups mini marshmallows 

1 cup shredded coconut (sweetened or unsweetened works)

1/2 cup chopped pecans 

What to do with the stuff~

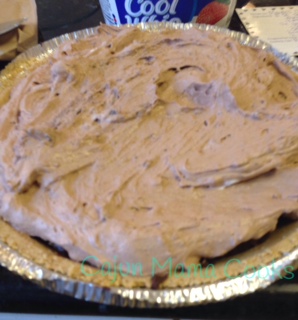
Combine the Cool Whip, cherry pie filling, crushed pineapple in a large mixing bowl.


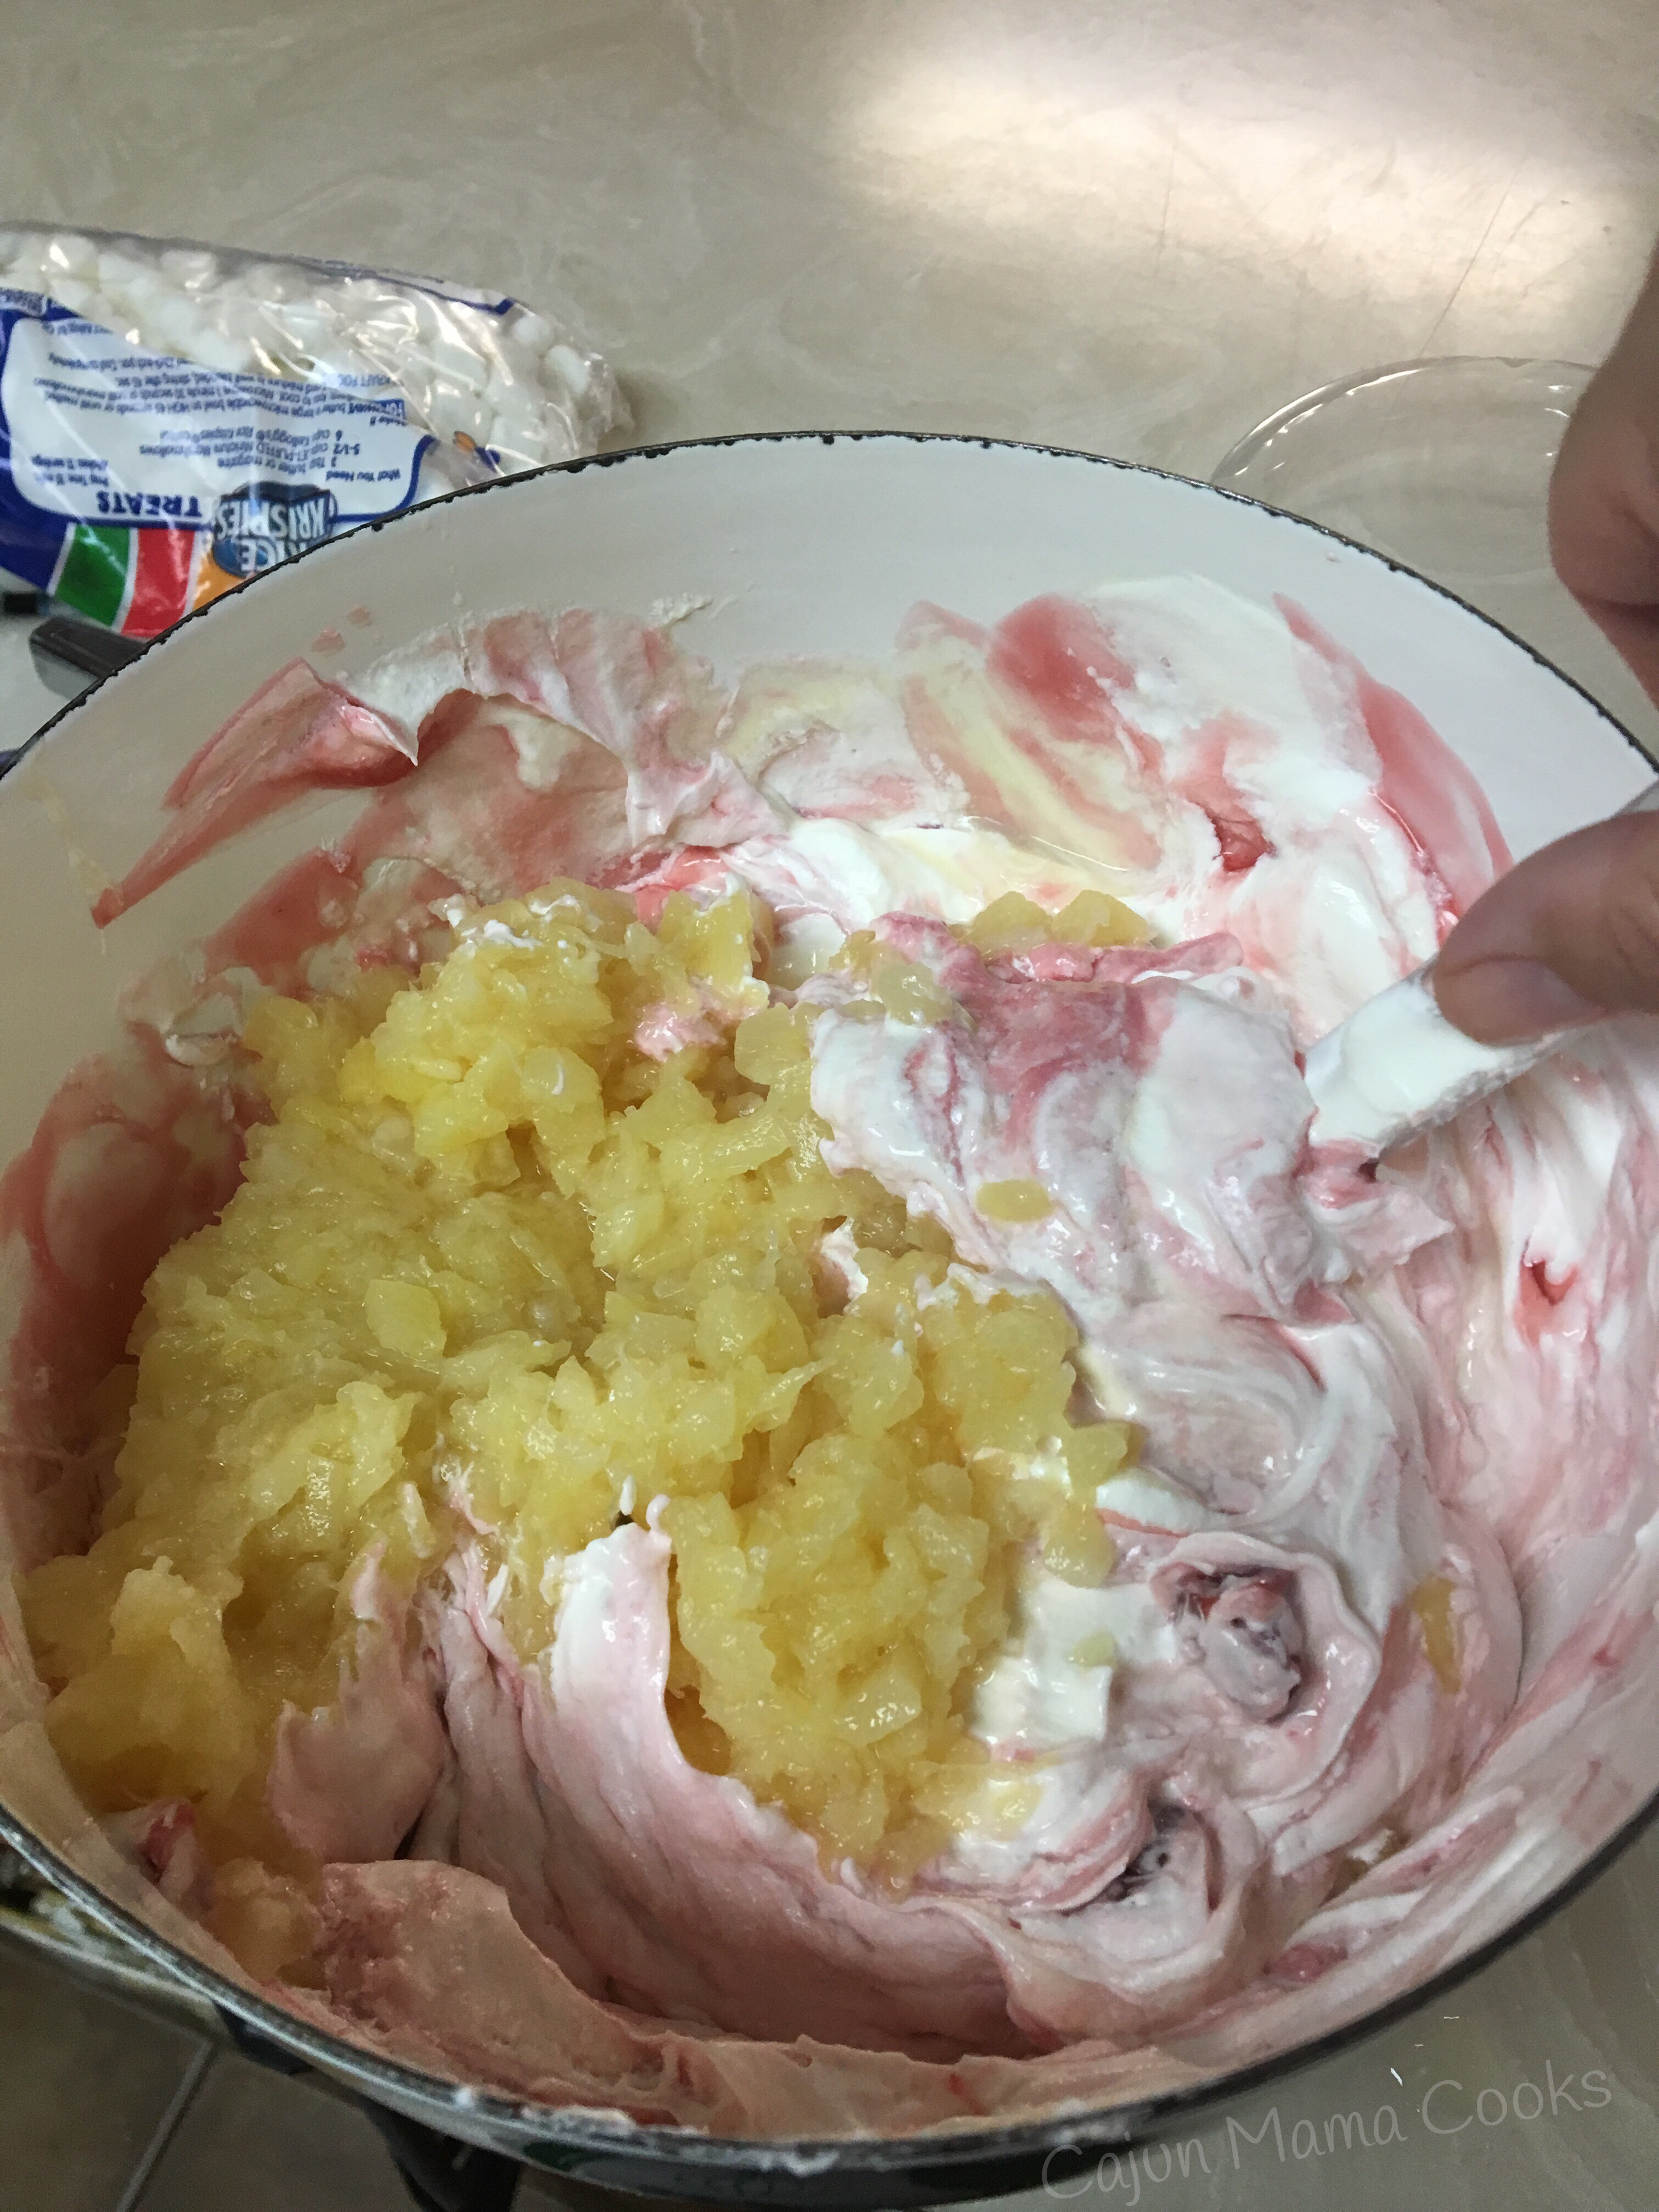
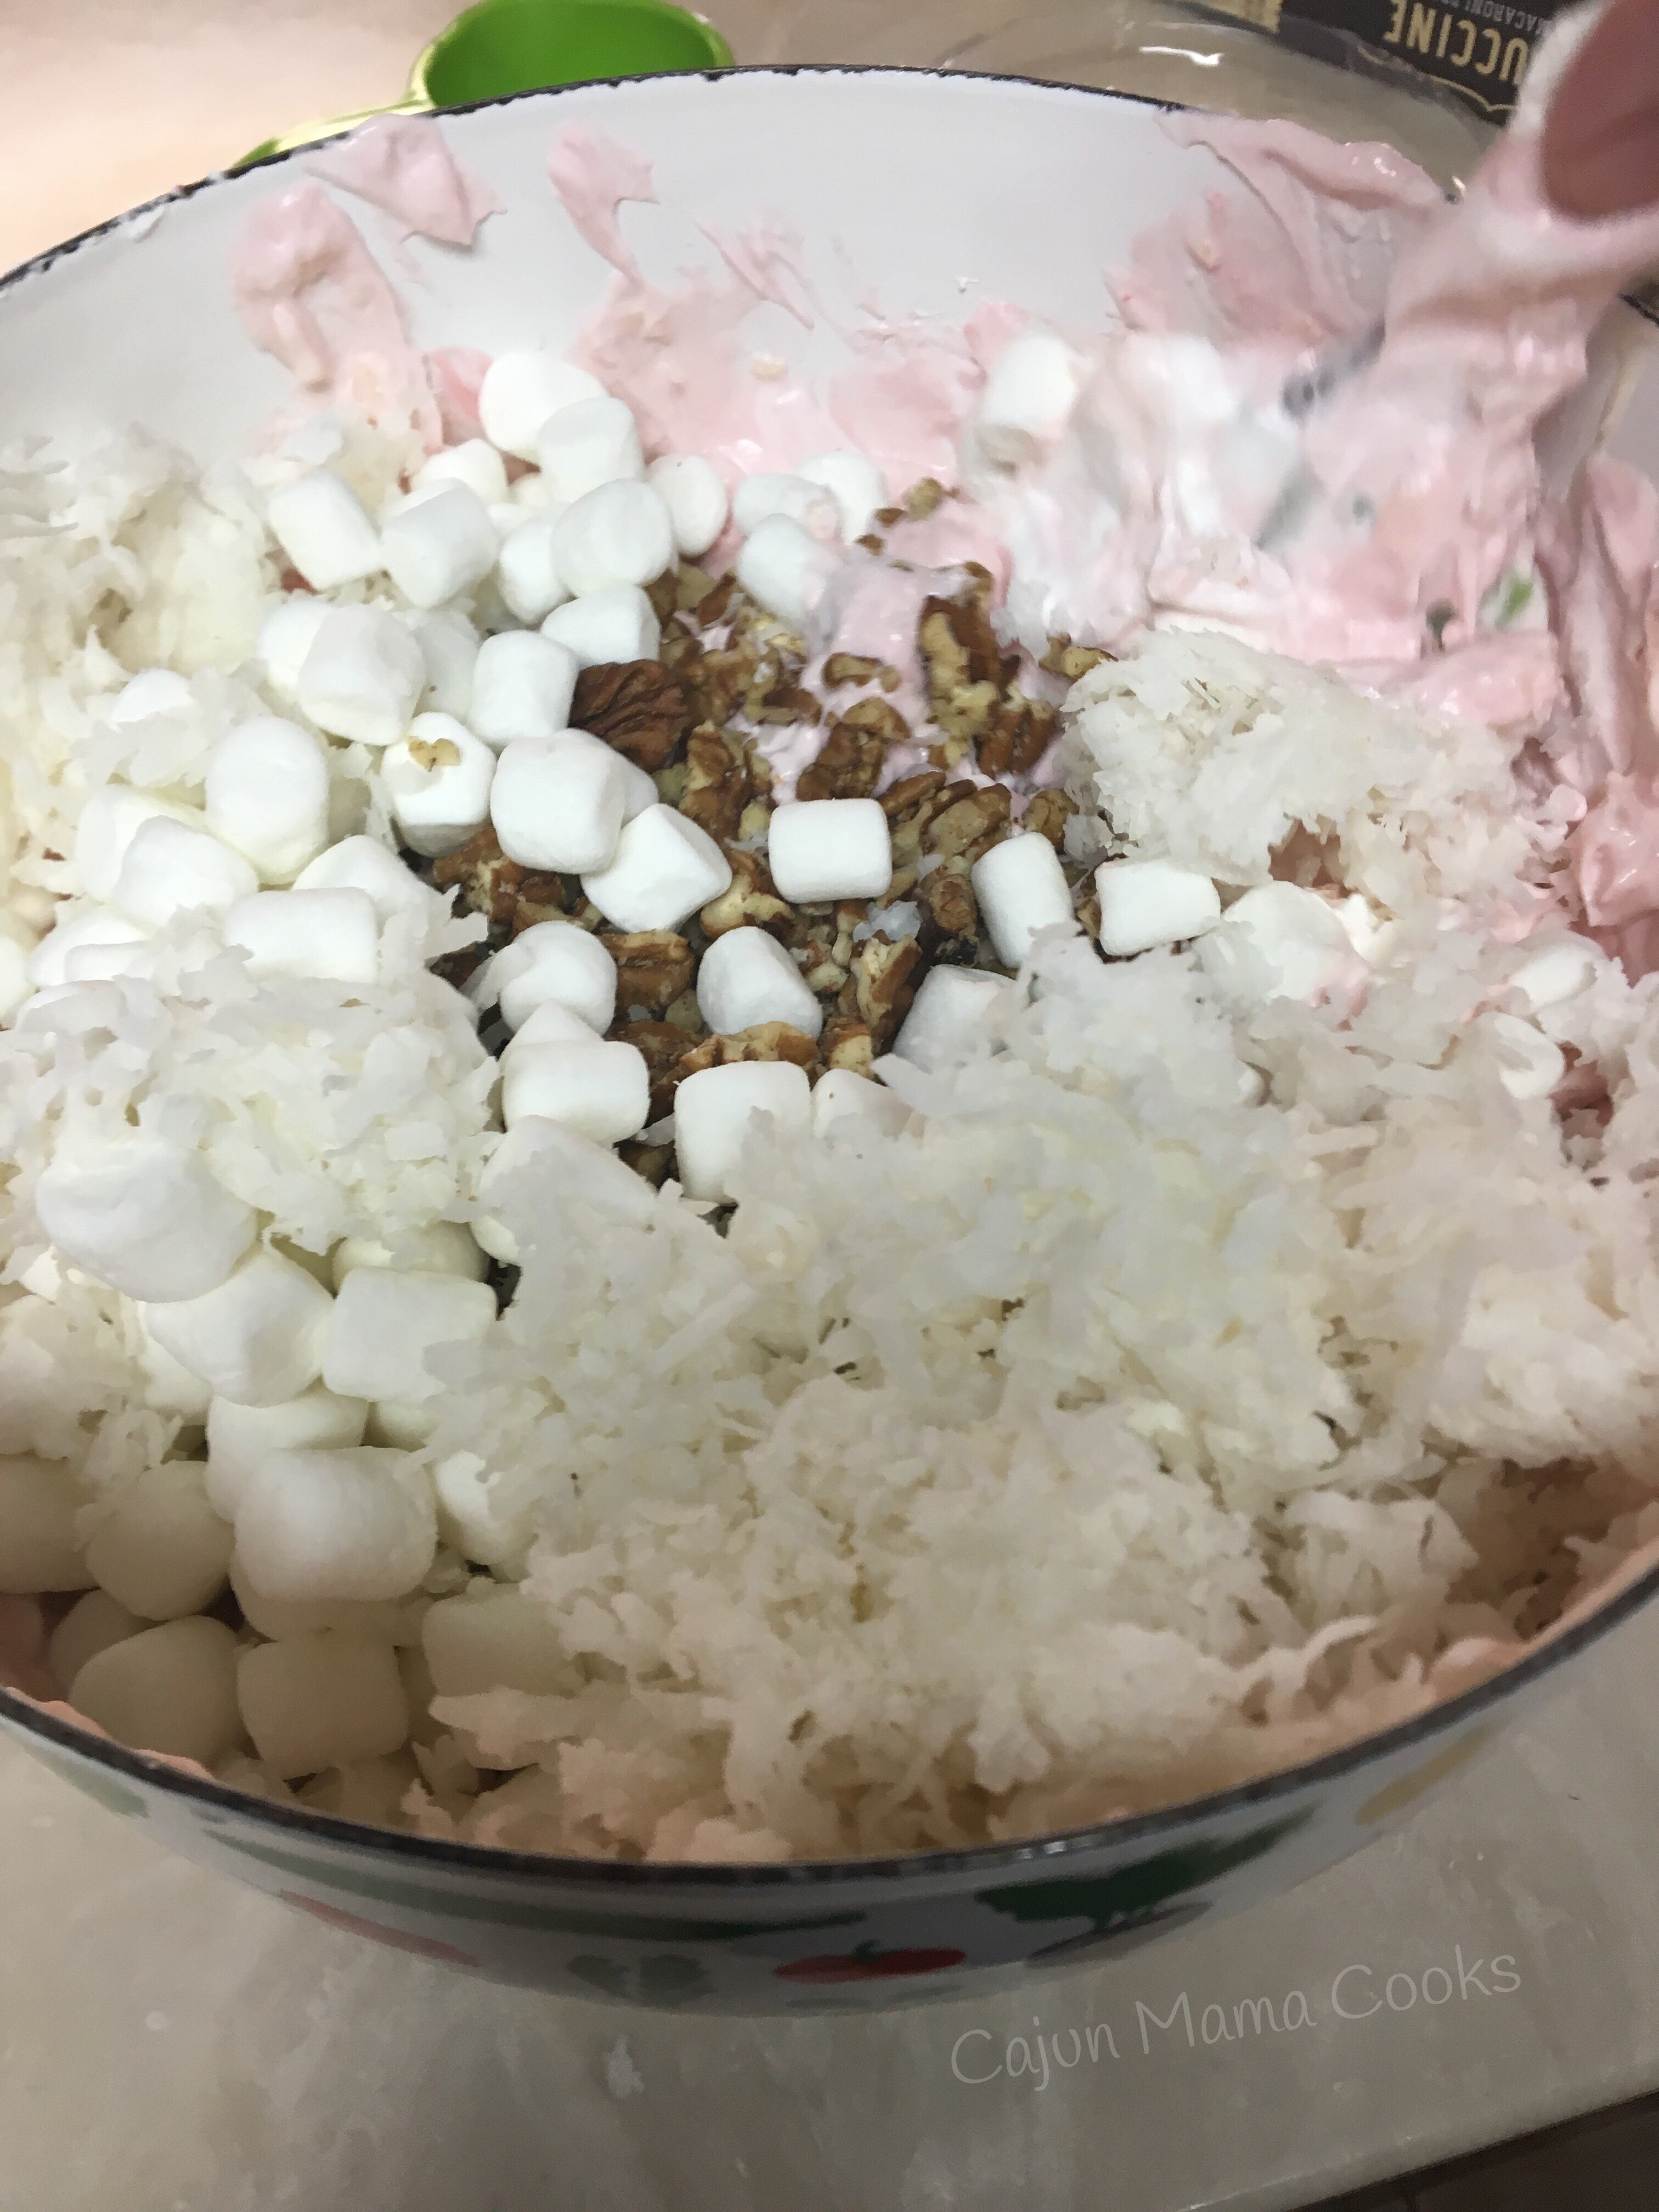
 Stir in marshmallows, pecans, and shredded coconut.


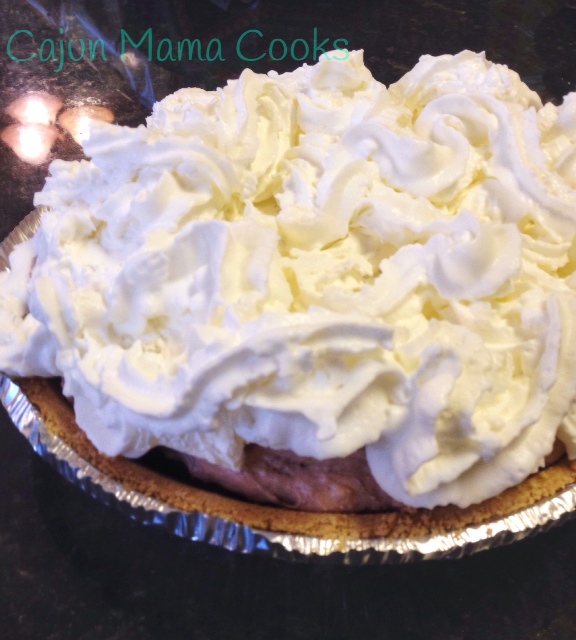
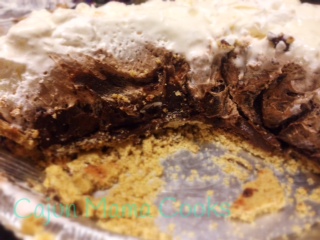
  Now, cover and pop in fridge. Let chill until ready to enjoy! It will thicken up as it chills. Be sure to take in the lovely pink hue of this sweet concoction sure to add a bright dose of color to your next meal!! Madame Toot would insist on this! 


I hope you enjoy this luscious pink dessert in your happy place! 

This is a luscious dessert!
Papa and Madame Toot at BLL

Advertisement

Bread Pudding with brandy butter sauce

So more than a few years ago, Big Daddy introduced me to his mama’s posse of Broussard/Youngsville friends. You see, Big Papa used to run coops and after they left the Bayou Rapides coop, he was moved to the coop in Youngsville. Now, I had met Mrs. Linda and Mrs. Sandra and Mrs. Peggy (the Broussard posse) but when Big Daddy and I started dating, they kind of took me under their wing and told me all the things that Mrs. Dianne would have told me. For instance, Big Daddy’s favorite dessert since childhood (banana bars…recipe will come), memories from his years in Broussard and so on. They kind of filled in the gaps because though I had always known him, I had missed out on his day to day life and some things a mama only knows…well her and her posse. Mrs. Linda taught me how to make sausage gravy for Big daddy’s biscuits, Mrs. Sandra taught me all about jelly roll pans and banana bars, so on and so forth. They are some lovely ladies but that comes as no surprise. Mrs. Dianne was a pretty fabulous lady herself and was smart enough to surround herself with equally fabulous friends. My mama is one of them…so it’s only fair to say. She also had her Keithville posse…the woman had some good friends. So one day as we are discussing recipes, Mrs. Sandra whips out this recipe for bread pudding. It comes from Pascal’s Manal Restaurant in Nola. I have never been there and I cannot remember if Mrs. Sandra had but she raved about this bread pudding and it sounded just fine to me. At this point I was in college and I fail to remember if I summoned the courage to try to make it (I think I did) but several years later when I started preparing Christmas dinner, I made this for dessert. It is a sumptuous dessert worthy of a holiday meal. It draws oohs and aahs and will make you a star. Well maybe not a star but you will be loved by your family even more than before. That’s never bad. Even my friend Tim who I say is fairly hard to impress could not resist this bread pudding. It’s pretty dang fabulous. It does make a quite a bit of bread pudding, but if you are making it for a holiday meal, I promise it will not go to waste. The recipe is not hard but it requires large amounts of staple ingredients. That’s the beauty of it…it is so simple and requires basic ingredients and turns them into this out of this world dessert. You’ll see.

Bread Pudding

Serves 15 or more

Stuff you need~

3 loaves of French bread
1/2 gallon or 8 cups of whole milk
10 eggs
2 sticks of butter, melted
3 ounces vanilla extract

What to do with the stuff~

Cut French bread into cubes.

IMG_0332.JPG

Toss french bread cubes into a big ole bowl. Pour the milk all over the French bread cubes. Let the milk soak into the bread. I usually let it soak an hour or two.

IMG_0335.JPG

Add the remaining ingredients to the bowl.

IMG_0338.JPG

Mix with your hands until blended. Pour into baking pan (not greased). I use two 9 x 13 baking dishes as I do not have a baking dish big enough to hold all this deliciousness. Bake for 45 minutes to an hour or until the bread pudding is no longer soupy in the middle.

IMG_0344.JPG

for the topping

stuff you need~

3 ounces brandy
4 sticks of butter (or 1 pound), softened
1 cup sugar
2 ounces vanilla extract

Add butter and remaining ingredients to a large mixing bowl or the bowl of your standing mixer. Mix until smooth. Pour over bread pudding. *side note…big daddy likes his brandy butter sauce melted a little before pouring. If the bread pudding is warm enough it will melt the topping quite nicely for you. So delicious ya’ll. Just. So. Delicious.

IMG_0343.JPG

IMG_0342.JPG

Berry picking and a dang good cobbler

So this past weekend a local blueberry farm, Hillcrest Blueberry Farm, ran a special on blackberries. A gallon for $10!! We have always wanted to take the kids to pick berries and every summer it is on our list but somehow we get busy and it just never happens. Until this past Saturday. What a wonderful time we all had picking berries! It didn’t take a full hour for us to fill two gallon buckets with those huge, juicy berries. They were the most perfect looking things I had personally ever seen. The kids were in awe over the size as they plucked one big one after another from the vine. Frankly, BD and I were pretty dang impressed too!
20140624-072511-26711483.jpg

20140624-072511-26711369.jpg

Here is a link to their website if you want to check it out and maybe take a trip to a great local farm so your family can get the whole experience too. http://www.hillcrestblueberryfarm.com/. Plus they have some super yummy berries, syrups, jams, and a bunch of other too delicious to mention goodies. They also have some out of this world Tahitian Vanilla soft serve that is out of this world. I say this and I am not an ice cream lover and certainly not vanilla and this stuff was ah-mazing. Just saying!! The kids were stoked…berry picking AND soft serve. Yes please! My little one saw that they had blackberries and blueberries to add to the top of your soft serve and he was all “don’t mind if I do!” My baby is smart like that. It was a great experience for them, for us, for our whole family and I highly recommend it.

20140624-073253-27173389.jpg
soft serve on a hot day=perfection
So now we arrive to the portion of this blog post where I give up the goods. I tell y’all, my friends, peeps, partners in cooking crimes, what I made with some of these ginormous berries. Well, I have some other creative ideas that I plan to execute, but on that first day, I made cobbler. Blackberry cobbler. Big Daddy adores blackberry cobbler and has always been fine with I have served him those frozen Mrs. Smith’s cobblers from our grocery store’s freezer section. Yes I said that. Yes I did that. I have told y’all about me being the anti baker. Until recently, my baking projects read mostly like a Pinterest “nailed it!” Roster. I am getting better with each attempt though I realize it is a process. So yes I have fed my man a frozen cobbler that I oh so generously cooked in the oven first. I am a loving caring wife who does that stuff. But buoyed by our authentic berry picking extravaganza and my recent successes in the baking department, I said I am gonna give it a go! I am gonna bake a cobbler from scratch! No wait, I think I said “I am going to attempt to bake a cobbler from scratch!!!” And my oven groaned. Ha ha!!! So I googled blackberry cobbler recipes and what do you think pops up?! Yes that’s right! Pioneer Woman’s blackberry cobbler recipe! It was a sign from the cooking gods and I ran with it! Here is a link http://thepioneerwoman.com/cooking/2007/08/the_great_cobbl/. This is a basic cobbler recipe and it is easy as…well…pie.~AMB

Blackberry Cobbler

Stuff you need~

1/2 cup (1 stick) butter
1 1/4 cup sugar, divided
1 cup self rising flour
1 cup milk
2 cups blackberries, fresh or frozen

What to do with the stuff~

First off, preheat your oven to 350 degrees.
Next melt the butter in a microwaveable safe dish
In a large mixing bowl, add self rising flour and 1 cup of sugar. Whisk in the milk. Then stir in the melted butter. Oh my. It’s getting good now.
Ok…now you will butter your baking dish. I used a round shallow one and it worked well but use what you have. Don’t be afraid to butter it well. Really work that butter. Yeah that’s right. Ok now, pour in the milk flour mixture. Now, add in the blackberries. Now, you want to sprinkle the remaining 1/4 cup of sugar all over the top. Pop that bad boy (really that sweet thing) into the oven. Bake for about 55-60 minutes until lightly browned on top and set in the middle.
Serve with a dollop of vanilla ice cream (Tahitian soft serve anyone? Anyone?) or some Cool Whip. It is good. It is divine. It is blackberry cobbler that you made yourself from scratch with berries that you picked! You are amazing!!! Take a bow. Just not in front of the oven or you might hit your head. 😉

20140625-124524-45924583.jpg

20140625-124704-46024108.jpg

20140625-124703-46023734.jpg

fresh berries in the cobbler! Go you and me and all of us. Blackberry cobbler for all!

20140625-170602-61562348.jpg
all for one, one for all…berries!

20140625-170602-61562457.jpg

20140625-170602-61562549.jpg

20140625-170914-61754630.jpg
a few more pics from our very excellent berry picking adventure

Fresh strawberry cake with cream cheese icing and people can change

I am usually such a chocoholic when it comes desserts that I never saw it coming when I came across a recipe for this strawberry cake on Christy Jordan’s Southern Plate Facebook page at http://www.southernplate.com/2010/04/fresh-strawberry-cake-with-cream-cheese-icing.html and was compelled to make it right away. I felt a call, an urging to make it. Yes. That’s right. Making this heavenly strawberry cake is a calling. More like a product of divine intervention. It is dreamy. It is moist. It fulfills all of my dessert needs and yet…there is no chocolate. I am in love. Who says people can’t change? This recipe has a made from scratch taste and look yet it calls for a boxed cake mix. There are fresh strawberries in the cake and in the icing and man…it is something else. I will warn you…the smell of it making in the oven will cause your family to ask “what is that delicious smell?” And say “something smells so good” every 5 minutes. If you are looking for a new dessert to bring along to a party or just to bake for your family because you love them…or you know…they cannot talk while shoving this awesome cake in their mouths (not that I do that! He he) this is the one to try!!!!! Plus strawberries are in season now and they are not so expensive. Get on it!!! ~AMB

Fresh strawberry cake with cream cheese icing

Stuff you need~

for the cake:
1 box white cake mix
3 eggs
3/4 cup milk
3/4 cup canola or vegetable oil
1-3 ounce package of strawberry gelatin
1 cup crushed strawberries and juice (1 regular container of fresh strawberries will do)*

for the icing

1-8 ounce block cream cheese, softened
1/4 cup butter (I used half a stick of the real stuff), softened
3 cups powdered sugar
Whatever is left of the crushed strawberries

*cut the green part off the berries and then slice them up. Add to a gallon size storage bag. Close the bag well once all strawberries are in. I did as Christy Jordan suggested and used a canned good to crush the berries. Just gently roll the can across the closed ziplock bag. It works like a charm.
20140523-153638-56198739.jpg
crushed strawberries . Easy peasy.

What to do with the stuff~

Preheat oven to 350 degrees. Spray two 8 inch round cake pans or 1 9 x 13 pan with Baker’s Magic or coat with oil and then flour them.
In a mixing bowl, add cake mix, eggs, milk, oil and gelatin. Using standing mixer or hand mixer, mix until all ingredients are combined. About 2 minutes. Next add in crushed strawberries. Mix again until the berries are incorporated well into batter.
Pour into prepared baking pan (s) and cooking until a toothpick inserted in the middle comes out clean. I did the 9 x 13 and it took about 35-40 minutes.
Allow cake to cool completely before icing.

While cake it baking, go on and get your icing ready. I just washed out my standing mixer bowl and used it again. In a medium size bowl, combine the softened cream cheese and butter and powdered sugar. Mix until smooth. Resist the urge to eat with a spoon. If you desire, add in the rest of the crushed berries you did not use. I like the way it looks and the taste is out of this world. CJ suggests it is prettier without the berries, but I disagree. Each to his own, so do your thing. You can’t lose either way!!
Once cake is cooled, ice that baby and cry your happy tears that you made a cake that is so luscious and pretty. Yay you!!!!

20140523-154420-56660931.jpg
look at that pretty cake mix!

20140523-154516-56716843.jpg
the icing. Will be my undoing. S.O.S.

Southern Living Pound cake and the perfectionist super woman who lives in my head

Watermarked Photo (104)

It used to take A’s on tests in grad school or a wonderful session for me to feel accomplished…now, when my pound cake slides out the pan and looks pretty…I feel like I climbed a mountain!  Yay!

Extra extra read all about it:  CAJUN MAMA CAN BAKE!  Like a true Southern woman.  I made my very first pound cake.  Now, I know for many of you this is not a big deal.  But for me, it is a true accomplishment.  Usually me baking equals an epic fail.  It usually does not come out nearly as lovely as what I envision in my head.  In my head lives a perfectionist wonder woman who should be able do everything.  Able to wake up rested after 3 hours of sleep and look refreshed and bright eyed.  Able to get it all done plus some and not get tired.  Able to whip up delicious desserts with nary a failure and make it all effortless.  Newsflash…that chick does not exist.  She is an accumulation of my unrealistic expectations in myself and society’s version of what a mom should be.  Guess what?  After a good night’s sleep, I am still tired and look mediocre.  I get some of it done and before leaving my house to go get in carpool line, every day without fail I say to myself “dang I need more hours in the day”.  And when I bake, well, usually it looks like a science experiment went wrong in my kitchen.  But I splurged a while back and bought a really nice bundt pan, hoping that this would solve all my baking problems and baking fails would become baking wins, wars would end, the government would get it together and we could all live in perfect harmony.  Not quite.  But this bundt pan did produce a splendidly browned bundt cake that did not stick!  Hallelujah! Perfectionist super woman got ahold of my debit card and went on Williams Sonoma online and bought this bundt pan.  Thinking of all the wonderful bundt cakes and pound cakes she was going to make (though in this case she was right). She does that sometimes.  Gets all these high falutin ideas about what’s gonna happen in Cajun Mama’s kitchen and buys stuff to make it happen.  I have to tell her to back it down sometimes because she gets out of hand.  I tell Big Daddy it is all her fault, but he reminds me that I do not have split personalities (at least he is pretty sure) and that me and her are the same people and therefore, in reality I am to blame.  humph.  Who lives in reality?  Not me.  Duh.  Lol!  So, cut to a while later, and Sunday evening I was feeling particularly domestic and I said out loud to whomever was listening (no one) “I am gonna bake a sour cream pound cake!!”.  So, I drug out some of my cookbooks (that perfectionist wonder woman bought most of those too) and set out to looking for a recipe.  I figured I had never made one so I would have to start somewhere.  And so I did.  I found a good one (I mean…Southern Living is always a good bet).  The wonderful part about cooking all the time and gaining experience as a non trained chef is that most of the time, I have almost all of the ingredients to bake whatever I fancy at the moment and whatever recipe we find that we want me to cook.  No, not we as in me and my other personality.  We, as in my family, the kids, Big Daddy…whatever we want me to cook.  Because guess what…if it is cooked, it is cooked by me.  Ya dig?  Ok.  So anyway, after some careful research (i.e. reading through cookbooks…tough job), and looking through the pantry and fridge, I was set on go.  Pound cake #1 would commence on Monday.  Well.  It was SCRUMPTIOUS!!!!!  Total win.  Between the wonderful bundt pan and a can of Baker’s Joy (Target brand of course.  I stay at home ya’ll…no money in that.  Store brands rule!!!) it turned out like a dream.  Color me shocked.  But that perfectionist Super Woman just sat there with her arms crossed, looking all smug.  She gets on my nerves.

So, if you have been looking for a good sour cream pound cake and are feeling fancy, this is a good place to start.  My sweet friend Lottie sent me her grandmother’s recipe for pound cake, so I think that will be pound cake #2.  Yes, I am the self appointed pound cake tester.  Also, I am bringing samples to some of my kids’ teachers and other staff members at the kids’ school so that I can get some feedback.  And I won’t injure myself eating an entire pound cake.  Yes, if you are employed at my kiddos’ school, you might be a pound cake guinea pig.  I have not heard any complaints yet!  So here goes friends.  Be Southern…bake a pound cake!!! ~AMB

Image

A few of the cookbooks I own.  I may or may not have a cookbook addiction.  

Image

Food blogger research.  Tough job but someone has to do it.

Image

Shocking that a wonderful sour cream pound cake recipe ended up here?  Nah.

Southern Living Sour Cream Pound Cake (from Southern Living: 40 Years of Our Best Recipes  cookbook)

Makes 10-12 servings

Stuff You Need~

1 1/2 cups of butter, softened (this is 3 sticks of the real stuff)

3 cups sugar

6 large eggs

3 cups all purpose flour

1/2 teaspoon kosher salt

1/4 teaspoon baking soda

1 (8 ounce) container sour cream

1 teaspoon lemon extract

1/4 teaspoon almond extract (am I the only one who loves the smell of this stuff?)

What to do with the stuff~

Preheat oven to 325 degrees. Prepare your 12 cup tube pan by spraying with Baker’s Joy or grease and flour your tube pan.

Add softened butter to the bowl of your standing mixer or a mixing bowl.  Using your standing mixer or electric mixer, beat butter at medium speed until creamy.  Gradually add sugar (I did a half cup at a time), beating after each addition at medium speed until light and fluffy.  Add eggs, 1 at at time, beating just until the yolk disappears.

In a separate bowl, mix together flour, salt and baking soda.  Add this to the butter mixture a little at a time, alternating with the sour cream, starting with flour mixture and ending with flour mixture. Beat batter at low speed until just blended after each addition.  Now stir in the lemon and almond extracts.  Pour into your prepared tube pan.  Bake for 1 hour and 20 minutes to 1 hour and 30 minutes, depending on your oven.  Or until a toothpick inserted in the center of cake comes out clean.  Mine took exactly 1 hour 20 minutes.  Cool in pan on wire rack for 10 minutes.  Turn out onto wire rack and allow pound cake to cool completely.  Enjoy and share with those you love.  Or those you wish to impress with your amazing baking skills.  Just saying.

Image

Butter and sugar beat together until light and fluffy. I had to restrain myself from grabbing a spoon.  #sugaraddict #letssellitinajar 

Image

Chilling on the wire rack. 


Image

White chocolate popcorn and doing what we can

I found this recipe a while back on Pinterest and made it almost immediately. You find the original post at http://www.the36thavenue.com/2013/11/white-chocolate-popcorn-recipe.html. This dreamy concoction tastes like a cross between rice crispy treats and popcorn. It is the ultimate blend of sweet and salty. Oh my. So good.
As always, we had too much, so for a little treat for my kiddos’ teachers, I wrapped up a ball of this yummy popcorn in some plain ole Saran Wrap and then tied it with some pretty pink twine. It made a nice little pick me up for some pretty special ladies. I have said it before and I will say it again…I am not Martha Stewart. Martha would have had treat boxes to deliver this in and I bet her kitchen would not have looked like a bomb went off after she made this. Mine did though. And I used Saran Wrap. But ya know…I have 4 kids and 2 of them have 3 teachers each. So that is 8 teachers in all. When it comes to Christmas gifts and such, I often fall short because I can not do for 8 teachers for what I might do for one or 2. And it is not a competition. All any of us can do is what we can, with what we have, where we are. So, it was a gesture in the middle of another crazy week where I had something extra to give that took little effort but sent a big thank you to some ladies who are so important in the lives of so many kids. God gave us all gifts and it is up to us to choose how we share with the world. That is all any of us can do. Whatever your gift is, I hope you let it shine for the world to see. You are a blessing to many.~AMB

White Chocolate Popcorn
Serves: 10

stuff you need~
2 bags of microwave light butter popcorn, popped
1 1/2 cups Sixlets
1 (11.5 ounce) bag white chocolate chips
1/2 bag regular size marshmallows
3 Tablespoons butter
3/4 cup corn syrup

what to do with the stuff
Pop popcorn according to package instructions and then pour into a big mixing bowl. Set aside. Mix together corn syrup, butter, and chocolate chips together in a medium saucepan. Over medium heat, bring to a boil, stirring often. Mix in the marshmallows, stirring consistently until they are melted. Pour this mixture over th popcorn and stir to combine well. Gently stir in the Sixlets, taking care not to break them. Sprinkle some more Sixlets over the top, if desired. Set it out and watch it disappear. It’s good stuff, y’all!

*yes the candy. But I found them in the baking section at Walmart not in the candy section and in a bottle not a bag. Also, you can use the pastel colored M&M’s in place of the Sixlets.

20140408-131731.jpg
my oldest with one of his wonderful teachers.

Luscious Lemon Loaf

I woke up yesterday morning with cooking on my mind.  My kiddos are on spring break, 2 of them are with their grandparents in Arkansas, one is up his daddy’s behind, and the other (my mama’s girl) has been chilling with mama.  So, frankly, I felt a little adrift. Regardless of how many kids you have, it seems like when one or two are away, things just aren’t the same.  I definitely felt their absence, though it has been nice hanging with my sweet girl and having some one on one time with her.    Anyway, I decided that I was going to cook up some stuff and this lemon loaf was one of the recipes on Pinterest that had caught my eye.  But I must say, it was originally called “white chocolate lemon bread” and frankly, it looked so yummy but the name threw me off.  Yes, I will admit I am not a white chocolate fan.  Mama likes her dark chocolate, that is all I am saying.  Always have.  And white chocolate?  Gag.  No really, gag.  But I took a risk.  I love, love, love the lemon loaf at Starbucks.  I don’t love, however, paying over 2 bucks a pop for a slice.  I mean, really?  I truly love lemon and this looked so easy, I figured what did I have to lose anyway?  Nothing.  So I went for it.  I am so very glad I did.  There is nothing white chocolate to it and this loaf tastes so close to Starbucks’ lemon loaf that it is uncanny.  Taking the risk (though with this the risk was small) was well worth it.  Don’t you love when things work out that way?  I renamed it luscious lemon loaf because even though there is white chocolate pudding mix, you cannot taste it.  This is just pure lemon delight.  And the glaze that you pour over it is simply fantabulous.  This recipe truly could not be easier and makes two loaves.  So, theoretically you can keep one and give one away.  Good luck with that.  This stuff is so good, you might consider hiding both loaves under your shirt and running like the wind.  And keeping it all for yourself.  If your family does not beat you to the punch.  It is that good.  You can see the original recipe here http://liluna.com/white-chocolate-lemon-bread.  I made it just like the recipe suggested this time, but next time I will replace the oil with applesauce and the sour cream with Greek yogurt.  I do the applesauce thing in most of my muffin recipes and it works great.  We get a little fruit boost and I can enjoy a slice or um…two…with less guilt.

Luscious Lemon 

Stuff you need~

1 box of lemon cake mix (I used Duncan Hines)

2 small boxes instant white chocolate pudding mix

4 eggs

1/8 cup fresh squeezed lemon juice (about 2 Tablespoons)

1/4 cup of oil

1 cup sour cream

zest of one lemon

For the glaze:  Mix 1  1/2 cups powdered sugar, juice and zest from one lemon.  Add more lemon juice if it was too thick. I used a big lemon and had plenty.

What to do with the stuff~

Mix cake mix, pudding mix, oil and eggs in a bowl with a beater (or your standing mixer) until well combined.  Now, add sour cream, lemon juice and lemon zest.  Use a spoon to mix at this point.  Pour batter into 2 greased loaf pans.  I used a regular size loaf pan and then a pan with 4 little mini loaves.  They were the cutest little things!!

Bake at 350 degrees for 40-45 minutes.  If you go the mini loaf route, bake for about 15 minutes.  Let them cool completely.  I removed mine from the loaf pans at this point and set them on a baking sheet or plate.  Now, poke holes in the loaves and drizzle the glaze all over them.  Get ready to curse me and thank me all at once.  You will want to do both.  It’s ok.  I still love ya.  Image

Big ole zested lemon 

Image


awww…look at those little darlings…so tiny and cute.  I could just eat em up.  he he 

Image


Sweet tart lemony glaze…so pretty

Image

Homemade dinky doozies

20140314-191515.jpg

All you need to make this yummy copycat recipe.

My oldest son LOVES cookies. Chocolate chip cookies. He loves cookie cakes. Specifically cookie cakes from Great American Cookie Company. He loves anything from there actually. So, we were pondering the other day how to make dinky doozies (he calls them double doozies…I am not sure why I think it is dinky doozies…were they called this back in the 80’s?) Anyhow, today I figured I would see if I could create these wonders at home. Cookie dough? Check. Vanilla icing? Check. What’s that you say? Did I make this stuff homemade ? Negative ghostwriter. Not when the good folks at Duncan Hines and Pillsbury do it so well! I wanted to see if I could whip these up and I think I did pretty good. No. They are not exact replicas, but they are very good. And I didn’t break the bank to make them. In fact, I did not even have to go to the store. I had the stuff at home.
This could not be more simple. So just get the stuff and make up a batch of dinky doozies/double doozies and get ready for the sugar rush.

Homemade Dinky Doozies

Makes about 6 dinky doozies

Stuff you need~

1 roll of chocolate chip cookie cough (I used Pillsbury)
1 container of vanilla buttercream icing

What to do with the stuff~

Preheat oven to 350 degrees. Line your cookie sheet with a silicone baking mat (these things are awesome and I highly suggest getting one or two if you bake). Using a medium cookie scoop (or spoon), fill a scoop with dough and place each scoop about 2 inches apart on the baking sheet. One regular sized roll of dough got me about 12 cookies. (Considering I may have had a bite or two….er…I mean Toby the dog did it). Bake for about 10-12 minutes. Really, use your judgement and how soft your family likes their cookies. We are soft cookie people here. But not too soft as you want the icing to have a substantial base.
Now, once cookies are done, set then aside to cool. You want them Cool because you want the icing to stay the right consistency rather than melt. Make sense? Ok. Once they are cool, turn the cookies over so that the flat side is facing up. Now, just spread some icing over the flat side of the cookie. Like you are making a sandwich and spreading icing on it. Lol. Like so…

20140314-191435.jpg
Now, take another cookie and put the flat side up against the other side of the icing. So icing should only be touching the flat sides. It is icing sandwiched between two cookies. Yeah, that’s right. Pure evil. Cue evil laughter. Muahahahahahah!

20140314-192110.jpg
No words. Other than get a glass of milk and go!

Carmelitas and lovely simplicity

My friend Barb introduced to me to caramelitas a while back.  I have been meaning to make a batch but ya know…life and other recipes kept getting in the way.  Yesterday I decided it was time.  Mission accomplished and these babies turned out just right. Sometimes, I find that if I make it my mission to accomplish the simple tasks without getting all fussy and over complicating things, life is so sweet.  And simple.  Along the same lines…I love to take pictures.  I have a really nice camera that Big Daddy won for me through the company he works for…the wonderful Farm Bureau Insurance…and I love to take pictures of my kids. I get that baby out and click away.  When I remember to bring it along.  I don’t keep it in the car at all times and sometimes I miss some great moments….or I would if I didn’t have my phone.  Many of the pics I take for my blog are taken on my phone.  I have some terrific picture editing apps and I am working on getting better at using them.  My phone allows me to take those every day shots that you cannot plan for.  You know…we call that life.  I started following a page on facebook called Click it up a notch.  I love her.  Them?  Anyway, she has some awesome photography tips for amateurs like me.  She initiated a #28lovelydays challenge on Instagram and I am loving it!  It challenges me to find the lovely in everyday.  And everyday life is quite lovely.  So much of what we do everyday can be lovely.  Beautiful. We just have to recognize it.  These caramelitas are the same exact way.  A bunch of fairly common ingredients blended together to make one heck of a dessert.  I am working on letting myself embrace what is already there.  Instead of searching for things out of reach, or adding to or complicating things…I am making something beautiful out of what is in front of me.  Simple can be lovely.  Bake up some carmelitas as soon as possible and tell me I’m wrong. ~AMB

Image

The view after dropping my babies off at their school…one of my #28lovelydays

Carmelitas (recipe adapted from http://www.thebakerupstairs.com)

Stuff you need~

32 caramel squares, unwrapped (I used the new fabulously ingenious caramel bits and I used a whole bag and then another cup full)

1/2 cup heavy cream

1 teaspoon sea salt , optional (I used fleur de sel which is a little thicker and more coarse than regular sea salt but sea salt is fine)

3/4 cup butter, melted (that is one and half sticks)

3/4 cup brown sugar, packed

1 cup flour

1 cup rolled oats

1 teaspoon baking soda

1 cup semi sweet chocolate chips

What to do with the stuff~

Preheat oven to 350 degrees.  Prepare an 8 x 8 inch baking dish by rubbing the bottom and sides with a stick of butter.  (not the whole stick ya’ll…just get some on the bottom and sides.  To be clear.  lol) Combine the heavy cream and caramel bits in a small saucepan over low heat.  Stir frequently until the caramels are completely melted and the mixture is completely smooth.  I stirred in the salt at this point.  Set aside (I kept the saucepan on my warming element on my stove to ensure it didn’t cool and get thick).  In a medium bowl, melt butter.  Next, stir in the brown sugar, flour, oats, and baking soda.  Press half of this mixture into your prepared baking dish.  Bake this for 10 minutes.  When you pull it out, sprinkle the chocolate chips over the baked layer.  Next, pour the warmed caramel sauce over the chocolate chips.  Finally, add dollops of the remaining butter/flour/oatmeal mixture on top of the caramel. It is hard to spread it.  I just kind of let it spread over the warm caramel naturally.  Then I flattened it as much as I could with a silicon spatula.  Pop this luscious concoction back into the oven.  Your kitchen will smell like heaven.  Let it bake for about 25 minutes.  Remove from oven and let cool completely.   Cut into squares and serve.  If you really want to be naughty (who doesn’t?) serve topped with some vanilla ice cream and a little drizzle of caramel topping.  Yeah…I said it.  I only mean if it is your birthday, your dog’s birthday, your aunt’s birthday, or if you made it through the day without cursing anyone out…only for occasions that call for a little celebrations.  I am all about celebrating small victories, ya’ll.  Or I am all about caramel sauce?  Either way.  You can address your thank you notes and notes of praise to Cajun Mama Cooks.  Just saying.

Image

Ooey, gooey, sweet, salty, chewy carmelitas….

Image

So many lovely things can be found in our days…

Watermarked Photo (56)


Our lovely fur babies…Idaho and Toby

Chocolate Pie and layers of goodness

Today I am writing about chocolate pie.  But ya’ll know me…I cannot leave it at that.  There is more to say.  So I must say it.  I have so many thoughts rattling/whirling around in my head all the time and some times I manage to corral them into some sort of cohesive statement.  Or I give it my best shot anyway.  Lately, I have become very conscious of the pressure on our social media networks to  be the best parent ever in the whole world.  The parent who does enough, but not too much.  The parent who knows the right thing to say, always.  The parent who is calm, rational, soft spoken yet firm, attentive always…you know what I mean…titles that get posted to our news feed like..”Awesome…you just broke your child” or “hands free mama…how to be one?”  or “enjoying the moments because you are lucky dammit to have these kids”.  Now, I am not saying that this is unnecessary, but I am saying I feel it is a bit too much.  It is getting nauseating.  I find myself reluctant to click and read the post because since I am not the perfect parent, I might see proof of this in what must be the Bible of parenting.  Now, I believe in good doses of self awareness from time to time.  There is always room to step up our game.  As parents, teachers, office administrators, doctors, grocery store clerks…whatever your vocation, nothing wrong with doing your best.  These little blurbs that bombard my news feed are about doing the impossible.  Being the perfect parent.  Sure, there is room for us to put the iphone down and be in the moment more.  There is room for us to yell less and use our calm voices more.  But as a mom of 4 kids, some days that is more feasible than others.  Most of these theories only work if you parent in a bubble.  And your child is perfect.  And you are starring in a sitcom where conversations are scripted.  And it will all work out nicely in 30 minutes.  That, my friends, is not life.  That is a television show.  Parenting in real life is like a comedy mixed with a horror movie with just a little fantasy thrown in.  Parenting has many faces.  Childhood has many faces.  Some of them are picture perfect and others are hide that picture ugly.  Some moments, days, nights, weeks are easier than others.    It is not all homogeneous, it has layers.  Kind of like this pie.  To dissect this chocolate pie and look at it layer by layer, would be unfair.  Because it takes all the layers to make this luscious chocolate pie the delicious delight (say that 3 times fast!!!) that it is.  Same thing with being a parent or child.  No parent is all good or all bad.  No child is either.  And sometimes the good parent and good child come together to make a lovely parenting moment.  I love those.  But on the flip side, sometimes, more than any of us care to admit, the less than good parent and less than good child come together to make one hot mess.  Or one rough morning.  Or evening.  I do not love those.  You cannot look at those moments as making up the whole of the parent or child.  You have to look at the entire pie.  ALLLLL the layers, ya’ll.  That is where the goodness is.  That is where it all comes together.  Lately, my youngest has been giving me fits.  I will admit it.  He is 5 and his own person.  I am working on adjusting my parenting style to suit who he is as a person.  But heaven help me, I am having to pray my way through it.  We have had some less than stellar moments lately.  Some of which I am not proud of.  But I know that this is not all there is to it.  He is a wonderful, scrumptious, precious little boy.  With one heck of a wild streak.  And I am a loving, devoted, involved mommy…who is just feeling a little overwhelmed lately.  That does not make me good or bad.  That does not make him good or bad.  We are probably somewhere in between.  But the love is there.  Not every moment can be whipped cream on top perfect.  And that, sweet friends, is just the way it is.  This does not make the pie any less sweet or delicious.  Thanks for hearing me out.  I really want to share the pie recipe with you, but I also wanted to say let’s be real.  Stop expecting so much of ourselves as parents.  Stop reading those things that dissect our parenting and pick it apart…that is only a little bitty small part…not the whole pie.  I, for one, am working on accepting the layers of my baby boy.  His sweet tender soft side, his fierce proud side, his wild side and so on.  They all make up who my precious boy is.  And I love that. ~AMB

Image

His determined, stubborn side

Image

His wild silly side

Image

His sweet delicious side…

Chocolate Pie (from the kitchen of my friend Betsy)

Stuff You Need~

1 graham cracker pie crust or Oreo cookie pie crust (the ready made kind)

1-8 ounce tub of Cool-Whip

2 (3 ounce) boxes of  INSTANT chocolate pudding

3 ounces of semi-sweetened bakers chocolate

1/4 cup sweetened condensed milk

2 cups cold milk

What to do with the Stuff~

Melt the 3 oz. of chocolate in the microwave (in a microwave safe bowl).  When it is melted, stir in the 1/4 cup condensed milk.  Pour this into the bottom of the pie crust.

Now, in a medium size bowl, whisk together the pudding mix and the milk.  Spoon 1 1/2 cups of this mixture into the pie crust.  Now, mix 1/2  of the tub of Cool Whip with the rest of the pudding mixture.  Stir to combine.  Smooth this on top of the other layer.  Top the pie with the remainder of the Cool Whip.  Let this cool in the fridge for several hours or overnight.  Enjoy the layers of lusciousness, my friends.  And a shout to my good friend Betsy B. for this wonderful recipe she got from her cousin’s wife, Mandy!! Gotta love how good recipes get around!!

Image

Layer number one..

Image

Layer number 2…we are getting there…gotta love some  layers…

Image

It all comes together nicely doesn’t it?  YUMMMMM

Image

Only 1 layer would be so boring!!!  

Watermarked Photo (53)


Me and my sweet, rough, wild, loving little boy…this sums it up.  lol!