Cheddar Cheese Grits Casserole and (im)perfect moments

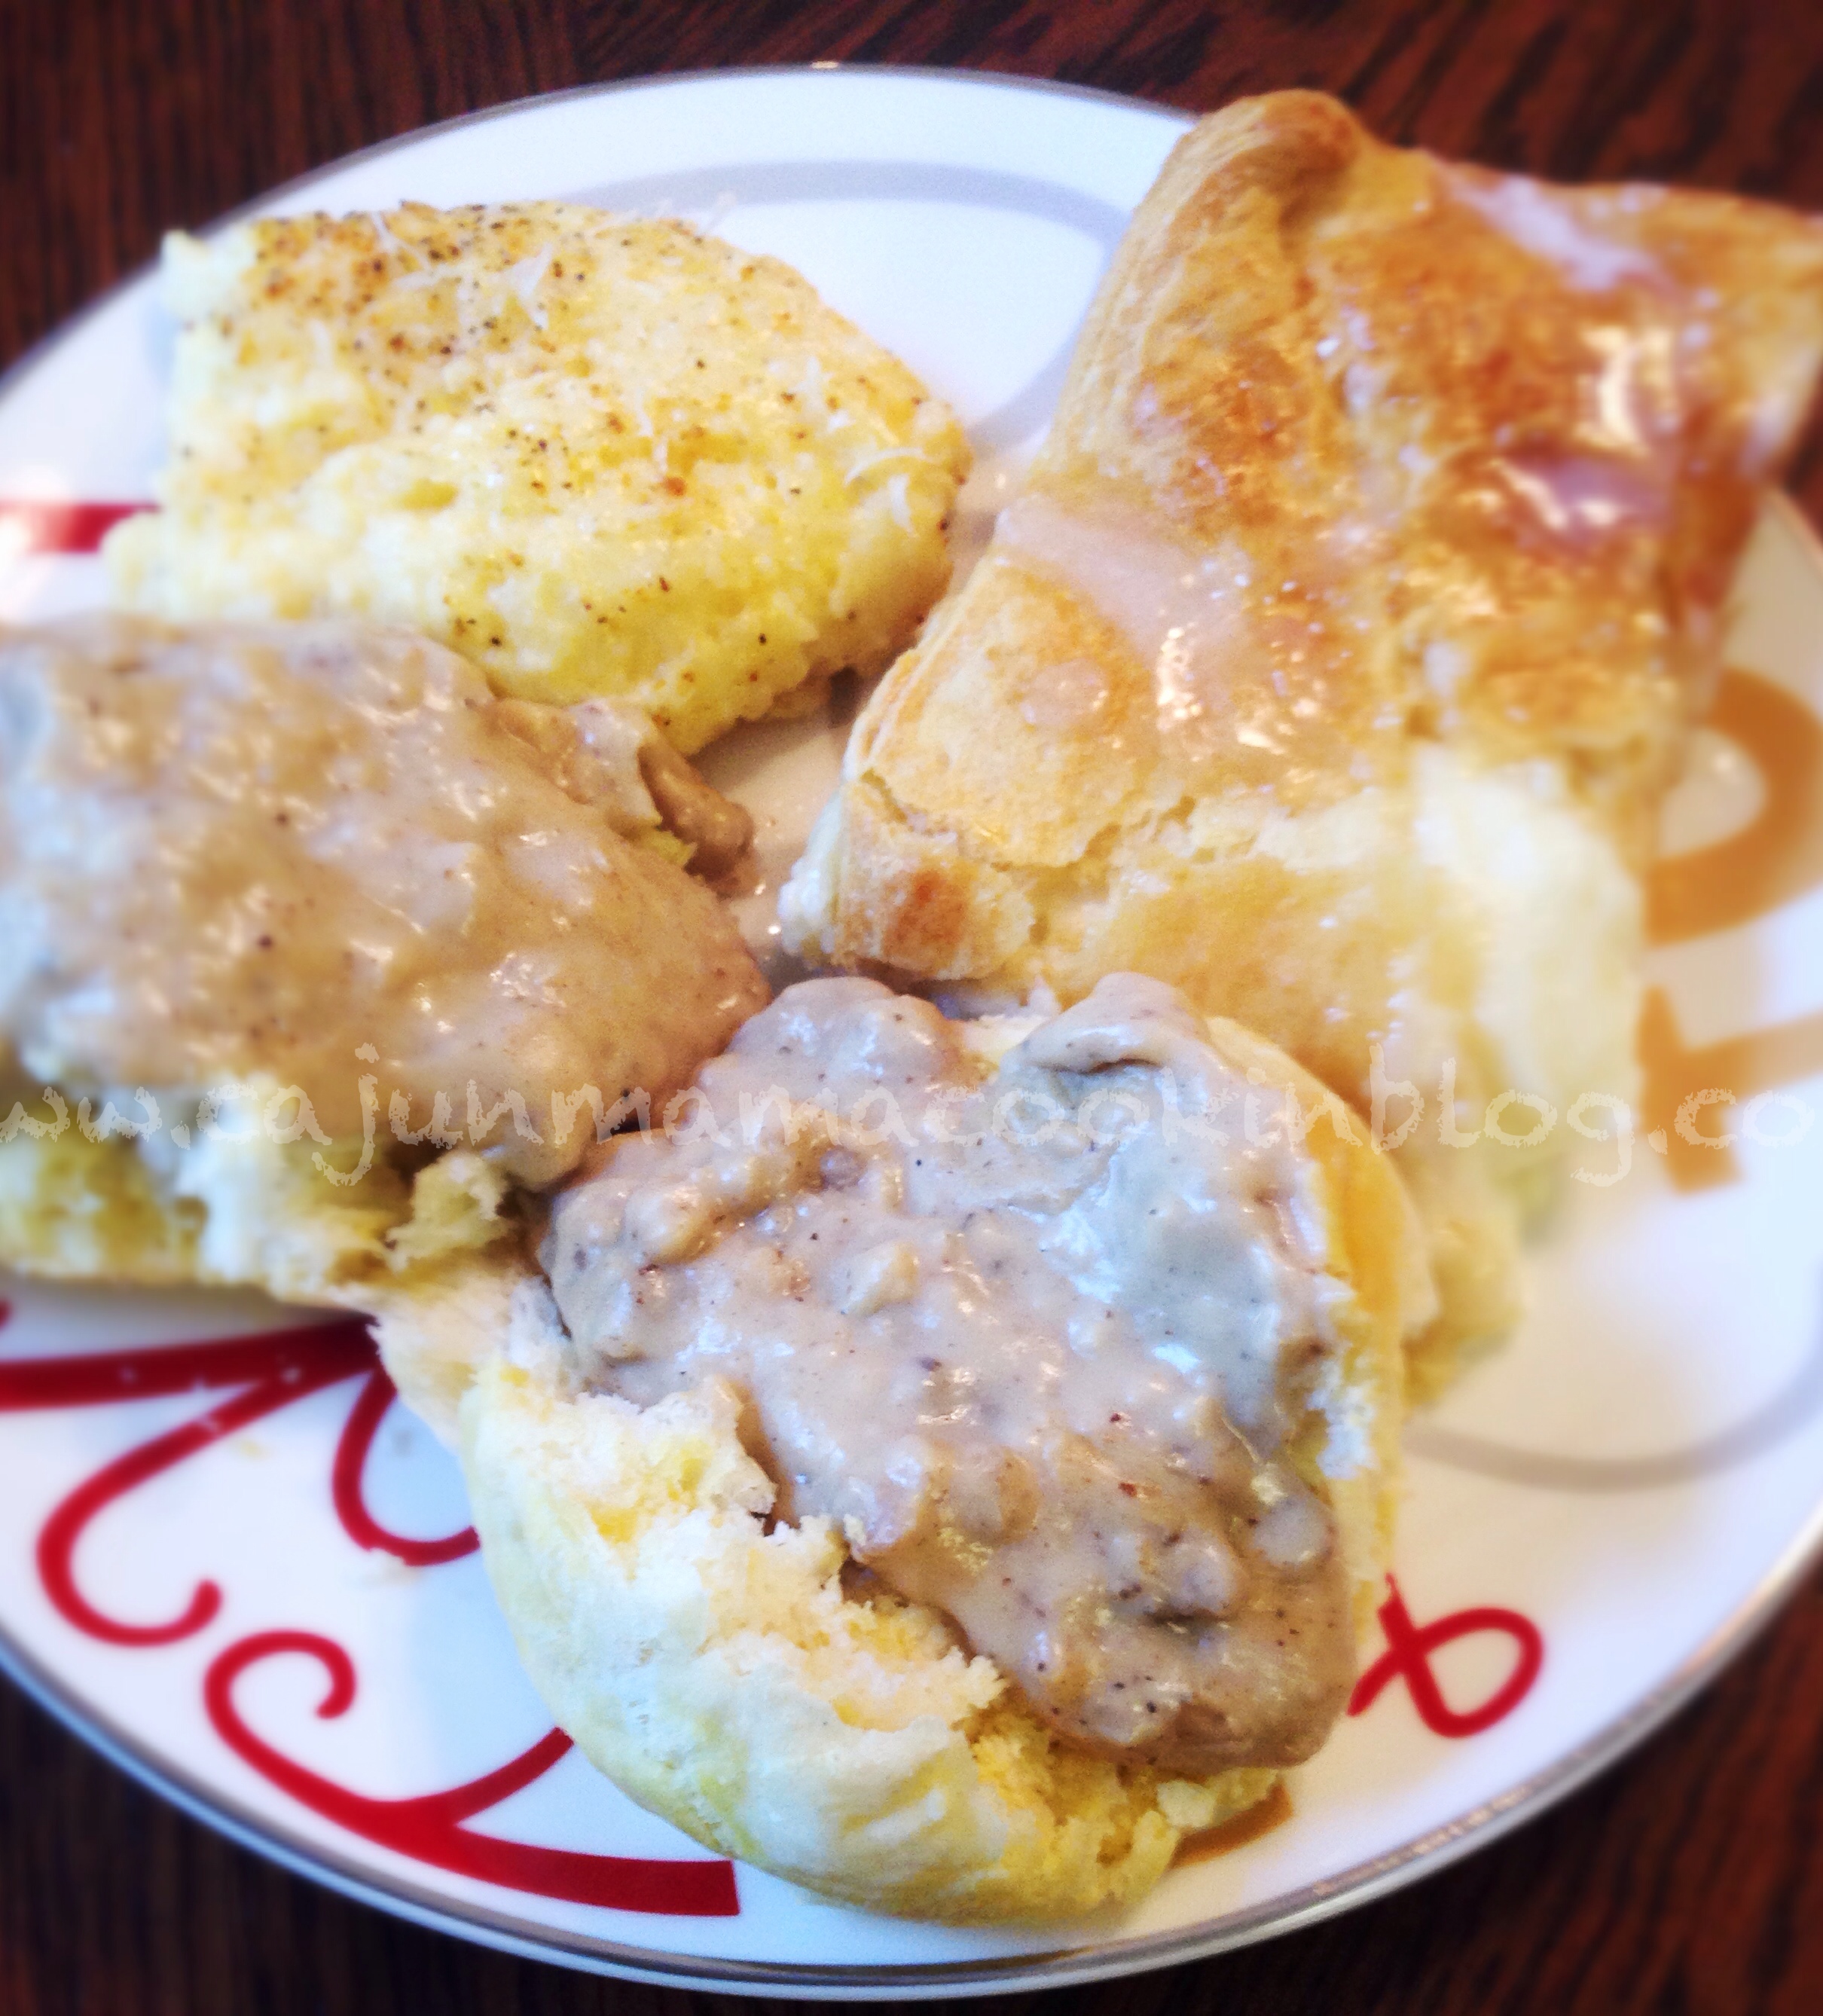
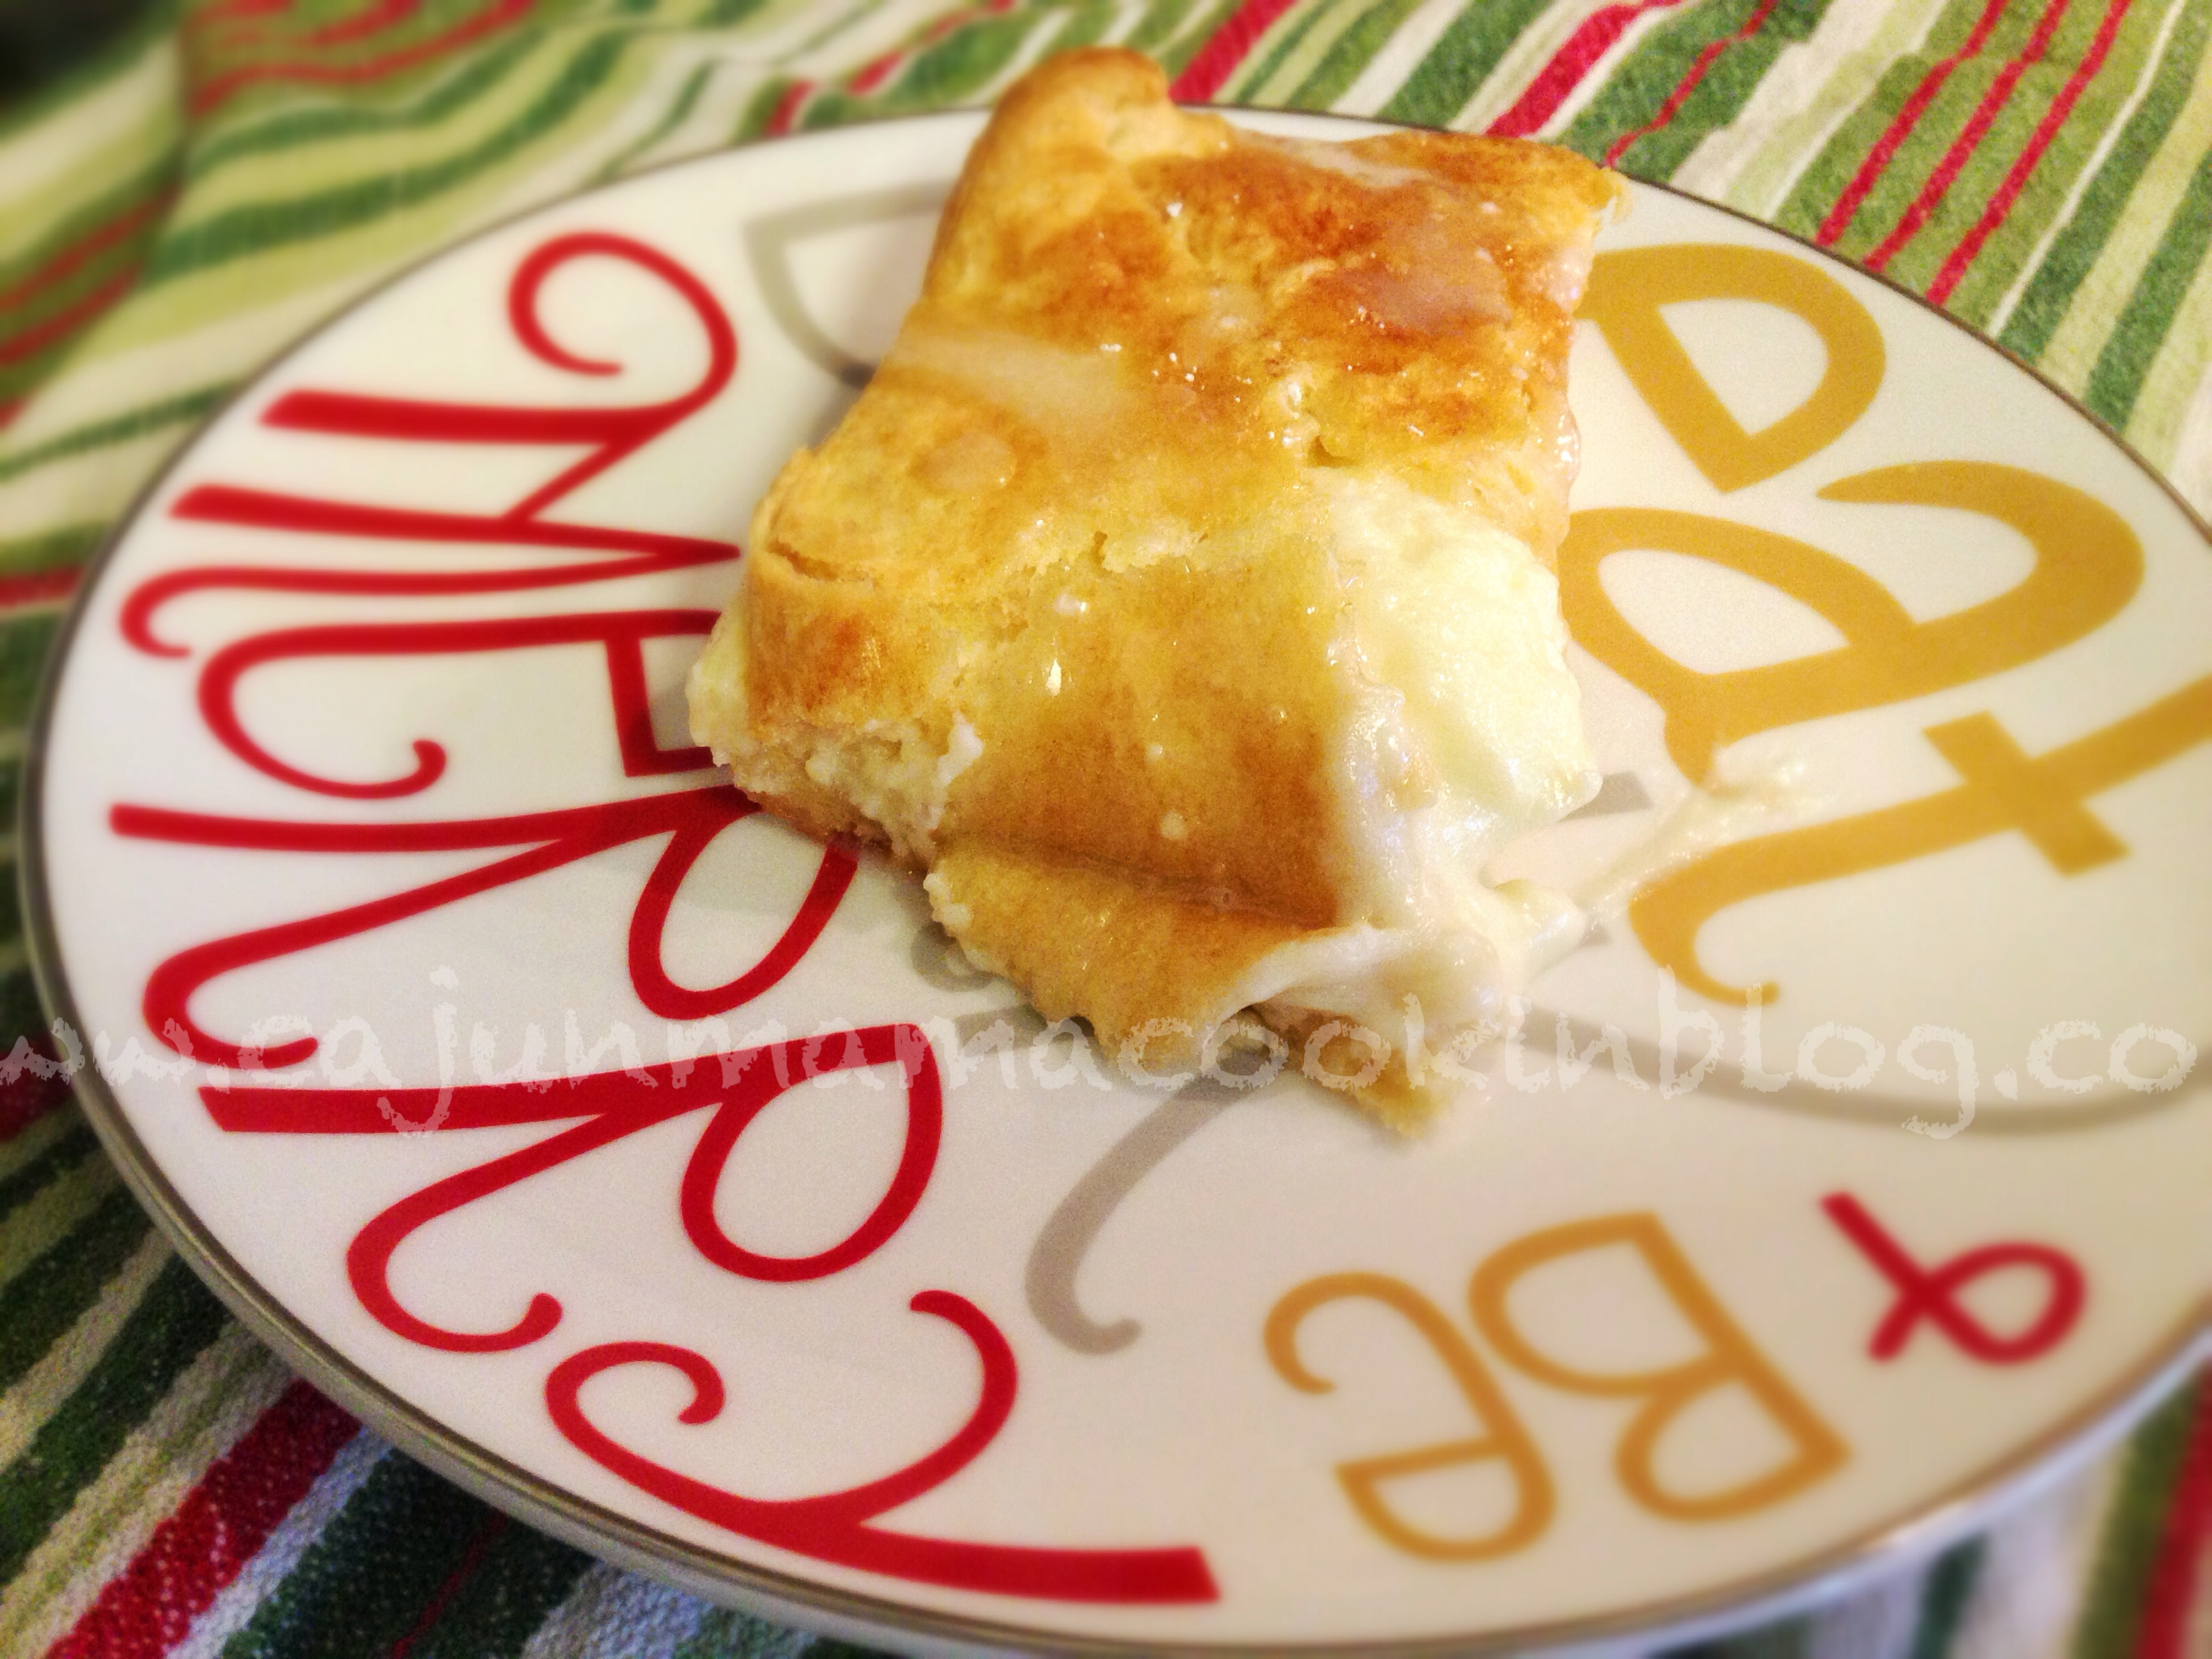
Grits.  You either love them or you hate them.  There is typically no in between ground there.  No gray area where someone is a little iffy and be swayed one way or another.  I am definitely a grits lover.  I like them with a good bit of salt, pepper and a ridiculous amount of butter.  This year I discovered something surprising…grits are so delicious with garlic and cheese in them.  I mean really, really delicious. Creamy, cheesy with just a hint of garlic to them.  Topped with more cheese…they are a wonderful accompaniment to any brunch.  I told ya’ll this week I was doing “blog about brunch”…I will say again…I am a fool for some brunch.  This grits casserole can find a home on any brunch table.  I have so many brunch recipes that I am not sure I could share them all with you over the course of a week or two…but I will round up some of my faves.  The other day I gave ya’ll the breakfast danish casserole.  Score one for Cajun Mama cause that baby is a winner.   Anyway, this is another excellent addition to your brunch recipe repertoire (say THAT 3 times fast!).

Like anyone, I tend to reflect as one year comes to a close and we usher in another.  I guess the time for reflection and taking stock comes for all of us at this time.  I hate to put too much emphasis on these days because for some it is such a hard time to get around and most of us are ready to move on to another year.  I don’t know what kind of year it has been for many of you.  For me, it has been good and fast paced but also has brought many things to light.  Some good and happy.  Others not so much.  But I do know this..and I hope you do too…I am where I am for a reason.  It is part of my path.  Just like finding these cheesy garlic grits are part of my destiny (I am not kidding…they are that good!), so is whatever you are doing or where you are at this moment.  I will not get all deep because I know ya’ll probably don’t get on here to listen to my insights about life..also because we have some family coming in for New Years Eve.  I have cooking to do.  Shocking…I know.   I will only say this…my in laws came in the other day to celebrate our Christmas.  They wanted to take pictures in front of the tree.  I took some of them and the kids.  They wanted me to get in there.  I had no makeup on.  My hair was not really fixed.  I didn’t know how my outfit would look.  I don’t consider myself a vain woman, but I am a woman.  Taking an ugly picture is not really ever my goal.  But I decided to be grateful for the moment to take pictures with my precious family.  To BE in the moment, instead of wishing to be somewhere else or look another way.  I ended up loving the picture because it captures our joy as a family.  The fun we always (ok…well usually) have together.  Being in the moment is not easy for me.  I tend to want to jump ahead or look behind.  But the good stuff, however not perfect it may seem, for me, is usually right where I am.  Even if I cannot see it or appreciate it at that moment.  So today, I hope you can look around and see the beauty in where you are.  In this moment, or the day, or of your life.  Every moment has something to offer and teach.  Even the imperfections (and mine are so many) can be beautiful.  Anyway, enough of that.  The focus here is cheesy, garlic, yummy, creamy grits.  Make them.  You will be oh so happy you did.  Much love and many blessings to all of you.

Watermarked Photo (8)


We may not have it all together…but together we have it all (that should be our family motto)

Watermarked Photo (10)


Garlicky cheesy goodness…so perfectly Southern and perfect 

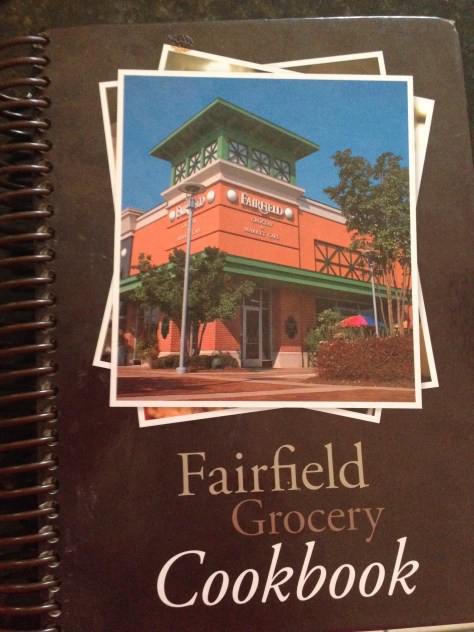
Southern Living Cheddar Cheese Grits Casserole (Southern Living magazine December 2010)

Stuff you need:

4 cups milk (I use 3 cups whole and 1 cup half and half for extra creaminess but the other way is great too)

1/4 cup butter \1 cup uncooked quick-cooking grits

1 large egg, lightly beaten

2 cups shredded sharp Cheddar cheese (that Kraft kind with Philidelphia cream cheese added is amazing in this)

1 teaspoon salt

1/2 teaspoon pepper

1/4 cup grated Parmesan cheese

2 cloves of garlic, finely chopped

What to do with the stuff:

Preheat oven to 350 degrees.  Lightly grease a 11 x 7 inch baking dish.  Bring milk just to a boil in a large saucepan over medium high heat.  Whisk in butter and grits a little bit at a time.  Reduce heat and simmer, whisking mixture constantly for 5 to 7 minutes, or until grits are cooked.  Remove from heat. Stir in lightly beaten egg followed cheddar cheese, salt and pepper.  Add in finely chopped garlic if desired at this time.  Pour into prepared dish.  Sprinkle with grated Parm.  Bake at 350 for 35 to 40 minutes or until mixture is set.  Serve immediately.  Yummmmm!!!!  The epitome of southern dishes, right on your kitchen table or brunch buffet table.  Be sure to take a nice long whiff of the garlicky aroma before digging in.  I also sprinkle some Tony’s on it before serving.  Adds just a hint of spice and a nice kick of color.

Advertisement

Carol Lynn’s Breakfast Casserole (the best EVA)

So I have already told ya’ll about my precious babysitters and their mama.  They are friends whom we have chosen as family.  Or they chose us.  Either way.  It was destined to be and I am awful glad.  When I was pregnant with baby #4 aka LMB, hot mess, the wild one, those sweet then 14 year old girls decided they wanted to throw me a baby shower to welcome baby Lucas.  It was very unexpected as he was my 4th child in a less than 5 year period and let’s face it…the bloom was off the rose.  Of course, it was very small and only close friends and family were invited.  It was more of a show of support and excitement  than a way to get gifts.  I just don’t want to start one of those debates about whether it is en vogue or appropriate to have a baby shower for subsequent children.  I am not weighing in either way…I will only say that every baby should feel as loved and welcomed as every single one of mine has.  It was not a huge shower it was more of a sprinkle and I felt so very loved and blessed.  Still do every time I look back on these memories.   All I know is that at the time, as I have told ya’ll before, I was not all that comfortable with being the lady with 4 kids back to back.  I was overjoyed to be having my little caboose and after a few miscarriages before and in between, I knew I had been blessed beyond belief, but still…I felt somewhat like a two headed circus freak.  I am completely comfortable now and wear it like a badge of honor, but then, with 3 kids 4 and under and another on the way, on that day, I felt like a queen.  I felt treasured and honored and loved.  So, I guess regardless of whether or not a shower for my 4th baby was en vogue or not…feeling the way I felt that day, was worth any faux paus.  You gotta know when hold them and know when to fold them.  I look back and smile, knowing that those girls and their mama were willing to buck tradition to celebrate me, my baby and ultimately the blessing of my (not so little) family.  Love you girls.

None the less, those girls and their mama planned the sprinkle to a hilt and the food was to die for.  It was my favorite meal…brunch…with cake…yum!!!  My friend and their mama, whom from here on I will refer to as Fairy Godmother, is an amazing cook and has inspired me to try new recipes and branch out, made some of her treasured recipes.  One of them was the best breakfast casserole…Carol Lynn’s Breakfast Casserole.  She got it from a friend (Carol Lynn) and it is oh so easy and oh so good.  I will be making this tomorrow morning for New Years Day breakfast.  It is something you put together the night before and then let it chill in the fridge until morning.  Then you get up and preheat the oven and pop it in.  A little later, out comes a warm and bubbly breakfast casserole.  Sounds fab, right?  Oh it is my friends.  It is.  My fairy godmother is fond of saying “that’s the stuff” or “it’s good stuff” when she really likes something…this stuff is “the stuff”.  So you still have time to get the ingredients if you are so inclined and you might even have most in the fridge already.  I hope you enjoy it when you do make it.

Happy New Year to all my Cajun Mama friends out there.  So glad that you are with me as we go into 2014.  It will be a great year full of new recipes, tried and true recipes, and fun stories.  I hope as we usher in 2014 you feel blessed, treasured and loved.  Knowing you are out there is a blessing to me and you make me look forward to the new year. ~AMB

Watermarked Photo (7)

Brunch with cake…my favorite…

Blessings abound…the precious cake at my LMB’s baby sprinkle 

Carol Lynn’s Breakfast Casserole

Stuff you need:

3 cups Pepperidge Farm herbed stuffing

1 1/2 lb. bulk breakfast sausage (I use Jimmy Dean mild), drained and crumbled

3 cups milk

2 cups shredded cheese (I use a blend of cheddar and colby jack usually)

6 eggs

1 can cream of mushroom soup

What to do with the stuff:

Prepare your 9 X 13 casserole dish by spraying it with cooking spray.  Layer stuffing, shredded cheese and sausage (in that order).  Beat eggs with 2 1/2 cups of the milk until frothy and pour over the casserole.  Cover and refrigerate overnight.  The next morning, whisk together the cream of mushroom soup with remaining 1/2 cup of milk.  Pour this over the casserole and bake 40 to 50 minutes or until firm.

Watermarked Photo (11)


Looks good, doesn’t it?  

Breakfast Danish Casserole

I love brunch. I am not sure if I have ever shared that little tidbit with ya’ll…but I do.  It is just such a convenient meal.  It is so versatile.  It can be as big and fancy of an ordeal as you want, but it can be laid back and relaxed if you choose.  You can have such a variety of foods when you plan a brunch too.  It is a culmination of all things good.  It’s an ANYTHING goes meal for the most part.  Who doesn’t love that?  The part I enjoy the most about it is that I can have a cup of coffee or two before I have to get cracking.  That makes for a much happier household and Cajun Mama likes happy.  Now, when you factor in that brunch makes it perfectly acceptable to drink at 10 in the morning, that just pushes brunch to the top of my list.  Mimosas, Bloody Marys, and coffee with Bailey’s in it.  I mean….what is not to love?  Over the next few days, I will be sharing my favorite brunch recipes.  I have some yummy, super easy ones and some that are a little bit more involved but totally worth it.  We can call it Blog About Brunch Week!!  Extra, extra bloggin about brunch, ya’ll!!!  Hope you will come back for some more scrumptious brunch recipes.

I am sure it would not tax anyone’s imagination to find out that I have an entire Pinterest board (or two..) dedicated to brunch foods.  So, when I ran across this Breakfast Danish casserole, it was an absolute shoe in for me to try ASAP.  I made it once a few months ago and it was a hit across the board.  Perfect with coffee and a definite kid friendly dish.  It is like dessert..at breakfast!  This is so easy to prepare, I can do it after only one cup of coffee.  That is pretty easy…let me tell you!  I had been pondering what to make for our Christmas morning breakfast.  I wanted to do  a brunch so that it would give us a chance to let the kids open their gifts and give us something more substantial than cinnamon rolls from the can.  Don’t get me wrong, we LOVE cinnamon rolls from the can…just wanted to do something more special for Christmas morning.  Big Daddy asked me to make biscuits and sausage gravy, so I knew we would have that and I LOVE grits and I have an excellent recipe for a cheesy garlic grits casserole (hint hint at my next post)…but I wanted something sweet to round it out.  Yes, I could have chosen fruit and we usually put that in there, but it is Christmas morning and I felt like breaking a few rules.  Being naughty after being nice for so long.  LOL!!  Plus, I didn’t have any fruit and there was no way in the world I was fighting the lines at Brookshires or Kroger to buy fruit.  So, breakfast danish casserole it is!!!  This was an EXCELLENT brunch menu.  With some fruit to add some color and nutrition to it, it would have been perfect!  It was pretty much a cinch to make and everyone was happy and full.

Image

Scrumptious I tell ya’ll…mmmm

Breakfast Danish Casserole (adapted from Key Ingredient http://www.keyingredient.com/recipes)

Stuff you need:

2 8-ounce packages cream cheese, softened

2 cans refrigerated crescent rolls (like Pillsbury)

1 cup sugar

1 teaspoon vanilla extract (My mother in law turned me on to Butter Nut Vanilla Extract…excellent in this recipe)

1 egg

1 egg white

1 cup of powdered sugar

milk

dash of vanilla

What to Do with the Stuff:

Preheat oven to 350 degrees.  Prepare a 9 x 13 dish by spraying it with a light coating of cooking spray.  Lay out one tube of crescent roll dough (don’t separate) in one long piece on the bottom of prepared dish.  Pinch together any separated pieces or use your pastry roller.  In your standing mixer, cream together cream cheese, sugar, egg, and vanilla until smooth.  Spread the mixture  evenly over the layer of crescent roll dough.  Lay second tube of crescent roll dough over the cream cheese mixture.  Brush the top with the egg white to ensure a nice golden brown top crust.  Pop this into the oven at bake for 35-40 minutes until the top is golden brown.

While the casserole is baking, make up your glaze.  It couldn’t be easier.  Dump powdered sugar into a small mixing bowl.  Add a little milk at a time, whisking after each pour of milk.  Add milk gradually until you have a mixture that is a little more runny than a paste.  You want it to pour but not be super runny.  Not as thick as peanut butter, but not as thin as syrup.  Does that make sense?  Probably more like molasses.  Whisk in a splash of vanilla.  When danish casserole is out of the oven, let it cool for about 15 minutes.  Pour the glaze over the semi cooled casserole.  Cut into squares and serve.  This will stand alone with a cup of coffee or a glass of ice cold milk.  You will love it.  I promise.

Image

As my Daddy says, “plum larapin”

Pioneer Woman’s Sunday Night Stew aka Perfection in a pot

Me oh my.  Growing up, my mom loved to make Mulligan Stew.  I truly detested that stuff.  Not sure why…it just didn’t flip my switch I guess.  As a result, I rejected stew for many years.  Of course, as we grow up, thankfully our tastes change and we expand our palette.  Now, before you read the ingredients list for this recipe, let me go on ahead and tell you…this recipe calls for turnips.  Go on…ewww…gag…gross…I don’t eat those.  Trust Cajun Mama, you will eat them in this stew.  Unless you are allergic to them…then I don’t know what to tell you.  They give this stew a sweet flavor that is unlike any other and this stew is absolutely perfect.  I promise.  Big Daddy loves him some turnips.  Remember he is country as all get out.  His theory is…”if there are turnips in it, I know I am gonna like it”.  He LOVES turnips.  He wants to grow turnips in his garden.  So, when I came across this recipe, I figured I would give it a try, knowing he would love it.  Oh he loved it alright.  And so did I.  It is one of my favorite dishes to make during the winter.  I really hope you won’t let your dislike of turnips turn you away.  It is almost like they are potatoes in this recipe.  So flipping good.

Image

Perfection in a pot I tell you.

Pioneer Woman’s Sunday Night Stew

Ingredients

3 tablespoons olive oil

1 tablespoon real butter

2 pounds stew meat or a 2 pound chuck roast cut into chunks

1 medium onion, diced

2 turnips, peeled and diced

3 cloves of garlic, minced

4 carrots, peeled and sliced

4 cups of beef stock or beef broth

a few dashes of Worcestershire

4 oz. of tomato paste

1/2 teaspoon sugar

chopped parsley, optional

Directions:

Salt and pepper your stew meat.  Heat olive oil in a dutch oven or heavy pot over medium high heat.  Add your pat of butter and let it melt.  When it is melted, put add half of your stew meat to the pot.  Brown it until the outside get nice and brown or about 2 minutes or so.  Make sure you stir it to turn as it browns.  Once it is nicely browned, remove it from the pot with a slotted spoon and  put  it on a plate. Do the same thing with the other half.  Remove from the pot and set aside.  Now, add the onion and garlic to the pot.  Stir to coat in all the brown bits in the bottom of the pot…my daddy calls that the gremille.  Cook for about 2 minutes, then stir in the tomato paste.  Stirring constantly, let this cook for another 2 minutes or so.

Pour in your beef stock, stirring constantly.  Add a few dashes or splashes of Worcestershire and sprinkle in the sugar.  Give it a nice stir to let all the flavors combine.  Now, add the beef back to the pot.  Cover and reduce the heat to low.  Simmer for 1 1/2 to 2 hours.  After the time is up,stir in the diced carrots and turnips to the simmering stew.  Let this simmer for about 30 more minutes.  The sauce will be rather thick, but if you think it is too thick, you can add a little more broth or stock until it is thin enough for your liking.  Once the turnips and carrots are fork tender, you can add some parsley if you like.  I do this once I serve the stew in bowls.  My kids tend to ask “Ewww what is that green stuff?!!” and the inspections begin.  So I try to not raise any red flags early on.  Sigh.  Anyway, ladle some of this absolute utter deliciousness into bowls over mashed potatoes (how I like it) or cooked rice (how Big Daddy likes it…yes, we are a couple divided…again…sigh).  If you make up a pan of cornbread, you will be golden and loved forever.  You will be hailed as queen of your castle and you will get a crown.  Oh wait, no, that was a dream I had.  Never the less, this is a WONDERFUL meal, especially on a cold windy and rainy day.  Hope you love this recipe as much as we do in Cajun Mama’s kitchen.  Cest bon ma chere!!  Joyeaux Noel!  Thank you for being a part of this journey so far.  You are a blessing to me!!!

Oreo Balls

Ok now some people call these Oreo Truffles.  I admit that does sound fancier.  But when my sister, Jenny, offered me one for the very first time, she called them Oreo Balls.  So it stuck.  My kids ask for them by name…Oreo balls.  And so it is.  These things are so tasty and a wonderful addition to any dessert buffet.  Perfect party treat.  They can be easily packaged into cute gifts.  Teacher appreciation gifts?  Put them in a clear treat bag, make a tag that says “It’s been a ball being in your class!!” , punch a whole in the corner and tie it to your treat bag with some colorful twine.  It’s in the bag…literally!!  They are superb treats for your neighbors, especially if you are into ding dong ditching.  You can use vanilla candy quick and put the food coloring of your choice in and voila…yummy, edible party favors that go with your color scheme.  I could go on but I know ya’ll want me to get on with it already and so I will.  You can use vanilla candy Quik, white chocolate chips, chocolate candy quick or semi sweet or milk chocolate chips.  I am working on a mint variation right now.  Mint oreos with those limited edition Nestle mint chocolate chips.  I will let ya’ll know.  You really truly can do almost anything with this recipe.  Make it your own!!  Now that the lovely people at Nabisco are offering so many different varieties of Oreos, the options are nearly endless.

Oreo Balls

Ingredients

1 8 ounce package cream cheese, softened

1 package Oreos, crushed

1 package candy quik or 1 package chocolate chips

Directions

Now, I use my food processor to crush my Oreos.  You want them to be ground until they are almost like sand and the food processor works perfectly.  I get that not everyone has a food processor or wants to get it out for this task, so you can also put them in a gallon size Ziploc bag and take a rolling pin to them.  This also works great for getting rid of some pent up aggression.  Unless you don’t have any…if that is the case, you can bring them to me and I will crush them for you.  I have plenty of pent up aggression…kind of makes me wonder why I missed the opportunity to smash cookies with a rolling pin?  Hmmm…need to consider this next time.  Anyway, once this is done put your cookies crumb sand into your standing mixer bowl or a regular mixing bowl along with the softened block of cream cheese.  Mix away until it is well combined.

Watermarked Photo (1)

This is how your mixture of cream cheese and cookie crumbs should look

Now, you are going to make them into uniform balls.  I just take a spoon and scoop some up and roll it into a ball.  Line a cookie sheet with parchment paper and place your balls on parchment paper a few inches apart.  Now, melt your candy quik according to package directions or put your chocolate chips in a microwave safe bowl and microwave for 30 seconds at a time, stirring in between each round until they are melted.  Taking one ball at a time, roll in the melted candy quik or chocolate chips.  I will tell you, this can get messy.  Place each dipped ball back on parchment paper once you are done until each ball is covered.  If you want, you can put some sprinkles or mini chocolate chips on some or all of the balls.  It gives them a little added texture and makes them look especially festive.  My kids like them plain, so I usually do half and half.  Put them in the fridge over night or for several hours at least, to cool.  Get ready to make more because they will disappear quickly.  Big Daddy says these are “tasty” and he is not usually a dessert person.

Watermarked Photo

Oh luscious Oreo balls…how I love thee…

Watermarked Photo (4)

The plan was to have some left for the man in red…yeah…there is one left.  Onto plan B.

Fairfield Grocery Chicken salad and Blooming where you are planted

Blooming where you are planted.  That is easier said than done.  When I moved to Shreveport and got married after I graduated from my Master’s program, I got a job.  I met some wonderful ladies, many of whom I still treasure a close relationship with many years later.  It wasn’t hard to make friends because I went to work everyday and I had lots of adult conversation.  The real test of blooming where I was planted came after I had a few kids.  I was a new mom with a 10 month old and pregnant with baby number 2 and we lived in the country with very few houses anywhere near us.  A precious lady we called Mama Kate lived next door to us and she took me under her wing.  Her granddaughter in law and I had babies a few months apart and we became friends.  It was very nice and I look back on those times with so much fondness.  Still though, something was missing.  After baby number 2, now referred to as Kayla Ann, came along, my feelings of wanting something more (not instead mind you because that is not how I roll.  I don’t replace, I just add on) grew.  We bought our first house in Shreveport in the middle of a great little neighborhood.  I would push Ben and Kayla in the double stroller through that neighborhood several times a day.  I was lonely and longed for adult interaction.  I met a few ladies on the street and of course we ended up getting to know one another.  Days became weeks and weeks turned into months, time passed as it tends to do and I had baby number 3.  Aka Madame Toot aka Aubrey Dianne.  So now I was the woman with 3 kids, 3 and under.  I was tired.  I was overwhelmed.  I was still lonely.  Now a few posts ago, I told ya’ll about my precious baby sitters and their mom.  Those relationships are a product of me walking up and down our street, getting to know the neighbors.  Their grandmother lived on that street and she encouraged them to come down and offer to babysit.  For that, I will always be grateful.  That small gesture changed my life.  Well…after we had a good stride going and I felt like I was handling 3 babies…Madame Toot turned one and I had stopped nursing her and felt like I could leave her more.  So Big Daddy and I went out to dinner and had a few drinks.  Well…a few weeks later we found out that we were expecting baby number 4!  Wow!  My mind was blown.  Say what?  I was going to have 4 kids under 4?!  Holy cow?!  How would I do that?  I wasn’t prepared for such a feat, as happy as I was with the news.  But my sister Lisa would remind me, God does not called the equipped..he equips the called.  And he did.  So here comes baby number 4…my precious Lucas Mayeux.  My little caboose.  I was overjoyed.  I had my sitters and their mom and a few other friends…but now I was the mom with 4 kids.  4 and under.  I felt like a 2 headed circus freak everywhere I went.  I was, to say the least, overwhelmed.  My oldest started kindergarten at our wonderful gem of a neighborhood school and the girls were in MDO at a local church.  One day, in early December, things started to change.  I met a fellow circus freak named Alexis who I refer to as Lexie B…she had 4 kids too (she has 6 now ya’ll!)  And I got to know other moms with several kids and we banded together like a pack of circus freaks and started to have girls’ nights.  Collectively we had close to 30 kids.  This bonding with fellow mommies of a bunch of kids did something for me.  I felt my roots starting to get comfortable in the soil I was in.  Maybe just maybe, the transplant shock was wearing off and my roots were growing.  Again, time passed.  Because of my friends, my awesome mommy friends who understood me and helped me see the beauty and humor in all of the chaos and liked me just as I was, I felt less isolated.  I began to find my footing as a mommy of 4.  There was no shame…it was pretty dang great come to think of it.  I was made for this life.  It only got better from there.  Sometimes when we can’t see ourselves in an accurate light and when we see ourselves through the eyes of our friends who love us and cherish us…we catch a glimpse of how they see us.  It changes everything.  We start to reach out…we start to feel worthy of those friendships and give back.  That little flower that was weary and withered has blossomed into a lovely bloom…fitting in quite nicely in its own special way.  Now, today, all 4 of my kids go to that wonderful neighborhood school.  I am no longer the overwhelmed mom of one kindergartner and 3 little ones who has no time to join in and get involved.  I am no longer isolated.  In fact, some days I wish to be able to hide and be isolated.  Then I remember how I hated feeling invisible and I smile.  I have come full circle.  It puts in perspective and I am perfectly content to be just where I am.    The teachers, parents and staff at that school are family.  You know on how on the Cheers theme song it says “sometimes you want to go where everybody knows your name…and there always glad you came?”  That is how I feel when I am there.  And many other places in this town that once never felt like it could be home.  A place where I could hardly find my way around and felt so foreign.  Where I stood out like a sore thumb.  Somehow, some way, through some God given miracle…that has all changed.  And when I see another mom looking like she may feel like a foreigner…I am always happy to learn her name and bring her in.  Because I never want someone else to feel the way I used to if I can help it.

Now we come to the chicken salad…I was getting there all along.  Ya’ll know I like to talk.  Today as I was processing how I would give discuss this chicken salad in a way that you all would understand the significance, I was able to see how it all fit together.  Hence the above story.  So, in my son’s class, there was this precious little red headed girl.  Sweet as can be and would always give me a big hug when she saw me.  I had never met her mama…I had seen her around some but we had never met.  Well last year that all changed.  I met her.  She was a precious as her little girl and I knew we were meant to be friends.  Her family has a restaurant in Shreveport called Fairfield Grocery.  I never knew she had a connection with it, but I LOVE that restaurant.  I love their chicken salad.  I owned their cookbook.  This place is fantabulous ya’ll.  If you are not from here, don’t live here and come to visit…you need to eat there.  The blondies are to die for.  The grown up grilled cheese is ah-mazing.  The chicken and dumplings will make you want to cry they are so good.  It is wonderful.  The restaurant is so quaint and cozy and it has a very family like atmosphere.  The other day, I decided I needed to make up a batch of Fairfield Grocery chicken salad.  Big Daddy and 2 of my kiddos absolutely LOVE it.  I wondered as I made it…could I blog this recipe?  I needed permission as I would never just post a treasured recipe without permission.  So I called my precious friend and asked.  She gave me her blessing.  So I am sharing it here today.  The cookbook is awesome and you should order a copy if you love cookbooks full of delicious recipes.  It also gives some back history on a wonderful Shreveport establishment.  When you are in the area, you should definitely stop by.  It is off of Youree Drive in the Shoppes at Bellmead.  Here is a link to the Mr. Menu site which tells you a little about it and the menu http://mrmenu.biz/bossier-shreveport/menu/fairfield-grocery-market-cafe/.  Anyway, with the holidays coming up, this chicken salad is great to have around.  It makes a ton so it is really good to make if you will have a house full of hungry visitors.  You can eat it as a sandwich, with crackers or as Aubs like to do it…with a spoon.  It really is wonderful.  It is amazing how so many wonderful things can transpire in just a few great years.  Lifelong friends are made, kiddos grow up, life gets a lot busier but in many ways a tad easier, mommies find their footing (only to lose it again later…but let’s not get into that), and life moves right along.  There is beauty in that.  Friends become family and what once was unfamiliar becomes home.  New recipes that once seemed daunting become family favorites you could make with your eyes closed.  I am grateful for all of those things.  And I am so glad to be able to share this recipe with all of you.


Image

This picture does not do this chicken salad sandwich justice…me oh my. 

Fairfield Grocery chicken salad 

Ingredients

5 pounds of chicken breasts

1 cup celery

1/4 cup red bell peppers

1/2 cup water chesnuts

6 tablespoons purple onions

1 1/2 teaspoon salt or to taste

1 1/2 teaspoon white pepper or to tsste

1 1/2 teaspoon cayenne pepper or to taste

1 quart mayonnaise, give or take some…they suggest Hellmann’s and I use that or Duke’s

Instructions

Cook and shred chicken.  I boil mine until no longer pink and then remove from water.  I then run them through the food processor. I think it gives it the same texture as Fairfield’s but you can shred with a fork.  Whatever works for you.  Dice the celery bell pepper, water chesnuts and purple onions.  Add this to the chicken in a big bowl.  Mix all ingredients with mayo until very moist.  I just add half the quart of mayo and stir.  I add more as necessary.  This time I used about 3/4 of a quart jar of mayo.  Season to taste.

Stop salivating and fix yourself a sandwich.  Make a few more and get ready for the ambush.  Send a container of this to a good friend to make their day.  When my friend Stacie had surgery, this is the only thing that she wanted to eat.  I was really glad that this recipe makes such a big batch then.  There is plenty to share.  When you are trying to bloom where you are planted, feeding the flowers around delicious food is a GREAT place to start.  Make this chicken salad and make good friends.  Circle of life my friends.

Image

Some beautiful friends of mine…part of my village…we are a tribe of mommies…Good heavens I love these girls.

Image

Me and my fellow circus freak…my precious Lexie B!  That girl made my blooming so much easier.  I love her to pieces. 

Copycat Wendy’s Chili Recipe

Chili is a buzz word around here.  Creates quite a stir.  Gets peeps going.  If you say Frito pie in conjunction with chili, you are asking for chaos.  Big Daddy and my kids can hear nothing else but chili.  Frito pie.  We have some?  Where is it?  So I have learned not to even mention it when I am cooking it until it is close to ready to prevent a revolt.  These people over here REALLY love chili.  A while back, I came across a copycat Wendy’s chili recipe.  It looked really good and I know Wendy’s has really good chili, so I thought “score!!” Well, life happened and I kind of kept it on the backburner…excuse the pun.  Until Big Daddy says to me the other day…”Cajun Mama…I think it is about time to make some chili.”  It was cold, I had ground chuck and you know how they say when you know, you know?  I am sure “they” weren’t talking about making chili…but let’s just pretend.  I knew. The time had come to break out the copycat Wendy’s chili recipe.  Big Daddy about did a little happy dance of delight.  It was some good stuff ya’ll!!  Oddly enough,  the other day I am in Target chatting up the cashier and I am talking about my lasagna recipe.  We talk a little more and I tell her about the copycat Wendy’s chili and she smiles really big.  She tells me she is the GM at a local Wendy’s.  I ask her if she has tried this recipe and she says no and asks what all the recipe calls for.  I tell her and she says that it sounds pretty close except for the seasoning.  She said they have packets of seasoning they put in theirs and it is not McCormick chili seasoning like what is called for here.  Of course, this does not surprise me.  You best bet your sweet behind I am going to ask her about what all this seasoning entails next time I go through her line.  Next week.  Not that I go to Target that much…today.  Errr…I may have a problem.  My kids may or may not call some of the employees by name.  Anyway, that’s another story for another time and we are not here to discuss how many times a week a person has to go to Target before they are considered to have a problem.  🙂  We are here to talk about chili..stay focused people because ya’ll are NOT going to want to miss this chili recipe.  That cashier also said that since it has been unseasonably cold here in the past week or two that they have sold a crazy amount of chili.  This does not surprise me as this chili is absolutely delicious and warms you from your head to your frozen tootsies.  No need to hit the drive thru my friends.  The recipe is right here!!

Copycat Wendy’s chili 

Ingredients

1 onion, finely chopped

1 bell pepper, chopped

1-14 ounce can stewed tomatoes

4-8 ounce cans of tomato sauce

1-14 ounce can Ranch style beans

1-14 ounce can pinto beans

1-14 ounce can kidney beans

1 can Rotel tomatoes

1 package McCormick mild chili seasoning

2 pounds ground chuck

Directions

Brown ground chuck in a dutch oven until no longer pink.  Drain.  Stir in chopped bell pepper and onion and let this cook for 2 or 3 minutes.  Stir in all other tomatoes, beans (don’t drain)  and seasoning.  Just dump the tomatoes and beans directly into the pot.  No need to drain.  That is what makes this recipe super awesome.  It is so easy and yields absolutely delicious results!!!  Let this simmer over low heat until onions and bell pepper are tender and the smell is so amazing you cannot hardly stand it.  Or do what I did…call it done when your 5 year old comes over and starts to whine “mama I’m hungry!!!”  You will know when it is time.  We added some shredded cheddar, a little sour cream and of course Fritos to ours.  Well, they did.  I like mine straight.  Just chili…no need to garnish.  This stuff is good enough to stand alone.  You will LOVE this chili!  Your warm toes can write me a thank you, I love you post later.  For now, eat your chili.  It is best served warm.  ~AMB

1488757_577628985651006_225243479_n


Happiness is a good bowl of chili…or something like that.  


Lazy Girl’s Lasagna

This lasagna recipe…oh this lasagna recipe…there are few words I can use to describe how much I LOVE this lasagna recipe.  Cajun mama cooking Italian food, you say?  What?!  Ok, well I admit you will probably never go to Italy and find a piece of this lasagna on your plate.  Authentic Italian this is not, but after one bite, you will not care.  Growing up, when lasagna was on the menu, it was a happy day in the Mayeux household.  You knew right away walking through the door that we were having lasagna for supper.  One whiff of the delicious aroma and my mouth immediately watered.  Oh the wonderful smells of coming home, right?  It had been a while since I had made this lasagna.  I have had so many recipes to try out and it just sort of fell by the wayside.  Never again.  As Big Daddy is fond of saying, “this has been missing from my life!!!!” (he says this any time it has been a while since we have had something he really likes…lol!)  I made a pan of this lasagna for the office staff at my kids’ school the other day for their Christmas gift.  That’s right, I gave the gift of lasagna.  They all loved it!  While I was at it, I made a second pan for my husband and his coworkers.  It was lunch time when I brought them their pan, so I had a piece myself.  Oh. my. heavenly stars.  You know how food tastes so much better when you are starving?  This lasagna was so good already and I was so hungry, I just about blew my own mind.  So. flipping. good I tell you!!  I decided to name it lazy girl’s lasagna because it comes together super quick, with minimal ingredients, and while you are at it, you can easily make another pan for a friend.

Image

You are welcome!!!

Lazy Girl’s Lasagna

Ingredients

1 1/2 pound ground chuck

1 jar Ragu spaghetti sauce

1/2 box oven ready lasagna noodles (6 noodles per lasagna)

1 large container of cottage cheese

2 cups shredded Mozzarella cheese

1 cup Italian 5 cheese blend (I used the kind with the Philadelphia cream cheese in it for both)

Kraft Parmesan cheese (yes the kind in the shaker)

Directions

Preheat oven to 350 degrees.  Prepare a 9 x 13 dish by spraying with cooking spray

Brown ground chuck in a large skillet until no longer pink and drain.  Stir in jar of Ragu into the cooked ground chuck.  Bring it to a boil and then lower heat to a simmer.  Let the meat sauce simmer for about 10 minutes.  Lay 3 of the lasagna noodles on the bottom of the prepared dish.  Spoon half of meat sauce evenly over the noodles.  Spoon half of the cottage cheese over the meat sauce.  Sprinkle one cup of the Mozzarella and 1/2 cup of the five cheese blend over the cottage cheese.  Generously sprinkle the Parmesan cheese over all of this.  Repeat the layer, starting with 3 noodles and ending with Parmesan.  Pop into oven for about 45 minutes-1 hour or until cheese is slightly browned and all bubbly on top.  Let it cool a bit and then cut into squares.  Eat it up!!

Broccoli Cheese Rice Casserole and Carrot Souffle

Isn’t it amazing how the memories of a certain dish can take us back to a certain place and time?  I mean, I know in reality I am a grown woman who drives a minivan with 4 kids and a husband, 2 dogs and a cat, but as I sit here and think of broccoli cheese rice casserole, I can instantly recall being 8 years old (my daughter’s age eek!!) playing in my room after church, waiting for my mom to get lunch on the table.  Ham, broccoli cheese rice casserole and carrot souffle is one of those meals.  Sunday lunch or supper worthy.  A meal that evokes contentedness and makes your inner child smile and remember that simple joys are never that far away.  The best thing about this meal is that it is easy as pie to prepare but will have your family sitting happily around the table in no time flat.  Hold the fights.  Hold the ipads and ipods and hold the phone.  Nothing but yummy in the tummy and happy smiles around the table (for as long as there is food on the plate, after the food is gone I can’t promise anything).  Now, I encourage you to try these two dishes with a baked ham but of course, this is a free country and you can make them with whatever main dish you want.  I will be honest and say that I can eat just these two sides and they are the main dish.  The combination of the textures and savoriness of the broccoli cheese casserole with the sweetness and smoothness of the carrot souffle is like nothing else.

1450349_575054542575117_806966861_n

Hold the phone my friends…dinner is served

Broccoli cheese rice Casserole

Ingredients

2-10 ounce boxes frozen chopped broccoli, thawed

2 cups cooked rice

1 can cream of chicken soup

1 can Cheddar cheese soup

1- 8 oz. jar of Cheez Whiz

1 cup shredded cheddar

1 roll of Ritz crackers, crushed

salt, pepper and Tony’s to taste

Directions

Preheat your oven to 400 degrees.

Thaw your broccoli in a colander.  If you are in a hurry, you can run it under some water to help it thaw a little better.  Make sure it is drained well.  Cook your rice in the rice cooker (or however you cook your rice…I don’t understand any other way…rice cooker is the first appliance I learned to use after the toaster lol!).  Stir the drained thawed broccoli and hot steamed rice together in a big bowl.  Pour soups and Cheez Whiz over the broccoli rice mixture.  Stir well to combine .  Add salt, pepper and Tony’s to taste   Stir in 1/2 cup of cheddar cheese.  Pour this into a prepared (greased) 9 x 13 dish. I let my kids help by letting them crush the cracker crumbs over the casserole once it is in the dish.  Sprinkle the remaining cheese over the cracker crumbs.

Bake in 400 degree over for about 20 minutes or until all hot and bubbly and delicious looking.

Carrot Souffle 

Now, there is a story behind this carrot souffle.  My mom made me a recipe book when I got married.  It included this recipe, which is one of her favorites at Piccadilly.  Yes, you heard me.  Piccadilly.  I love Piccadilly.  Big Daddy loves Piccadilly.  Our kids, every one of them, loves Piccadilly.  When we go to the mall, we go eat at the Piccadilly.  It is not just a restaurant to us, it is an event.  It is a tradition.  Big Daddy and I have been best friends since we were little.  We grew up across the street from one another.  Our moms were best friends and worked together.  When our dads would go hunting on Friday nights, our moms would take us to Piccadilly.  When they moved to Broussard, we would go visit them and guess where we would go eat at least once?  You guessed it.  Piccadilly.  So naturally, this recipe was a must make for me when I got that special cookbook.   I made this for one of the holidays when we first got married.  It was sooo good.  But, it involved quite a bit of prep work and once I had babies, I was not a fan.  So when baby 3, Madame Toot, came along, we were blessed with 2 13 year old angel that came to our door one day with offers to baby sit.  They were THE most precious girls I had ever met and they knew just what I needed at that time in my life.  They took over and allowed me to get away.  I needed to get away.  3 kiddos ages 3 and under…I had to get away.  But it was so hard.  These two angels made it seem less hard.  And since then, they have become a part of our family.  And of course, the woman who gave birth to these angels, has been and always will be my fairy godmother.  And she can cook to boot.  Boy can she.  She taught me to make gravy and she taught me how to make this awesome carrot souffle.  These 3 ladies (those 13 year old girls are now young women in college) are so special to us.  We have spent holidays with them and they are a part of our family.  Lisa made this for one of the holiday meals we shared and it has been a mainstay ever since.  Her recipe is so much easier.  It used canned carrots and comes together fast.  It is kid friendly and just all around amazing.  This recipe will become a favorite at your house too.  This carrot souffle always reminds me that sometimes the most perfect things come to you by surprise.  And that blessings come in many forms…I mean canned carrots?  Bleck!!  But not in this dish…this dish turns canned carrots into the tastiest of side dishes.  Sweet and wonderful without being too complicated.  Like the surprising family we found in those two little girls who showed up at my front door.  Turned into so much more sweetness than I ever expected.  Carrot souffle…same thing.  So try it, you will be so glad you did.

photo (44)

Our precious girls with the kiddos…so much sweetness I cannot handle it

photo (42)

My fairy godmother and I…how I love that woman

Carrot Souffle

Ingredients

1- 16 ounce can of carrots, drained

1/2 stick of butter, melted

1 cup of sugar

3 eggs

1 teaspoon vanilla

1 teaspoon of baking powder

Directions

Preheat oven to 350 degrees.  Beat drained carrot and melted butter in a mixing bowl until smooth.  Add remaining ingredients and mix well.  Transfer to a souffle dish or a round Corningware dish (My fairy godmother made sure I got my own souffle dish several years ago but I used a 1 quart round Corningware until then).  Bake at 350 for 45 minutes or until knife comes out clean.  Once it cools some, sprinkle some powdered sugar over the top before serving.  Get ready for your kids to ask for seconds of carrots.  It is that good!!

photo (41)

Sweet, perfect carrot souffle…

photo (43)

Me and my two angels, all grown up…I love these two girls and I am so proud of them