Category Archives: Uncategorized

Bisquick Chicken Potpie

Image

Drool worthy yet so simple…it can only be Bisquick potpie!

Here is the scenario.  You drove to Monroe and back to pick up 2 of your kids from your mother in law.  You have been up since 5 because your husband and youngest were up insanely early to go turkey hunting.  You are wiped out.  You know these little people you are raising and your biggest baby (mine is called Big Daddy) are going to have to eat something.  Ya’ll ate out last night and the budget does not allow another meal splurge (keeping it real people, that is all…no money tree growing in our yard and going out to eat with 4 kids is expensive no matter where you go).  You have some cooked chicken breasts in the fridge, so what now?  Yeah, this is not a hypothetical scenario.  That was me last night.  Ya’ll know when you are feeding a hungry bunch of monkeys that you have to think on your feet and fast.  If the natives get restless, they may rebel.  Cannot have that.  Keep them fed.  And so I do.  When mommy is tired and kiddos are hungry, Bisquick potpie is always a good fast choice.  Yes, yes, it has Bisquick in it. Bisquick has preservatives, gluten or whatever in it.  You can always take the high road and make your own…or suck it up and use the flipping Bisquick already in the pantry.  That is what I did.  I don’t tend to stand on the high ground when it comes to feeding my kids.  I like the middle ground.  It is solid, grounded in tradition and allows me to keep my ever fleeting grip on reality.  So if you are like me and love you some middle ground, keep reading.  Ok, we all here?  Alright!  This potpie is so warm, comforting, filling and fast to throw together.  Added bonus, there are veggies (canned, yes) in there.  The kids are so preoccupied with the buttery tasty crust that they actually get a veggie in their pie holes, I mean, precious little mouths.  he he he.  🙂  I am so kidding.  Unless you thought it was funny then I was dead serious.  Wink Wink!  So, if you want to know how to get a good meal on the table fast, this is the post for you. ~AMB

Bisquick Chicken Potpie

Serves 6 

Stuff you need for the filling~

1 chicken breast, cooked and cut up into 1 inch pieces

1 cup of peas and carrots (I use a small can, drained)

1 cup cooked potatoes (I use a half of a regular size can because they don’t make the small cans…get on that Del Monte)

1 can cream of chicken soup (I have used cream of celery and I rather it that way)

*For the crust~

1 cup Bisquick mix

1 egg

1/2 cup milk 

What to do with the stuff~

Preheat your oven to 400 degrees. In a 9″ pie dish or round dish, combine soup, chicken, and veggies.  Now, in a separate bowl, combine Bisquick, milk and eggs.  Pour this over the the chicken/veggie mixture.  Pop it in the oven for about 25 minutes or until crust is nice and brown.  *I double the recipe for the crust usually because my kiddos really like it.  


Image

He loves this potpie.  His sweet smile gives it away.  He had 2 helpings.

Image

Double the crust means double the smiles around the table (for about 5 minutes then chaos resumes…but I take what I can get)


Callie’s Ham Salad

This must be my week to try new things.  I cannot recall having ham salad before and to be honest I was a tad bit reluctant  to try it.   I love most things that include the word salad…tuna salad, potato salad, definitely chicken salad, egg salad..but ham salad?  Yes, ham salad.  Now, I know lots of people are very familiar with ham salad but not me, so forgive my innocence or what I call now…my ignorance.  Several recipes for ham salad have caught my eye, and I have kind of planned to make it, but the minute I saw this little beauty, I knew I would have to make it.   Like now.  Cannot wait.  Impulsivity reigns supreme when it comes to a recipe I see that must be made.  I may perish if I don’t make this asap.  (said in my best Southern damsel in distress voice…)  Tomorrow is another day and by God, I will make this ham salad!!!  Now,   what I love about this recipe is that it is simple and straightforward.  I like recipes that tell me how to get from a to z directly.  Shortest route here people.  No need to reinvent the wheel.  I guess because I deal with kiddo mood swings, fake illnesses, deciphering their language (mine are all at ages where nothing is as simple as it once seemed, maybe it is just me?)…so a recipe should get down to the nitty gritty pretty quickly.  If you start off and tell me that I need to cook a whole ham first before I can get a ham salad out of it…well no thank you.  I am tired, need more coffee and want ham salad.  This recipe took you straight to it.  No hoops to jump through.  This is very easy, takes few ingredients and you can double to feed a hungry bunch if you need to.  Now, this original recipe comes from a cookbook that is now at the top of my list to buy.  My birthday is coming up…hint to BD.  The cookbook is called Callie’s Biscuits and Southern Traditions and I discovered it when I came across blog lovin and this link~ http://www.thecountrycook.net/2014/01/callies-ham-salad.html?m=1.  If you have never had ham salad, I encourage you to try this recipe.  It made a believer out of me.  we ate it in a sandwich, but some people spread it on crackers.   I will be making this one again and again.  Cajun mama is a ham salad convert…spread the word.

Image

Definitely on my make again list…already.  

Ham Salad

Stuff you need~

1 lb. ham (I used a ham steak that I bought at the store.  It was a little over a pound.  That is what the blogger I got this recipe from did.  But you can use leftover ham from Easter (great idea, Laura!) or any time you bake a good ole ham.

3 stalks celery, cut into 1 inch pieces

1/2 onion, chopped

2/3 cup mayo (as always…Duke’s is my fave)

2 Tablespoons Dijon mustard

2 sandwich sliced pickles, chopped (I used BD’s favorite kind Claussen that we already have in the house-picture below)

1 1/2 tsp. pickle juice

1 Tablespoon light brown sugar

kosher salt and black pepper to taste (slow your roll and give it a taste first.  I added salt without reading that part and it was a tad too salty for us.  But still amazing)

What to do with the stuff~

Now, she suggests just pulsing the ham and celery together for 20-25 pulses or so.  Again, I did not read all the way through and tossed all the ingredients in the food processor and pulsed it all.  I had left the pickles and onions pretty coarsely chopped and it turned out fine.  If you don’t have a food processor, you can still make this but the consistency might be a tad off unless you chop the ham silly fine.  So, as I said, my way was to throw it everything into the food processor and pulse it a few times until it was combined. Lol!  I was being a hardheaded gal today (or more so than usual…) She says after you pulse the ham and celery set aside.  In a bowl, combine other ingredients.  Add the ham and celery mixture to the mayo mixture and gently stir.    Potato potato I say.  It was dang good my way so I think any way you go, you are golden!!  And that ham salad will taste so good with a glass of iced tea and some potato chips.  Ya know…if you like that sort of thing.  And I do.  I really do.  OOH she also added a few  pieces of chopped green onion (green parts) to the finished product.  I did this as well.  Mmmmmmm….

Image


Yes, yes, I am a believer in the powers of ham salad.  

Image

Big Daddy’s and Benny’s favorite pickles 

Image

All set to be pulsed all together into a lovely ham salad…it was good even if I didn’t do it right

Luscious Lemon Loaf

I woke up yesterday morning with cooking on my mind.  My kiddos are on spring break, 2 of them are with their grandparents in Arkansas, one is up his daddy’s behind, and the other (my mama’s girl) has been chilling with mama.  So, frankly, I felt a little adrift. Regardless of how many kids you have, it seems like when one or two are away, things just aren’t the same.  I definitely felt their absence, though it has been nice hanging with my sweet girl and having some one on one time with her.    Anyway, I decided that I was going to cook up some stuff and this lemon loaf was one of the recipes on Pinterest that had caught my eye.  But I must say, it was originally called “white chocolate lemon bread” and frankly, it looked so yummy but the name threw me off.  Yes, I will admit I am not a white chocolate fan.  Mama likes her dark chocolate, that is all I am saying.  Always have.  And white chocolate?  Gag.  No really, gag.  But I took a risk.  I love, love, love the lemon loaf at Starbucks.  I don’t love, however, paying over 2 bucks a pop for a slice.  I mean, really?  I truly love lemon and this looked so easy, I figured what did I have to lose anyway?  Nothing.  So I went for it.  I am so very glad I did.  There is nothing white chocolate to it and this loaf tastes so close to Starbucks’ lemon loaf that it is uncanny.  Taking the risk (though with this the risk was small) was well worth it.  Don’t you love when things work out that way?  I renamed it luscious lemon loaf because even though there is white chocolate pudding mix, you cannot taste it.  This is just pure lemon delight.  And the glaze that you pour over it is simply fantabulous.  This recipe truly could not be easier and makes two loaves.  So, theoretically you can keep one and give one away.  Good luck with that.  This stuff is so good, you might consider hiding both loaves under your shirt and running like the wind.  And keeping it all for yourself.  If your family does not beat you to the punch.  It is that good.  You can see the original recipe here http://liluna.com/white-chocolate-lemon-bread.  I made it just like the recipe suggested this time, but next time I will replace the oil with applesauce and the sour cream with Greek yogurt.  I do the applesauce thing in most of my muffin recipes and it works great.  We get a little fruit boost and I can enjoy a slice or um…two…with less guilt.

Luscious Lemon 

Stuff you need~

1 box of lemon cake mix (I used Duncan Hines)

2 small boxes instant white chocolate pudding mix

4 eggs

1/8 cup fresh squeezed lemon juice (about 2 Tablespoons)

1/4 cup of oil

1 cup sour cream

zest of one lemon

For the glaze:  Mix 1  1/2 cups powdered sugar, juice and zest from one lemon.  Add more lemon juice if it was too thick. I used a big lemon and had plenty.

What to do with the stuff~

Mix cake mix, pudding mix, oil and eggs in a bowl with a beater (or your standing mixer) until well combined.  Now, add sour cream, lemon juice and lemon zest.  Use a spoon to mix at this point.  Pour batter into 2 greased loaf pans.  I used a regular size loaf pan and then a pan with 4 little mini loaves.  They were the cutest little things!!

Bake at 350 degrees for 40-45 minutes.  If you go the mini loaf route, bake for about 15 minutes.  Let them cool completely.  I removed mine from the loaf pans at this point and set them on a baking sheet or plate.  Now, poke holes in the loaves and drizzle the glaze all over them.  Get ready to curse me and thank me all at once.  You will want to do both.  It’s ok.  I still love ya.  Image

Big ole zested lemon 

Image


awww…look at those little darlings…so tiny and cute.  I could just eat em up.  he he 

Image


Sweet tart lemony glaze…so pretty

Image

Love, evolution and Cajun Mama’s coleslaw

20140327-055853.jpg

sweet tangy coleslaw. I love you.

Yes.  Yes.  I know.  Coleslaw?  What in the world?  This chick posted about potato salad yesterday and now she is posting about coleslaw.  Yes I am.  But hear me out.  All coleslaw recipes are not created equally.  Even in the great state of Louisiana, there are major differences in our coleslaw recipes.  I never knew this.  But ya’ll, and I am not exaggerating, I had NEVER been to Shreveport before 1994.  No I am not lying.  I am dead dang serious.  I came up here with my mom to see BD’s mom when she was sick (back when he was just Clay, my childhood friend.  Before the whole falling madly in love, marriage and 4 kiddos thing) and I remember passing a Home Depot and thinking “wow!  This is not a little podunk town.  They have a Home Depot!”  Please keep in mind that I am from Alex. and we did not have a Home Depot at that time.  Not sure where I got my notions from.  I was 19 and living in BR and going to LSU and thought I was hotsy totsy.  This was August and please keep in mind that by the next January, I was a  Northwestern demon and that was that.  So, I was a drifting college student who did not know Shreveport was a big city.  Anyway, as far as I know, when you live in Central Louisiana (at least when I was young), you took field trips to one of 3 places if you got out of town.  Houston (back in the day we went to Astroworld), New Orleans, or Natchitoches.  So as far as I was concerned, LA stopped after Natchitoches.  How ironic that I now live in Shreveport, right?  And I love it here.  Go figure.  My whole life seems to be a lesson in irony.  Or maybe I protest too much and try to run the show and God likes to show me in funny little ways that he is the boss and I will enjoy the path he chose. ( I am NOT dating some country boy in Keithville!!  Nope, I dated him and married him.  Thank heavens God knows what he is doing and has the power!) Either way.  I know I am where I am supposed to be, coleslaw differences aside.  Oh yeah, I am supposed to be talking about coleslaw.  Blogging ADD is no joke.  Excuse me when I go off on my trips down memory lane.

Ok, so before I was a Shreveport gal, I only knew of one kind of coleslaw.  And we never ate it with BBQ.  Never.  Seriously, not ever.  At least not in my family.  The main times I can remember eating coleslaw was with grillades and rice and gravy and maybe fried fish or at a boucherie.   my cabbage is not shredded fine enough.  It is a work in progress, just like my potato salad.  I had a friend who is from Alex. and has roots in Avoyelles like me (Denee I am looking at you) and she asked me to post a recipe.  So, I will do my best.  It definitely takes me back.  And I have to say, while mayo based coleslaw had its day in the sun for me…I think I prefer it this way.  Just not with grillades.  Please note, I will make adjustments to the recipe as I get better at making it.

photo (66)

Lovely cabbage…

Watermarked Photo (68)

Straight forward, simple, uncomplicated.  Perfect.

Cajun Mama Coleslaw 

Stuff you need~

A head of cabbage

1 cup vinegar

1/2 Cup sugar

2 teaspoons salt

1 teaspoon pepper

yes, that is it…don’t make it too complicated

What to do with the stuff~

Ok, cut the bottom hard part off of the cabbage.  You don’t need that.  Now cut the head of cabbage in half and in half again.  Now, here is where I have some adjustments to make.  Taking a good heavy knife, shred the cabbage very fine, into little ribbons.  If I had to give a measurement, I could say a 1/4″ thin strips.  Fine.  But really, it is not the end of the world if it is thicker.  Again, work in progress.  Add the cut cabbage to a colander and wash well.  Let it dry or get some paper towels and soak up the excess moisture.  Ok…now dump the washed cabbage into a bowl.  In a separate bowl, whisk together your other ingredients.  Adjust accordingly to suit your family’s taste.  Pour over the cabbage and then toss the shredded cabbage with the vinegar mixture.  Let it sit in the fridge for about an hour if at all possible to let the flavors soak into the cabbage. You are ready to go.  Sweet, salty, crunchy, tangy…all the good stuff together.

photo 1 (1)

BD and I…circa 1978…he was my best friend.  We ate vinegar based coleslaw and loved being together.

photo 2 (1)

Circa 1996…finding our way…in love and coleslaw.  We were evolving. 

Watermarked Photo (67)

Circa a month ago…still straightforward and not fussy as this coleslaw recipe.  He is still my best friend.  Gotta love evolution.

Dianne’s Quick and Easy Crawfish Étouffée

20140316-090058.jpg

20140316-085330.jpg

20140315-173719.jpg

Big Daddy and his mama circa 1993(photo property of Lyndy Hartley Doskocil)

Some of you might ask “who is Dianne?” and some of you already know. What a lady. Such a great lady. Dianne Hartley Bowlin was Big Daddy’s mama. She passed away in 1994 and we miss her everyday. She was a spirited and strong lady full of conviction and a loud laugh that was contagious. She had beautiful brown eyes and a little button nose that I am so glad my girls inherited. She was a beautiful spirit that lives on everyday in so many ways.
And her recipes of course are one of those ways. She ended up a social worker but got her degree from NLU in home economics and she loved to cook. See, she passed before Big Daddy and I got together, but I knew her all my life. It’s a long story and one that I am proud of but it is an emotional story that is a blog post in and of itself. So, let’s just say, she was a part of my life since I was little and by the grace of God, she still is. Because I married her son and gave birth to her grandkids. She is known as Mammaw Dianne to them and she is very much a presence in their lives. My father in law remarried and I love my mother in law. Aka Deb aka Granny. None of this takes away her part in our lives. But to tell about this recipe, I must tell of Dianne. She had many great recipes, ones that I will share as time goes by but this is by far my favorite. It represents her in so many ways. Spicy, no fuss, practical and yet absolutely perfect in it’s simplicity. It is not an old Cajun recipe. I actually have no clue where it came from. I remember getting it when big daddy and I started dating and I fell in love (with him and this recipe). You make a potato salad and some French bread and just go on and you will be just right. With the Lenten season upon us, this is a great recipe to have. It is perfect for company or just to make for the fam on a Friday night. Please don’t judge this recipe by it’s surprise ingredients. They somehow end up making a truly delicious étouffée. Trust me on this one, ok? Dianne would be proud and I believe she is up in Heaven laughing her big laugh at the thought of a blog post all about her.

Dianne’s Quick and Easy Crawfish Étouffée

Serves about 6

Stuff you need~

1 stick of butter
1-12 ounce bag of seasoning blend
Tony’s to taste
2 cans Golden mushroom soup
1 can cream of mushroom
1 pound of crawfish tails (fat included…Good night do not forget the fat!!)
A bloop of ketchup
A bloop of mustard (I had to put that because the original recipe had that in it. Bloop. A squirt. And yes ketchup and mustard. I don’t know why but it works. Just go with it.)

What to do with the stuff~

In a large deep skillet, melt the butter over medium heat. Stir in the seasoning blend and sauté until the veggies are tender. Add a little Tony’s at this point but don’t over do it. Now stir in the soups and let this cook on low heat for about 10 minutes or so to let the soups and seasoning blend get comfortable together and flavors blend. Stir in the crawfish tails. Now squeeze in the ketchup and mustard. Let it cook for about 5 minutes and give it a quick taste. It may need a little more ketchup and mustard. I usually add 2 bloops of each. Lol at bloops. That’s the funniest word! Ok anyway, let the étouffée simmer for about 20
minutes while the flavors blend aka the time while the rice finishes cooking. Give it another taste and add a few shakes of Tony’s if you think it needs it. Serve it up over rice and let the good times roll. Don’t forget your potato salad and the French bread. Ooh Cher, it’s gonna be good yeah!

20140316-085109.jpg
bloop!

20140316-085224.jpg

20140316-085246.jpg
pretty little veggies getting all tender

20140316-115310.jpg
bloop bloop bloop

Crispy cajun shrimp fettucine

Oh boy.  Another crazy week down on the books in our house.  What concerns me about this is that every single week for the past month or so has been this way.  Which leads me to ponder the scariest thing of all…is this just our norm now?  When did the shift occur?  It seemed like we were just going along, grooving to a nice little family rhythm and then wa bam…every week is a crazy week. One would think that when someone gives birth to 4 kids in a little under 5 years, a certain amount of chaos is expected.  I guess I did.  I mean, it was mayhem when they were all little.  Mayhem I tell you.  But this is mayhem in a different, no one is wearing diapers, nursing, taking a bottle, and everyone can walk and talk kind of way.  I am pretty dang sure that the walking and talking are causing a majority of the problems.  Yes, the children I once dreamed of all being mobile and verbal have all joined together to create a little army of monkeys that will surely destroy my house.  And what is left of my sanity.  Sigh.  Yes, we are at the stage where they fight.  A lot.  Over who sits up front in the car, who is on whose profile on the 3ds, Minecraft, who gets to be player one on Mario.  Who gets the last piece of gum.  The list goes on.  And on.  Factor in the time change, and I have never been so glad to see a week end in all my life.  Or did I say that last week?  Yeah, these are wild times for sure.  I think with a little more sleep I might be able to accept all of this more gracefully.  With acceptance comes peace.  Sometimes, we have to bow down and say “this is just where I am in my life” and not only get through it, but enjoy it.  All of these 10 1/2 years of mothering have taught me a thing or two, one being is that no child ever stays in a stage forever.  Good or bad.  So, no matter how unbearable the sleepless nights seem, they don’t last.  No matter how bad the refusal to eat seems, it won’t last forever.  No matter how cute that baby stage is, it won’t last forever.  No matter how much they seem to fight over every single detail, it won’t last.  Around the corner is another cute stage or something else equally annoying.  So, what I decided long ago to do is try to laugh, drink more coffee (or wine), take some pictures and accept what is and call on God for restoration or faith when it seems as if all else is failing.  Because no matter what happens, raising these God given gifts is a blessing.  I am one lucky mama.  I may want to cry in frustration one minute, but coming soon is a hug, a sweet smile, a giggle, or a cuddle to make it all better.

kids

Just a stage mama…the smiles and the frown (my little one is not a fan of mom taken pics these days)…

Now, I know ya’ll have to know I am moving on to a recipe at some point.  And my blabbering about motherhood fits in there somewhere.  Somewhere in the midst of our (crazy) weeks, I came across a recipe that I filed away to make later.  One of my kiddos’  teachers told me she had made it and it was amazing.  I considered that a sign from God that this crispy cajun shrimp fettucine needed to be made.  Not to mention, Lent arrived and my meatless meals files needed some revamping and spicing up.  This recipe did the trick.  Not sure if  you do meatless meals once a week or if you are Catholic like me and try to stay away from meat on Fridays, but either way, this is one delicious little gem.  Growing up in my house, Lent was an excuse for my parents to cook all the things they didn’t get enough of all year like.  Goo fish, gar balls, cappel in tomato gravy, fried fish and sometimes, sometimes if we were lucky crawfish etouffee or fried shrimp.  Nothing like this recipe I have for you today.  This is one amazing shrimp pasta recipe and you have to try it.  It is easy to make, comes together in a flash and has flavor to spare.  I made a few changes to the recipe, but you can find the original recipe here:  https://www.facebook.com/pages/Recipes/522004091198543

Crispy Cajun Shrimp Fettuccine

Stuff you need~

1 box of fettuccine noodles, cooked according to package directions

1 Tablespoon olive oil

1 Tablespoon butter

16 jumbo shrimp (I bought a bag of jumbo shrimp frozen from Kroger and used that)

1 Tablespoon Tony’s seasoning or your favorite cajun seasoning

2 Tablespoon flour

2 cups chicken broth

2 cups heavy cream

1 cup grated Parmesan cheese

What to do with the Stuff~

Cook pasta according to directions.   Clean and peel shrimp, removing tails.  Pat them dry with a few paper towels.  On a large baking sheet. lay shrimp out and coat with the cajun seasoning.  Now, sprinkle the flour over the shrimp.  Using your hands, make the flour gets on all the shrimp.  This is part of how they get crispy.

Watermarked Photo (63)

Getting these babies all ready for cooking.

Heat the olive oil and butter over medium high heat.  Add the shrimp to the heated skillet.  Cook over for 2 minutes on each side. Remove from skillet and set aside on a plate.

Pour the chicken broth and heavy cream into the skillet.  Bring this mixture to a boil, whisking frequently.  Reduce heat once it has come to a slight boil, allowing it thicken up.  Just a few minutes should do.  I added about 2 tsp. of Tony’s to this mixture and then added the shredded Parm.  Stir in the cooked pasta and what is left of the crispy delicious shrimp (you will nibble on them because they are tasty and perfect and irresistible.  Definitely going with double the shrimp next time).  Serve warm.  Hint:  This is even better the next day when the flavors have had a chance to mingle and get to know one another.  Yeah, it is a delicious party the next day.  I served this with a salad and garlic bread and it was sheer delight.  Mouth watering delight.  Mmmmm.

blog pic

Big Daddy came around at this point and ate half of these babies.  Yeah, I will double the amount of shrimp next time. 

fettuccine

Scrumptious I tell you!!!  I love Lent!

Pea and asparagus casserole and coming home

This recipe is not fancy. It is not new. It isn’t famous or even the most popular with any crowd. Except maybe my family. It calls for simple ingredients and goes great with roast and rice and gravy. In fact, this casserole is one I make any time I make a roast or bake a chicken.
You see, I was up all night with a sick kiddo. We came to Arkansas to spend time with our family and to just get away. Little did I know, a stomach bug did not get the memo and came along with us. Sometimes, I guess the best laid plans go wrong. And you just have to roll with it. And be happy anyway. Because to be frustrated and annoyed about what is means nothing good will come of it. I am from the school of thought that some days you just have to fake it until you make it. So today, I will post a recipe that I know like the back of my hand and just get it out there to y’all. Also, the comfort of knowing a recipe like this and knowing how great it goes with certain main dishes is immeasurable. We left town Friday and I was so excited to get away. I needed to get away from the mundane daily life. Not that it is a bad life, but I wanted to shake things up. We headed to the lodge in search of some R & R with our family. And we did have a good time. It was relaxing. The kids ran wild and wore themselves out (one of them ran until he was sick). And there is just something about walking out the front door and seeing this view.

20140309-135756.jpg

Kiddos up all night sick or not, this is breathtaking and does not get old. But as the saying goes, no matter where you go, there you are. This holds true even at Bayou LaGrue Lodge aka my happy place. So after a miserable night, I was ready to get my little herd back home. So just like I love trying new recipes and discovering new recipes, some recipes are just like coming home to what you know. Comforting, nothing new, same as always recipes. This pea and asparagus casserole is that way for me. Like an old pair of shoes, that beat up old sweatshirt, or returning back to the same old, same old…homework, carpool, mess…comforting all the same, even though some days I just want to get away. It is always so wonderful to know recipes like these are just waiting. One must appreciate these recipes for what they are. This one has been on the table for many of our family meals. I don’t know where my mom got the recipe, but I know it is a great one to have. I hope someday when you are looking for a new tired and true classic, you will give this a try. It’s a real gem. ~AMB

Pea and asparagus casserole

Stuff you need~

1 can Lesuer peas (petite pois or silver can peas as I tell Big Daddy when I send him to the store)
1 can asparagus spears and tips
1 can cream of mushroom soup
4 slices Kraft singles (that is what we use and to me it isn’t the same with cheddar)

What to do with the stuff~

Spray a 1.5 quart round or oblong casserole dish with cooking spray. Preheat oven to 350 degrees. Lay out 1/2 of the can of peas on the bottom of the casserole dish. Layer 1/2 the can of asparagus over the peas. Now, spread half of the can of cream of mushroom over the asparagus tips. Place two pieces of the cheese (kind of torn into smaller pieces) over the cream of mushroom. Repeat the whole process, starting with peas and ending with cheese. Place, uncovered, in preheated oven and bake for about 30-40 minutes or until cheese is all bubbly and kind of browned. What you will have is a casserole dish full of bubbly, creamy, cheesy peas and asparagus. Side dish of my dreams!

20140309-141343.jpg

20140309-142649.jpg
Never gets old I tell you.

Pioneer Woman’s Eggberts Sunriser

Ok, first of all, it may seem like I have a slight fixation with the Pioneer Woman aka Ree Drummond.  I admit, that may be a little true.  I think she is beautiful, witty, smart, and I love her recipes.  She has 4 kids just like me and she was a city girl who married a country boy and learned to adapt and bloomed where she was planted.  I got to say, that is a lot like my story.  So I guess I identify with her and I love to cook and her recipes seem to be the ones I gravitate to.  So, I showcase many of her recipes on my blog and all of this is amounts to a hill of beans except you get the benefit of my take on her recipes and I share them with you.  Do ya’ll remember this pic…Image

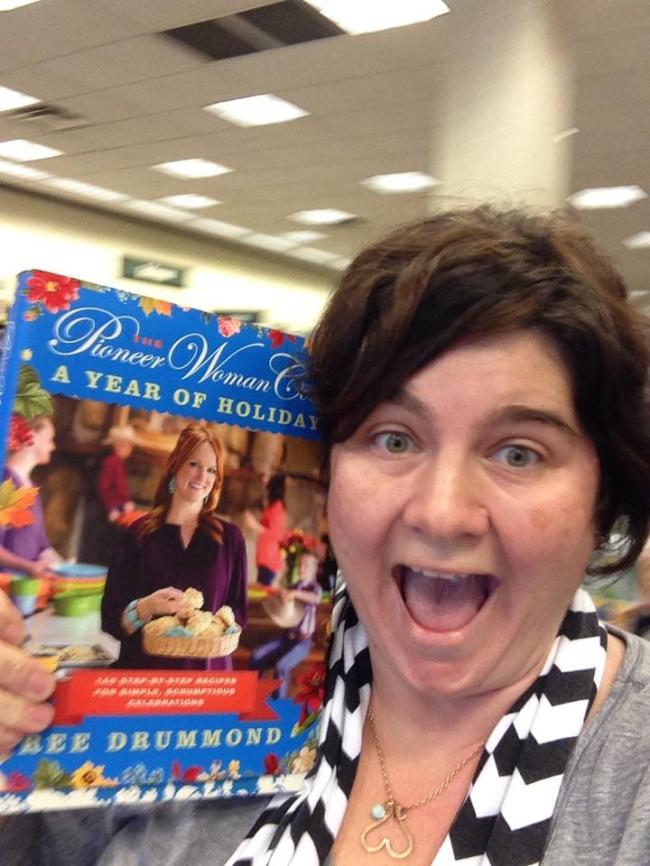
Yeah…I guess I have a little fan obsessed when it comes to PW.  That’s ok…we all have our thang, right?  So, naturally I follow her on Facebook and the other day a picture popped up on my newsfeed that made me drool.  A recipe that I knew I could not walk on this Earth much longer without making.  It practically cried and begged me to make it.  Bless its little heart…I had to answer its cries.

So,  a little back story here.  Big Daddy loves him some breakfast.  I grew up in a household that did not make breakfast except for rare occasions and on vacation.  He grew up in a family of pancakes or french toast every morning.  Breakfast was a must and for him it still is.  I have certainly developed a deeper appreciation for the most important meal of the day and now that we have our kiddos, they of course eat breakfast every morning.  It stands to reason that seeing a recipe for a wonderful concoction called an Eggberts Sunriser would drive me to drop it all and make one ASAP.  Well, it just so happened that the perfect occasion presented itself almost immediately.  Our 13th anniversary.  What?  You say, a breakfast recipe for your anniversary.  Well…yes.  Let me tell you, Saturday my youngest starts complaining of a sore throat.  When I tell you my easy going baby boy does not complain often, I mean that.  So I knew something was up.  Then Sunday, when some friends were over to celebrate our oldest daughter’s birthday, started running fever and it was downhill from there.  The writing was on the wall…our anniversary was the next day and going out to dinner was probably not going to happen that day.  BUT I could make him a delicious anniversary breakfast.  Eggberts Sunriser seemed appropriate.  So I made it.  Ya’ll…it was so perfect.  I looked so tasty when I put his together that I followed right in there and fixed myself one.  OH.  MY.  WORD.  All I can say is, if you are a breakfast lover or like me a brunch fanatic, you have to get in there and try this.  You can read all about PW’s take on this recipe here…http://thepioneerwoman.com/cooking/2009/12/the-eggberts-sunriser.  For now, here is my take on this fabulousness. Oh and after a trip to our pediatrician’s office, it has been confirmed that my baby has strep throat and a double ear infection.  Yeah, fancy dinner out for 13th anniversary was not in the cards.  That’s ok…plenty of time for that.

Image

Happy 13 years of wedded bliss/craziness to us!!  I love this man so.  He makes me happy.  And nuts.  But mostly happy.  
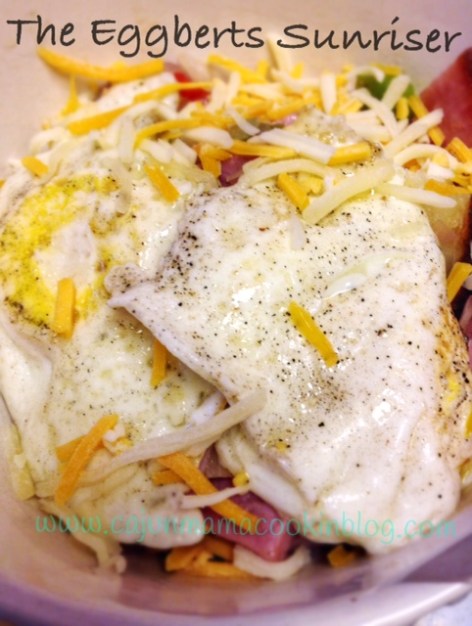
Eggberts Sunriser 

Serves:4

Stuff you need~

8 cups frozen hash browns

20 whole frozen mini potato wedges (I used some leftover baked potatoes that I had from Sunday lunch.  I cut those up into wedges and then did the same thing)

Canola oil for frying

Salt and pepper, to taste

1 whole medium onion, diced

1 whole green bell pepper, diced

1 whole red bell pepper, diced

1 jalapeno, seeded and diced (optional)

1 1/2 cups diced ham

1 1/2 cups sharp cheddar cheese, grated

4 Tablespoons butter

8 whole eggs

Salsa for topping, optional

What to do with the stuff~

Now, I will start by telling you that I halved this recipe because I knew it would be only Big Daddy and I eating this, but next time I will probably make extra because you could easily reuse this stuff together for breakfast burritos.  We love breakfast burritos in this house and also like to use up what we cook, so for us this is a win win.  Also, I think next time I will omit the hashbrowns and mini wedges and just use all cut up baked potatoes.  What my mother in law (the great and wonderful Deb) calls country fried potatoes.  Mmmmm.

Ok…Now, to start off…grab a big cast iron skillet and really douse it well with canola oil.  Cover the bottom and then add some more.  Trust me.  I tried to use my oil sparingly and it resulted in the frozen hash browns sticking to the bottom of the pan.  You don’t want to deep fry them, but you want them crispy and browned well.  Not stuck to the bottom.  Got it?  Good.  Heat the oil over medium heat and then cover the bottom of the pan with the hash browns.  Now, season them really well as they cook and don’t turn them much.  Ideally, you want to let them brown and then flip them maybe once.  Let them be, precious little darlings.  Let them become crispy and brown.  Again…don’t let them burn.  If you need more oil, add some to the pan.  I did and it was all good.

Now, if you are going the frozen wedge route, you will add considerably more canola oil to your skillet so you can kind of deep fry the wedges.  I just added the baked potato wedges to the pan at the end of frying the hash browns and let them brown some.  Or you can bake the frozen wedges.  It is really up to you.  I HATE to deep fry.  It is just so messy and makes the house smell.  To each his or her own though so do your thing!  In another skillet, add some canola oil and warm it over medium heat.  Not a lot of oil, but enough to just grease the skillet.  Now, stir in the diced veggies and ham.  You want to stir it around just let the raw veggies get a little tender and take the rawness away.  Unless you like all that stuff raw, then, well skip this step I guess.  I probably cooked mine for about 8 or 10 minutes, stirring several times.

Now, in a bowl, layer a some of the hash browns, then wedges, then the veggie and ham combo.  Now, sprinkle some cheese over this.  While the cheese is doing its melting thing, get out a small skillet and add your butter to it.  Turn on the heat on medium low and let the butter melt.  Crack your eggs into the skillet and cook them to taste.  Big Daddy likes his sunny side up but I am an over medium gal.  The pic I took is of mine so it is not as pretty as his was.  Or PW’s picture on her’s.  But mine still had the yellow juice and it dripped down over the potatoes and…oh just writing about this is making my mouth absolutely water.  Sweet Maria, that was an excellent breakfast.  Definitely put a fresh start on our 13th anniversary and if this next year of our marriage is as good as Eggberts Sunriser…well we are in for one wonderful year.  I am pretty dang sure we have started a new anniversary tradition…or a once a week tradition.  Yeah, this dish is that good.

Image

Happy, happy, happy!


Roasted tomato and mozzarella pasta

20140226-114342.jpg

Our kitchen table on any given night.

It has been another wild week at camp cajun mama. Obviously as I am a little behind on blogging. I got the cooking bug on Monday and literally spent all day in the kitchen. Yesterday I spent the school day helping out at the kiddos’ school in the library. Their librarian is the sweetest person and it is book fair time so I figured why not. I got to interact with so many of the sweet kiddos and see their little faces. I love it when they say “hey you are so and so’s mom!” And their face lights up. Not sure I have ever seen people that happy to see me so it’s a win win. Anyway, I apologize for once again falling behind, but I am here now and plan on getting several recipes in. Sometimes the mama part of Cajun mama takes over and I have to handle up on my mommy duties. I am writing this sitting in the parking lot at their school waiting for my son’s strings performance to start. A mama’s got to do what a mama’s got to do, right?
So, on to more important things…this pasta. Oh y’all…this pasta is so delicious. Full of flavor and easy to prepare and just so filling, it is a sure fire winner. I loved knowing that it was chock full of cherry tomatoes and all of the vitamins and good stuff they contain. Also, You can add chicken to this dish or you can leave it out making it a great meatless option. I saw this recipe on Pinterest and knew I would love it and had to make it ASAP. My friend came over for a visit and I decided to throw it together. She loved it. I loved it. Big Daddy…loved it. Even 2 of my kiddos gobbled it up. Yummy noises all around my friends. So grab yourself some cherry tomatoes and pasta and get to cookin. You will be so glad and the yummy noises will be yours!!

20140226-085424.jpg
Look at those lovely tomatoes ready for roasting…mouth watering

Roasted tomato and mozzarella pasta (adapted from http://www.scalingbackblog.com)

Serves about 6

stuff you need~

2 pints of cherry tomatoes (I used one pint of the cherry and one pint of the sunburst tomatoes…adds color which is pretty and good for you!)
3 cloves garlic, minced (or 1 1/2 teaspoons of the jarred stuff)
Olive oil
Good ole kosher salt and freshly cracked black pepper
1 box of whole wheat or regular pasta (I used angel hair and loved it)
1-8 ounce package of fresh mozzarella
1/4 cup freshly shredded Parmesan cheese
Fresh basil (I used the kind in the tube that most stores carry and it worked fabulously…herbs seem to go bad too quickly in my fridge and it is not as cost effective)
1 pound chicken breasts, cut into 1 inch pieces (or you can omit this and go meatless…whatever works for you)

What to do with the stuff~
Preheat your oven to 425 degrees. We are going to roast us some tomatoes. (See above pic) I covered a baking sheet with foil. Now lay your washed and dried tomatoes all out on the foil. Now sing to them and let them know they are going to be so delicious roasted and they need not worry. What? You don’t talk to your food as you cook it? You are missing out! (Don’t judge me…I am tired a lot of the time and drink too much coffee). Sprinkle the little darlings generously with the Olive oil. Don’t hold back now. Now sprinkle some kosher salt and pepper then using your hands give those little tomatoes a nice rub down. Lol. Add the garlic and basil. Do the same. You just want to make sure all the tomatoes get some of that flavor. your pasta. Pop them in your preheated oven and roast them until they are literally bursting with flavor. The smell alone coming from your oven will have you salivating. About 25 minutes give or take should do you good. While the tomatoes are doing their thing, go ahead and boil your pasta. Reserve the liquid for use in the dish later as it helps to thicken up the saucy sauce. Next, season the chicken with salt and pepper. in a skillet, heat some olive oil over medium heat. Add the chicken to the skillet and cook until browned on both sides and cooked throughout. Add those beautifully roasted tomatoes to the chicken and cook for 2 minutes. Pour the cooked pasta into the skillet with the tomato chicken mixture and add about 1/4 cup of the reserved water and cook over low heat until sauce is thickened. Stir in more reserved water as necessary to coat all the pasta. Cut the fresh mozzarella into 1/2″ chunks. Stir into the pasta and toss around until the cheese is slightly melted. Season to taste with extra kosher salt, pepper, and extra basil. Serve the pasta up in bowls and sprinkle with Parmesan cheese as desired. Y’all are going to flip!! This is one of my new favorite dishes. Manga!

20140226-113949.jpg
Heaven in a pasta bowl. It’s even good cold.