Tikka masala, basmati rice with peas and minted cucumber salad…I am in love with this Indian inspired meal!!

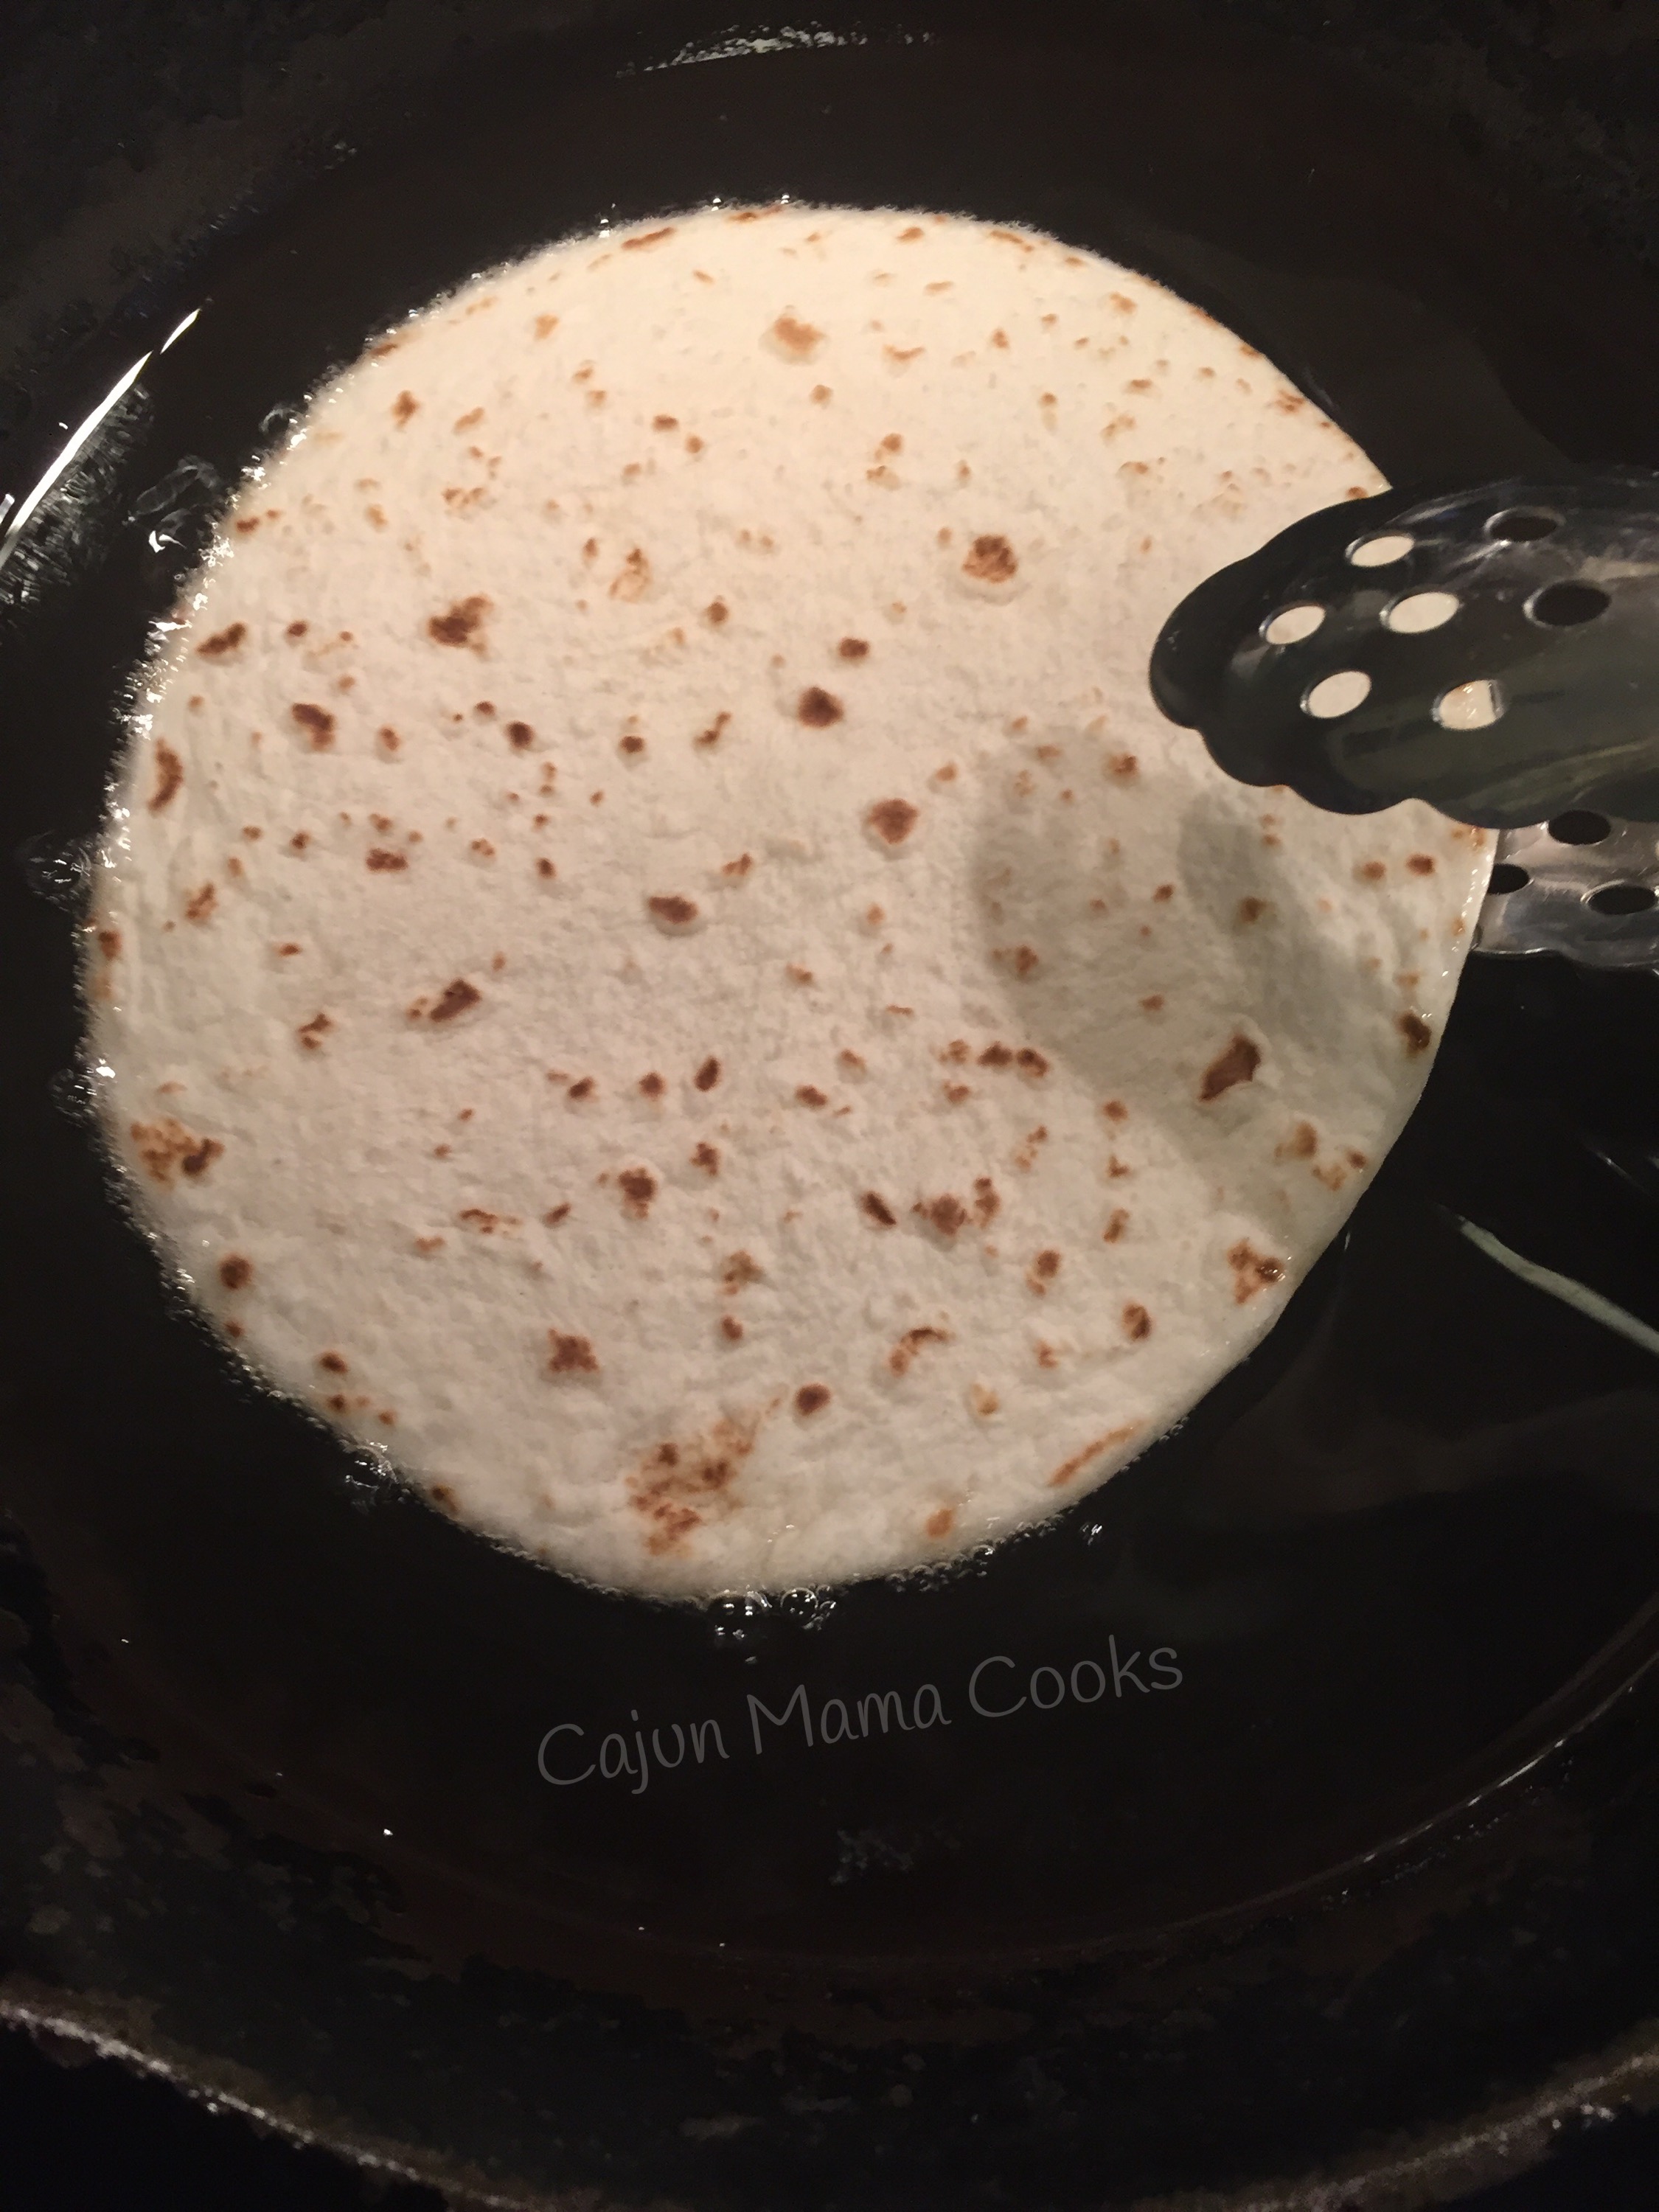
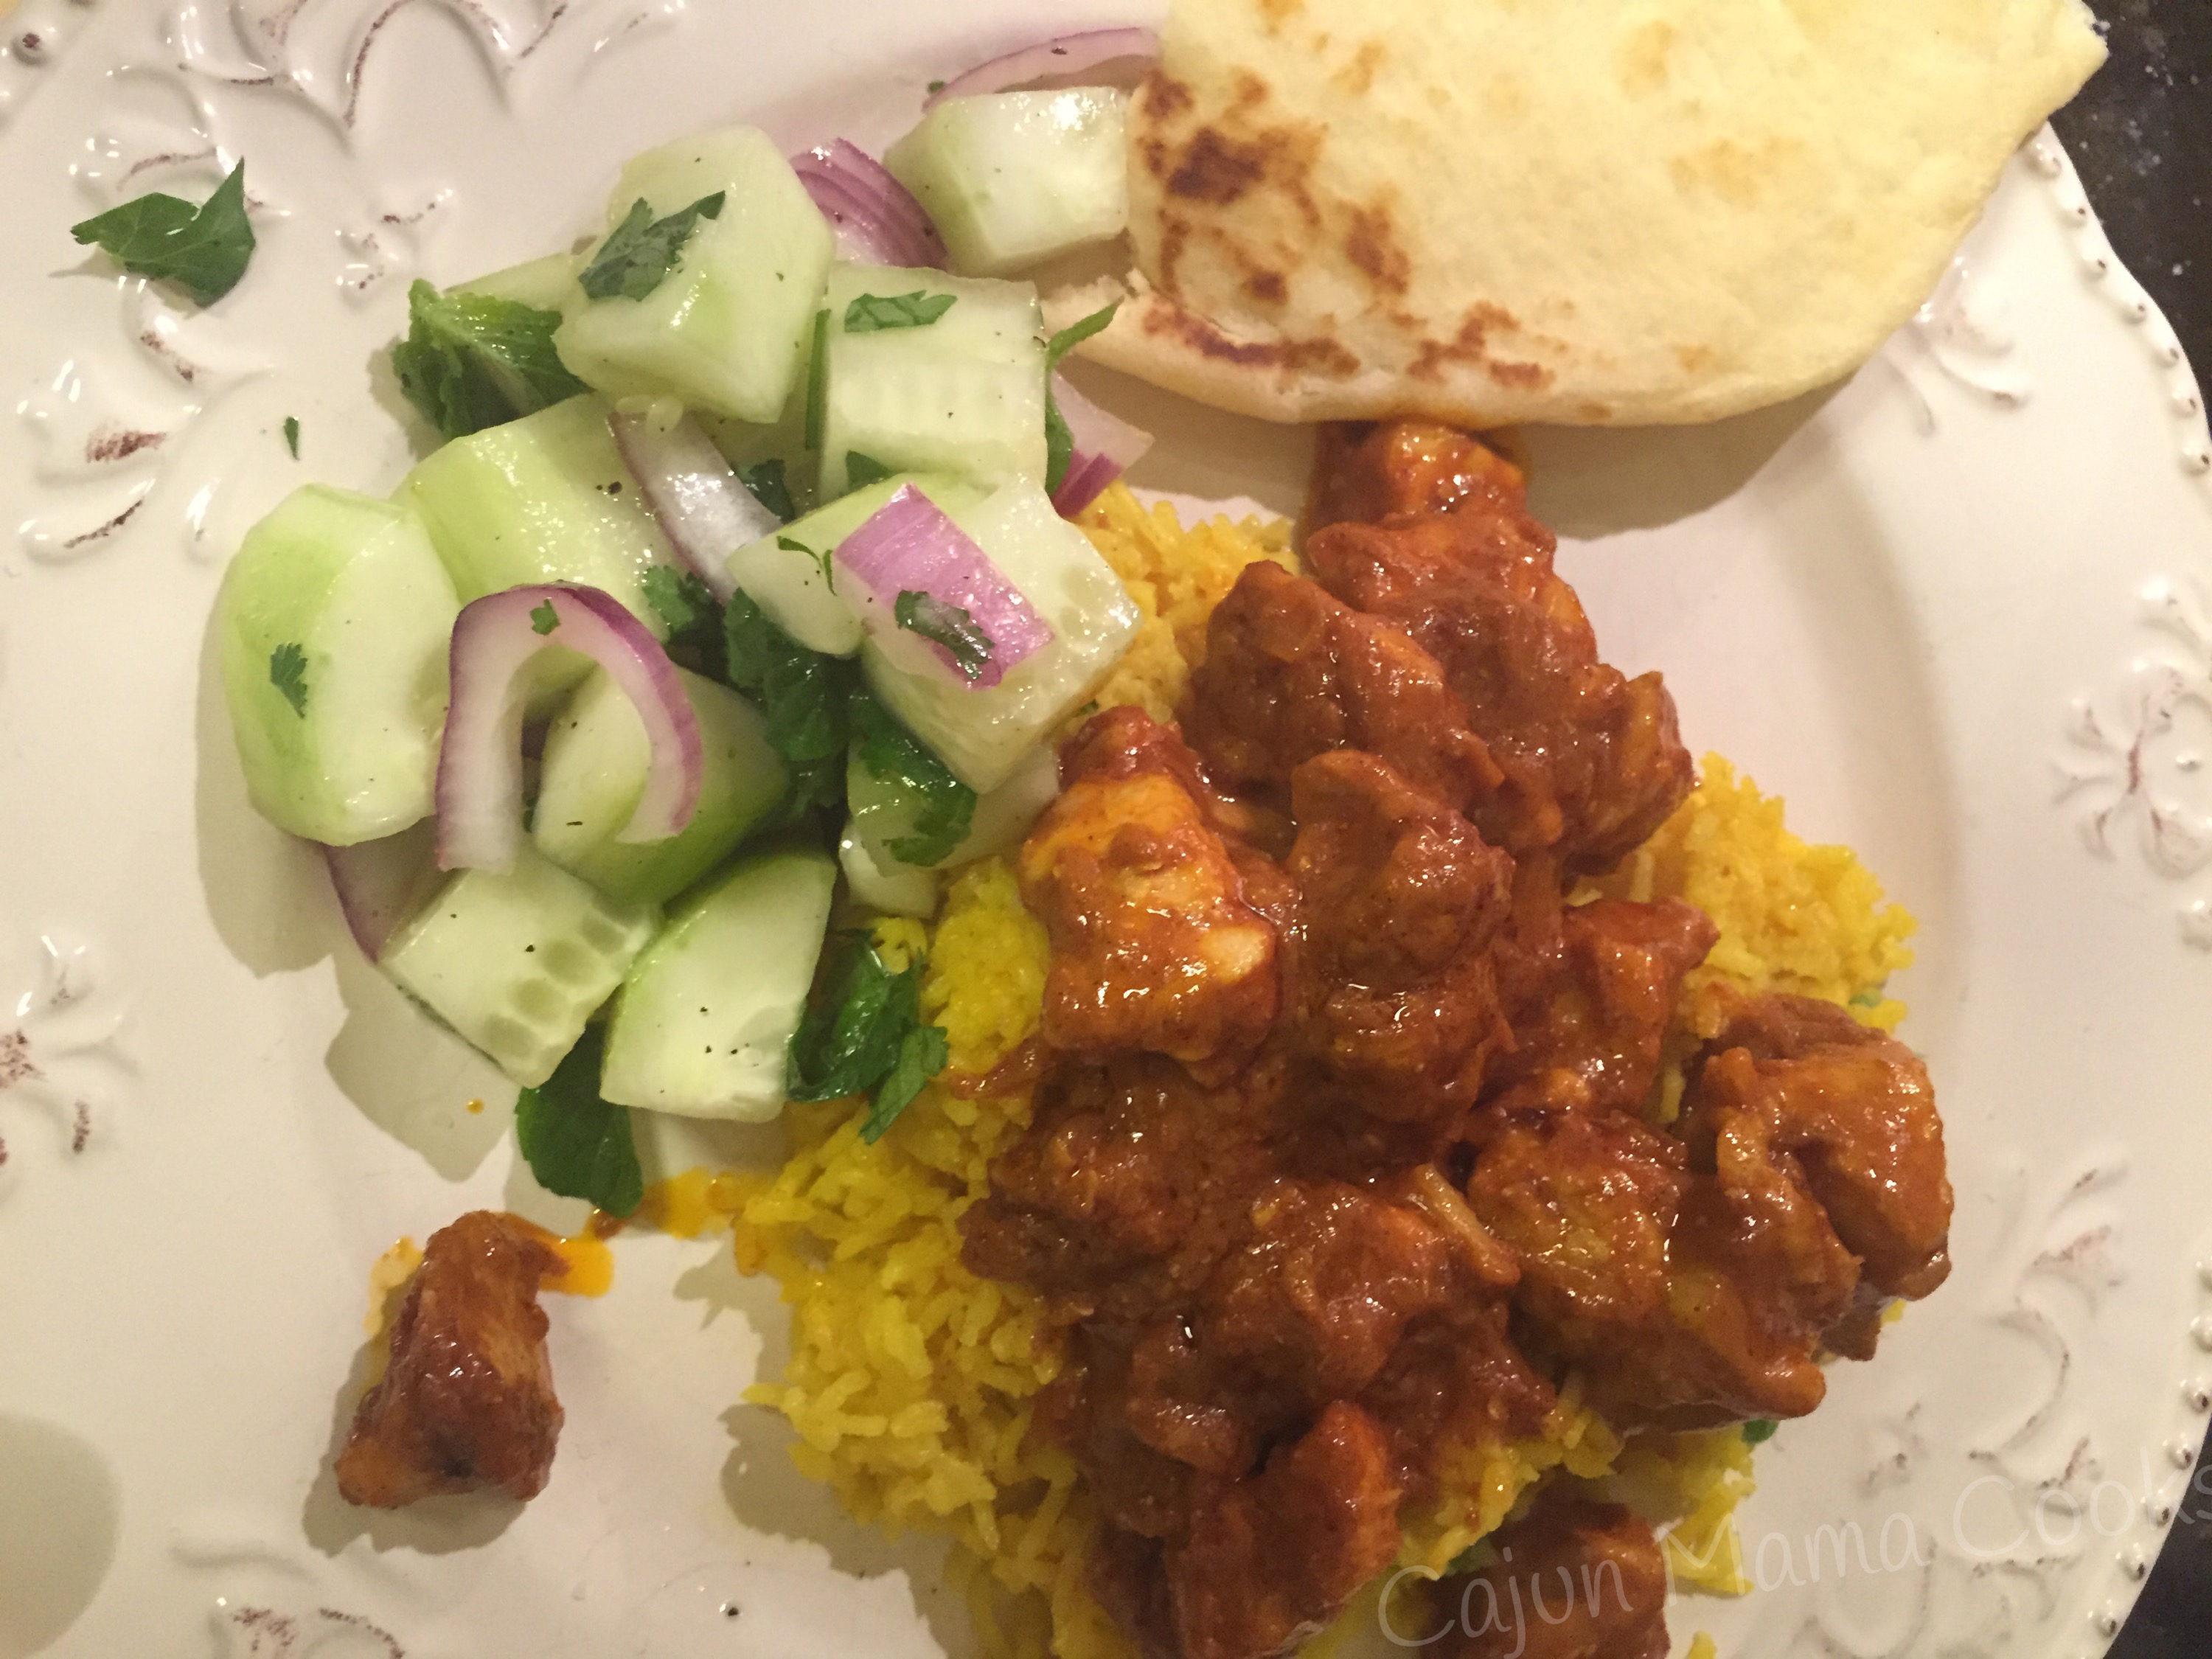
This meal right here. This is the one. I make many meals, I try new kinds of foods and I can honestly tell you all that this is one of my favorites thus far. No kidding. Dead serious. I had to make big daddy sign in blood that he really loved it and enjoyed it before I would share the leftovers with him. Ok I did not make him take a blood oath but I grilled him pretty hard. It’s not hard to make really but I did not double the recipe and I was so sad when it was gone. I usually send leftovers to his office the next day but not this time. Not because I don’t love his coworkers (I totally do ) but because I was not a quite certain they would APPRECIATE the wonder that was this meal. Because it is Indian food some people might be a little (or a lot…I am looking at you, Chris Flowers) leery of such a new experience. Let me say this. I am making this again this week and doubling the recipe. The leftovers were even better because the fantastic melee of flavors had a chance to commingle and make friends with one another. My mouth is watering just thinking of having this meal in front of me again. If you have always wanted to try Indian food but felt intimidated by the notion, don’t be. This is super simple, easy peasy. The ingredients are not even that far fetched. It just requires quite a few spices. Now, I had all of them but I cook a lot. I ordered the ghee off of amazon and it was here in a flash. I imagine world market might have it and you can make it yourself if you are so inclined. It’s essentially clarified butter and can be made at home. The ghee and some of the spices will be the main thing you might have to buy that is out of the norm, but please don’t let that stop you . Anyway, this is absolutely doable for anyone who wants to try Indian food. I have never eaten at an Indian restaurant but I know tikka masala is a very popular dish. The rice and salad are both pretty standard dishes that are pretty commonly served with Indian main dishes. I found the naan at target and it was absolutely fantastic. I saw it at Brookshires as well. It was a perfect accompaniment to this meal. Let me know what you think if you decide to try this. As I said, it is on my top 10 list of most delicious meals I have cooked. Cajun mama went to India and she liked it. Traveling while I stay in my own home…that’s right up my homebody ally. I would love to hear from any of my readers who live in India. Does this vary greatly from how you make it? I know I have a few readers located in India, so feel free to chime in. How close is this to an authentic meal in your country? What’s different?

IMG_2932
ghee = clarified butter in a jar

IMG_2941
I need more of this in my life. I ❤️ tikka masala

Ok first off I am going to tell you how I would prepare this meal to be most efficient. I made it on a weeknight and the heat was on…literally and figuratively. Lol. So first off, get your rice going. Here is what you need…

Basmati rice with peas (adapted from Pioneer Woman’s blog)

stuff you need~

2 cups basmati rice
4 tablespoons butter
1 teaspoon salt
1 tablespoon turmeric
4 cups water
1/2 cup frozen green peas

what to do with the stuff~

Add all ingredients except the peas to your rice cooker. Give it a stir and then turn on rice cooker and let it cook. Do not mess with it. If you don’t have a rice cooker (why?!!), then just cook it in a pot but same thing…let it cook and don’t mess with it. After it’s done, stir in the peas. Mine were frozen and defrosted as they were warmed up by the cooked rice.

IMG_2939
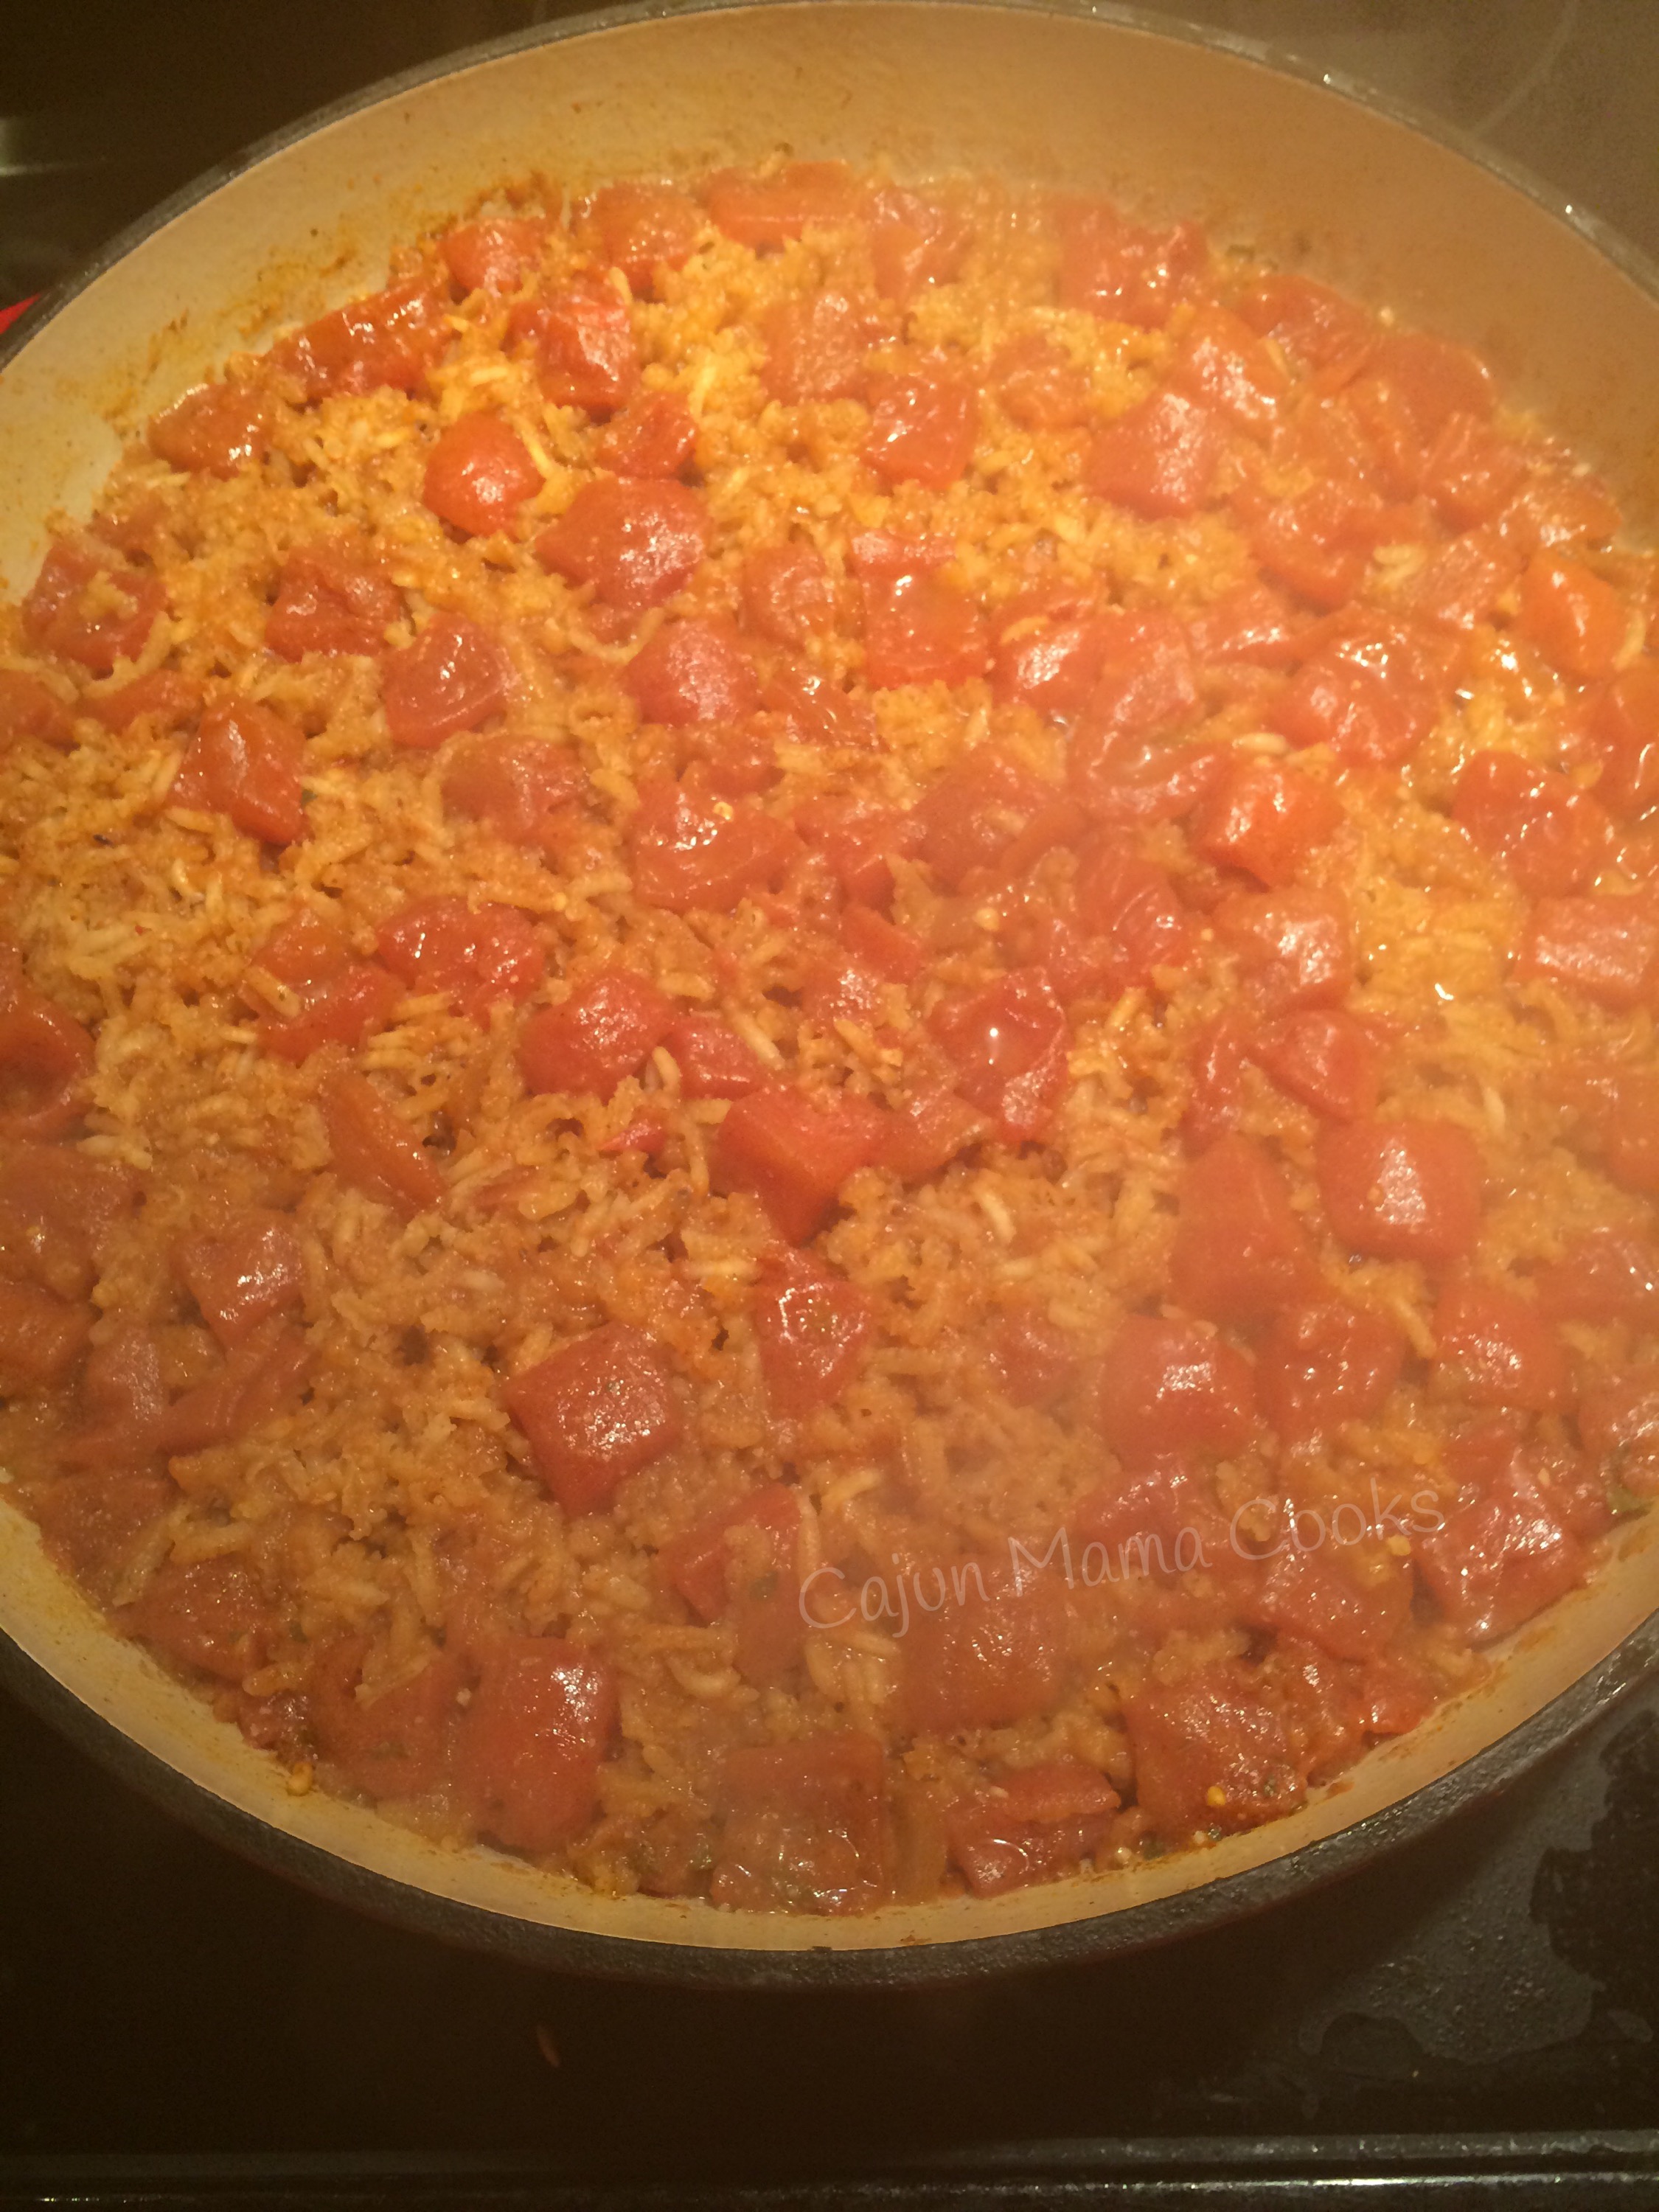
check out how the turmeric turned the rice a nice yellow…this is before the peas

Ok now…the minted cucumber salad can be prepared ahead of time and it gives the flavors a chance to meld together. Just a suggestion. The coolness of the salad from the cilantro and mint is an excellent counterpart to the slight spiciness of the tikka masala. Excellent combo.

minted cucumber salad (adapted from http://www.blueapron.com

stuff you need~

1 cucumber, peeled and sliced
1/2 purple onion, sliced up or cut into mini chunks
A bunch of cilantro, roughly chopped
A bunch of mint, roughly chopped
The juice of one lemon
Kosher salt and black pepper, to taste
Olive oil for drizzling

what to do with the stuff~

Add sliced cucumber and the purple onion to a bowl. Toss in half of the cilantro and mint. Drizzle with olive oil and toss in the lemon juice. Sprinkle with salt and pepper. Give it a stir and taste. Add more salt and pepper if needed. Refrigerate until ready to serve. Before serving, add a little more mint and cilantro. To be honest I used it all at once and I was not sorry. The freshness of the mint and cilantro with the cucumber and onion is a thrill ride. Enjoy.

IMG_2936
simply beautiful and so tasty

Now…for the star of our show! The most fragrant, full of lovely flavors, just spicy enough and fit for an Indian prince…tikka masala to the stars!! I mean…some stars might have tried this recipe, who am I to say they have not?! I have not ever tried another recipe for this but I can say it fulfilled every expectation I had. I will look no further! I had a friend who tried one and it was fancy and it left her hanging. So I think this one is a winner. I found it on http://www.allrecipes.com. Tikka means “little bits” and masala means “spices”. Sure enough! This dish smells so heavenly when it is cooking. My biggest piece of advice is to double the recipe. Just saying.

Curry Stand Tikka Masala

stuff you need~

2 tablespoons ghee or clarified butter
1 onion, finely chopped
4 cloves garlic, minced
1 tablespoon ground cumin
1 teaspoon kosher salt
1 teaspoon ground ginger
1 teaspoon cayenne pepper
1/2 teaspoon ground cinnamon
1/4 teaspoon ground turmeric
1 (14 ounce) can tomato sauce
1 cup whipping cream
2 teaspoons paprika
1 tablespoon white sugar
1 tablespoon cooking oil
4 chicken breasts, cut into bite sized pieces
1/2 teaspoon curry powder
1/2 teaspoon kosher salt, or to taste
1/2 teaspoon white sugar, or to taste

what to do with the stuff~

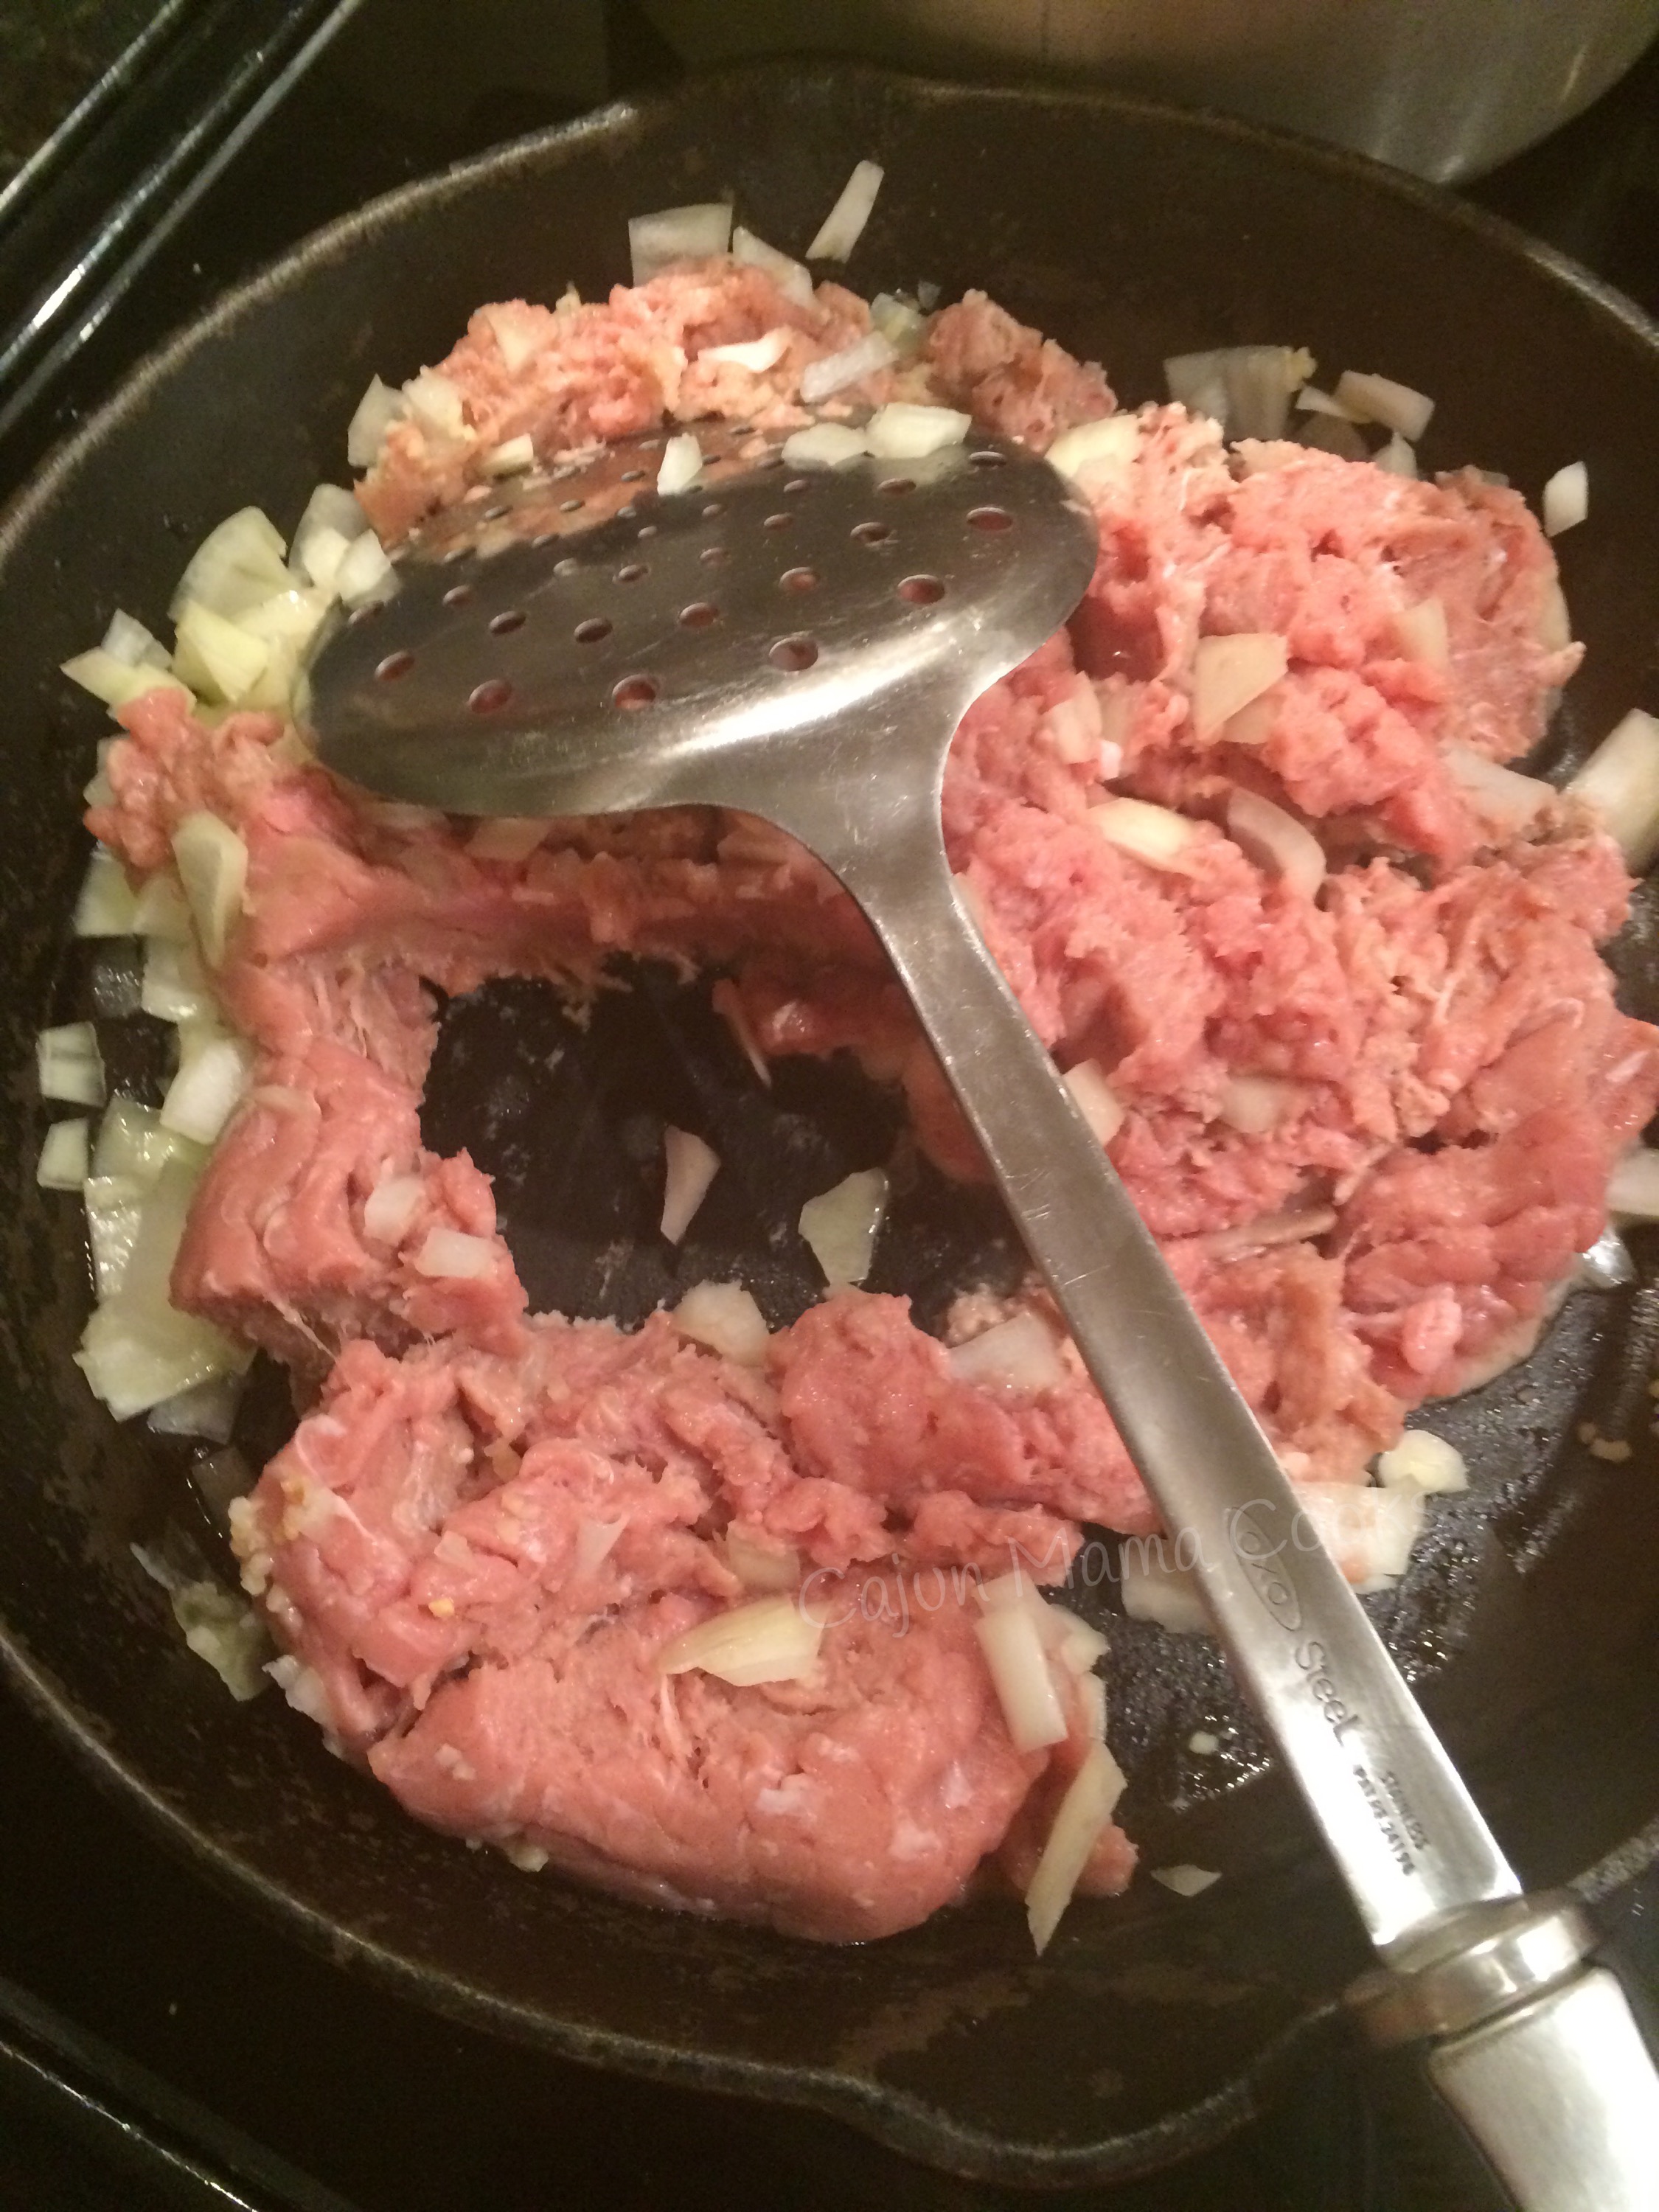
Warm ghee over medium heat in a large skillet. Add the onions and cook until they are translucent. Stir in the garlic and cook another minute or so. You know the drill…when the garlic is fragrant, you are golden. Stir in 1 teaspoon of salt, the cumin, ginger, turmeric, cinnamon, and cayenne. Cook for about another 2 minutes or until fragrant. This will make you salivate and you will know why I love this recipe. Good things are happening ya’ll. Ok…now, whisk in the tomato sauce. Bring to a boil and then reduce heat.

IMG_2934

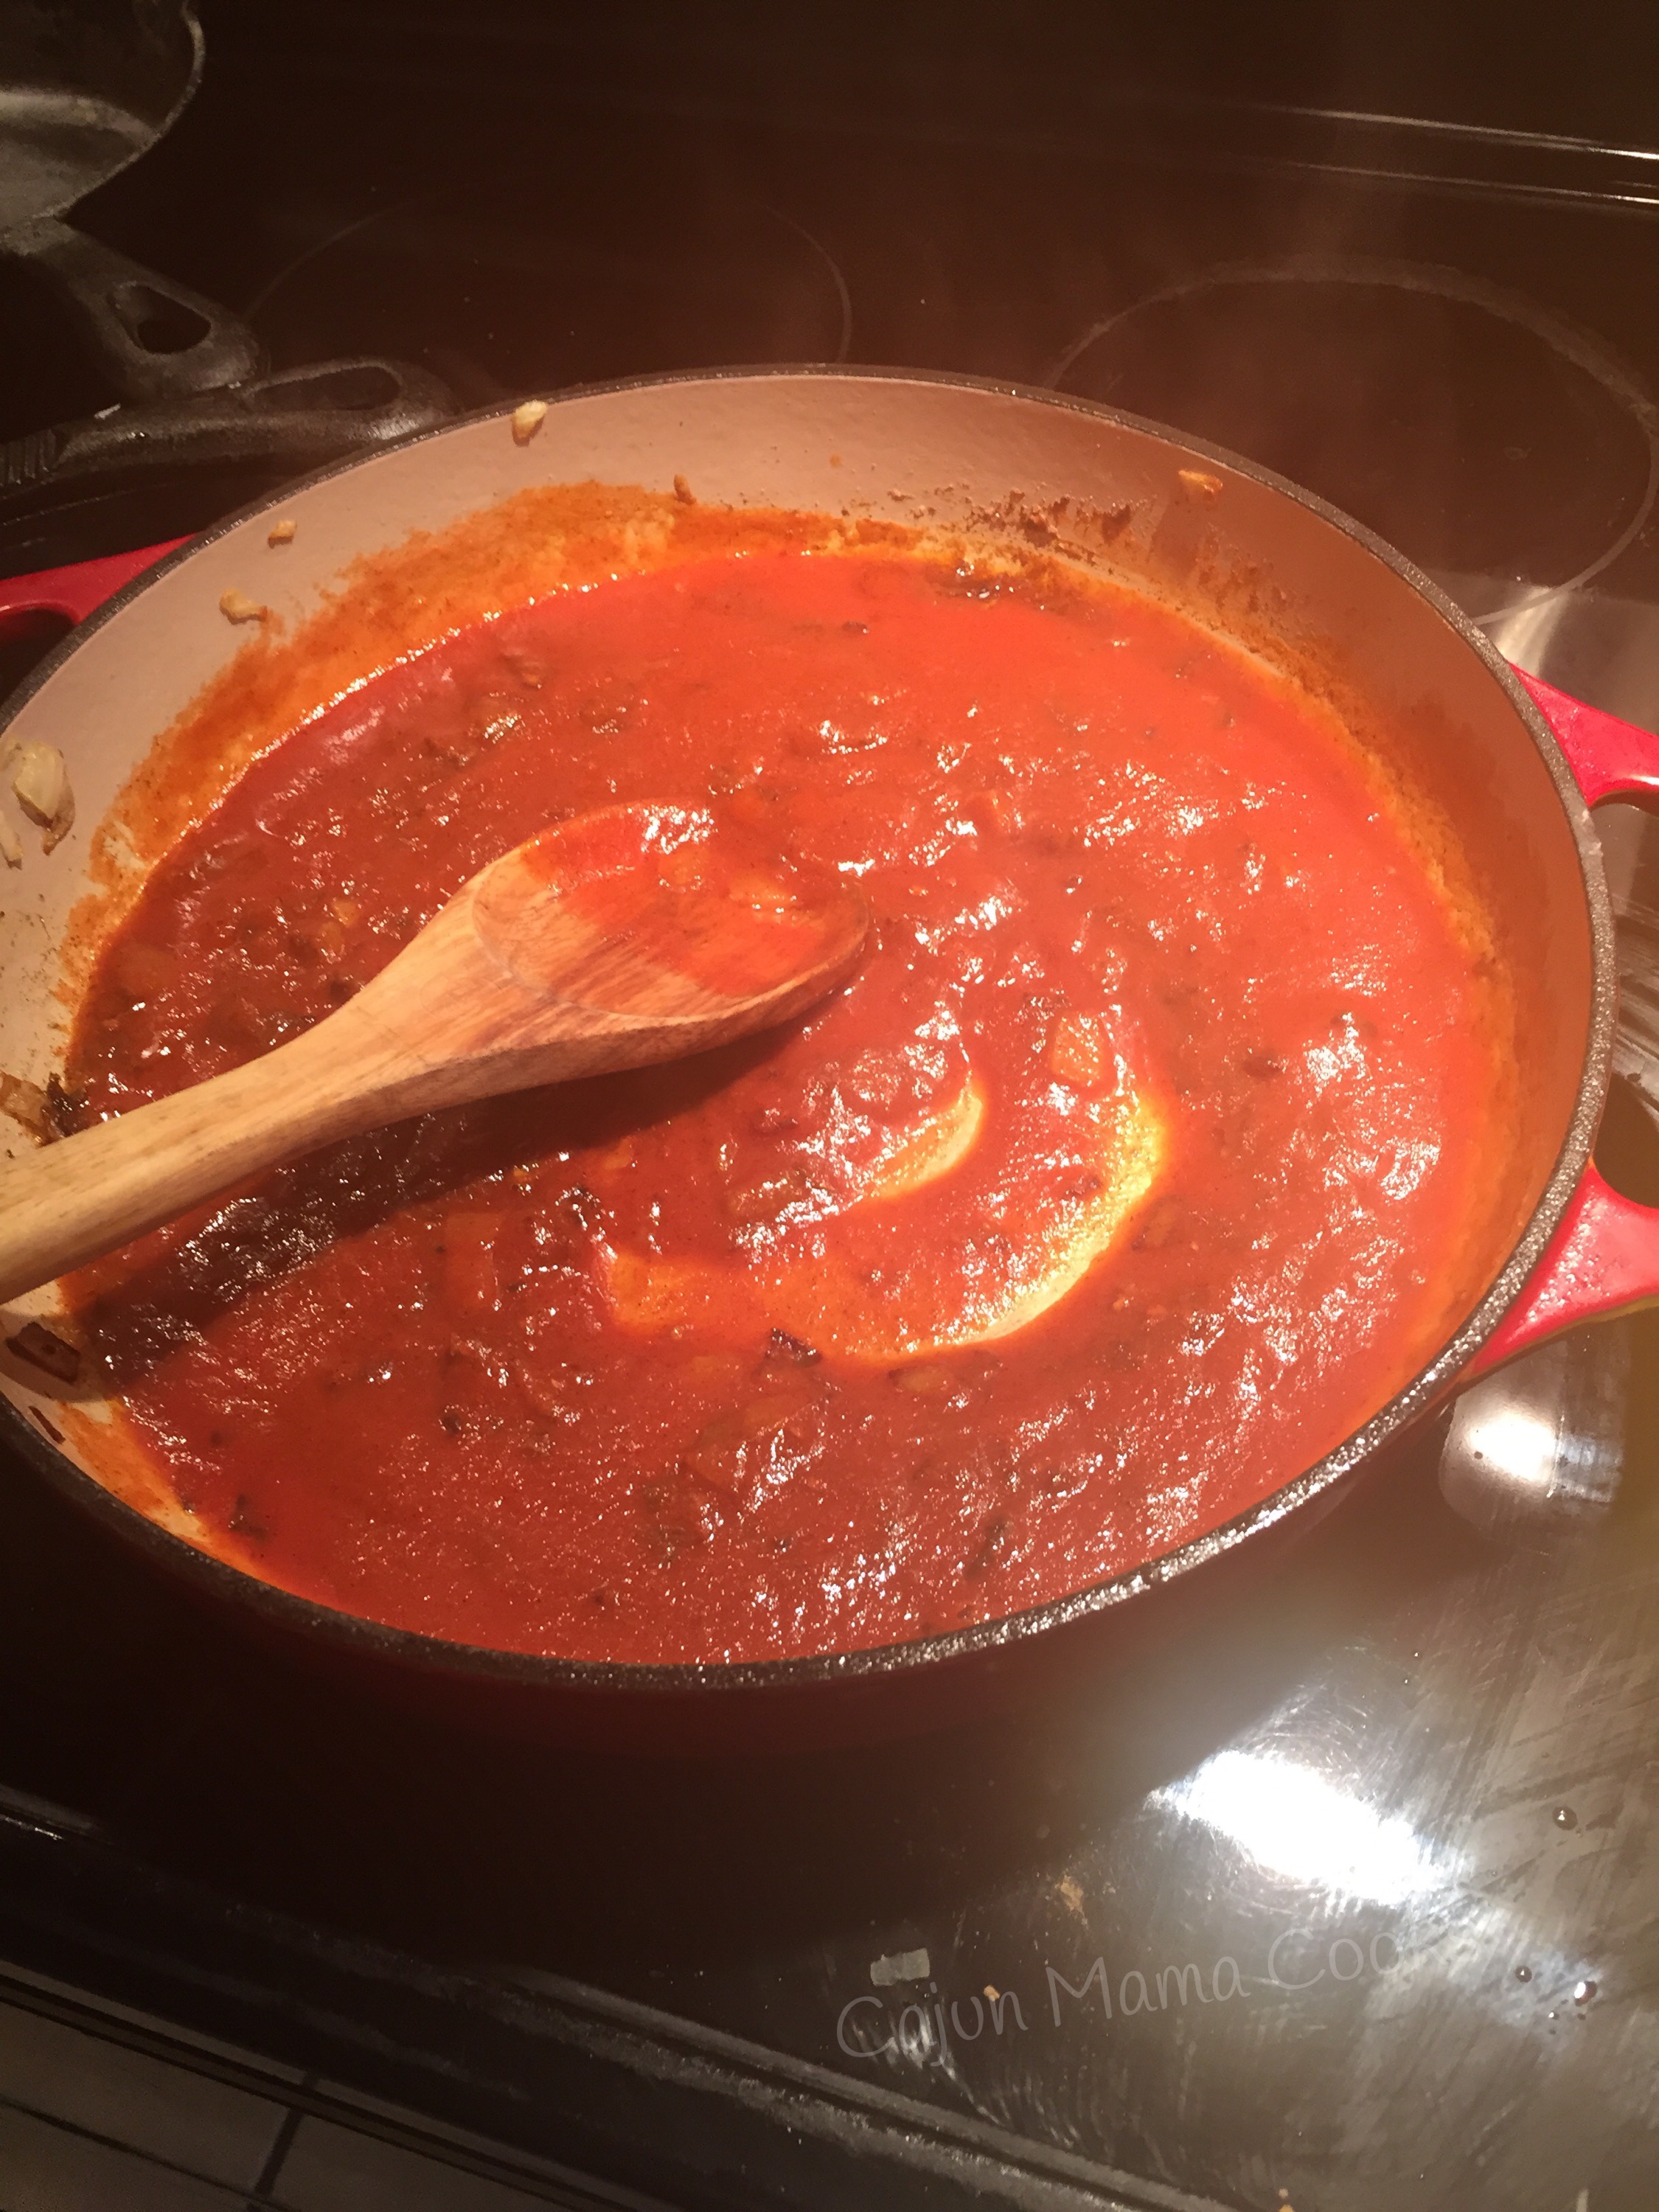
Simmer for about 10 minutes and then whisk in the whipping cream. Stir in the paprika and 1 tablespoon of sugar. Bring this luscious concoction back to a simmer and allow it to simmer another 10-15 minutes, or until thickened. While this is simmering, heat the cooking oil in a separate skillet over medium heat. Stir chicken into the hot oil and sprinkle with curry powder. Working in batches if necessary, cook until browned but still has some pink on the inside. This won’t take long I allow it to cook on one side for a few minutes and then use a spatula to sort of flip the chicken. This gives it a stir fried effect that I like. Do the next batch and then done. Transfer the chicken to the simmering sauce (say that 3 times) and allow it to simmer in that highly fragrant sauce until chicken is no longer pink inside. Adjust flavor by sprinkling in more salt and sugar as necessary.
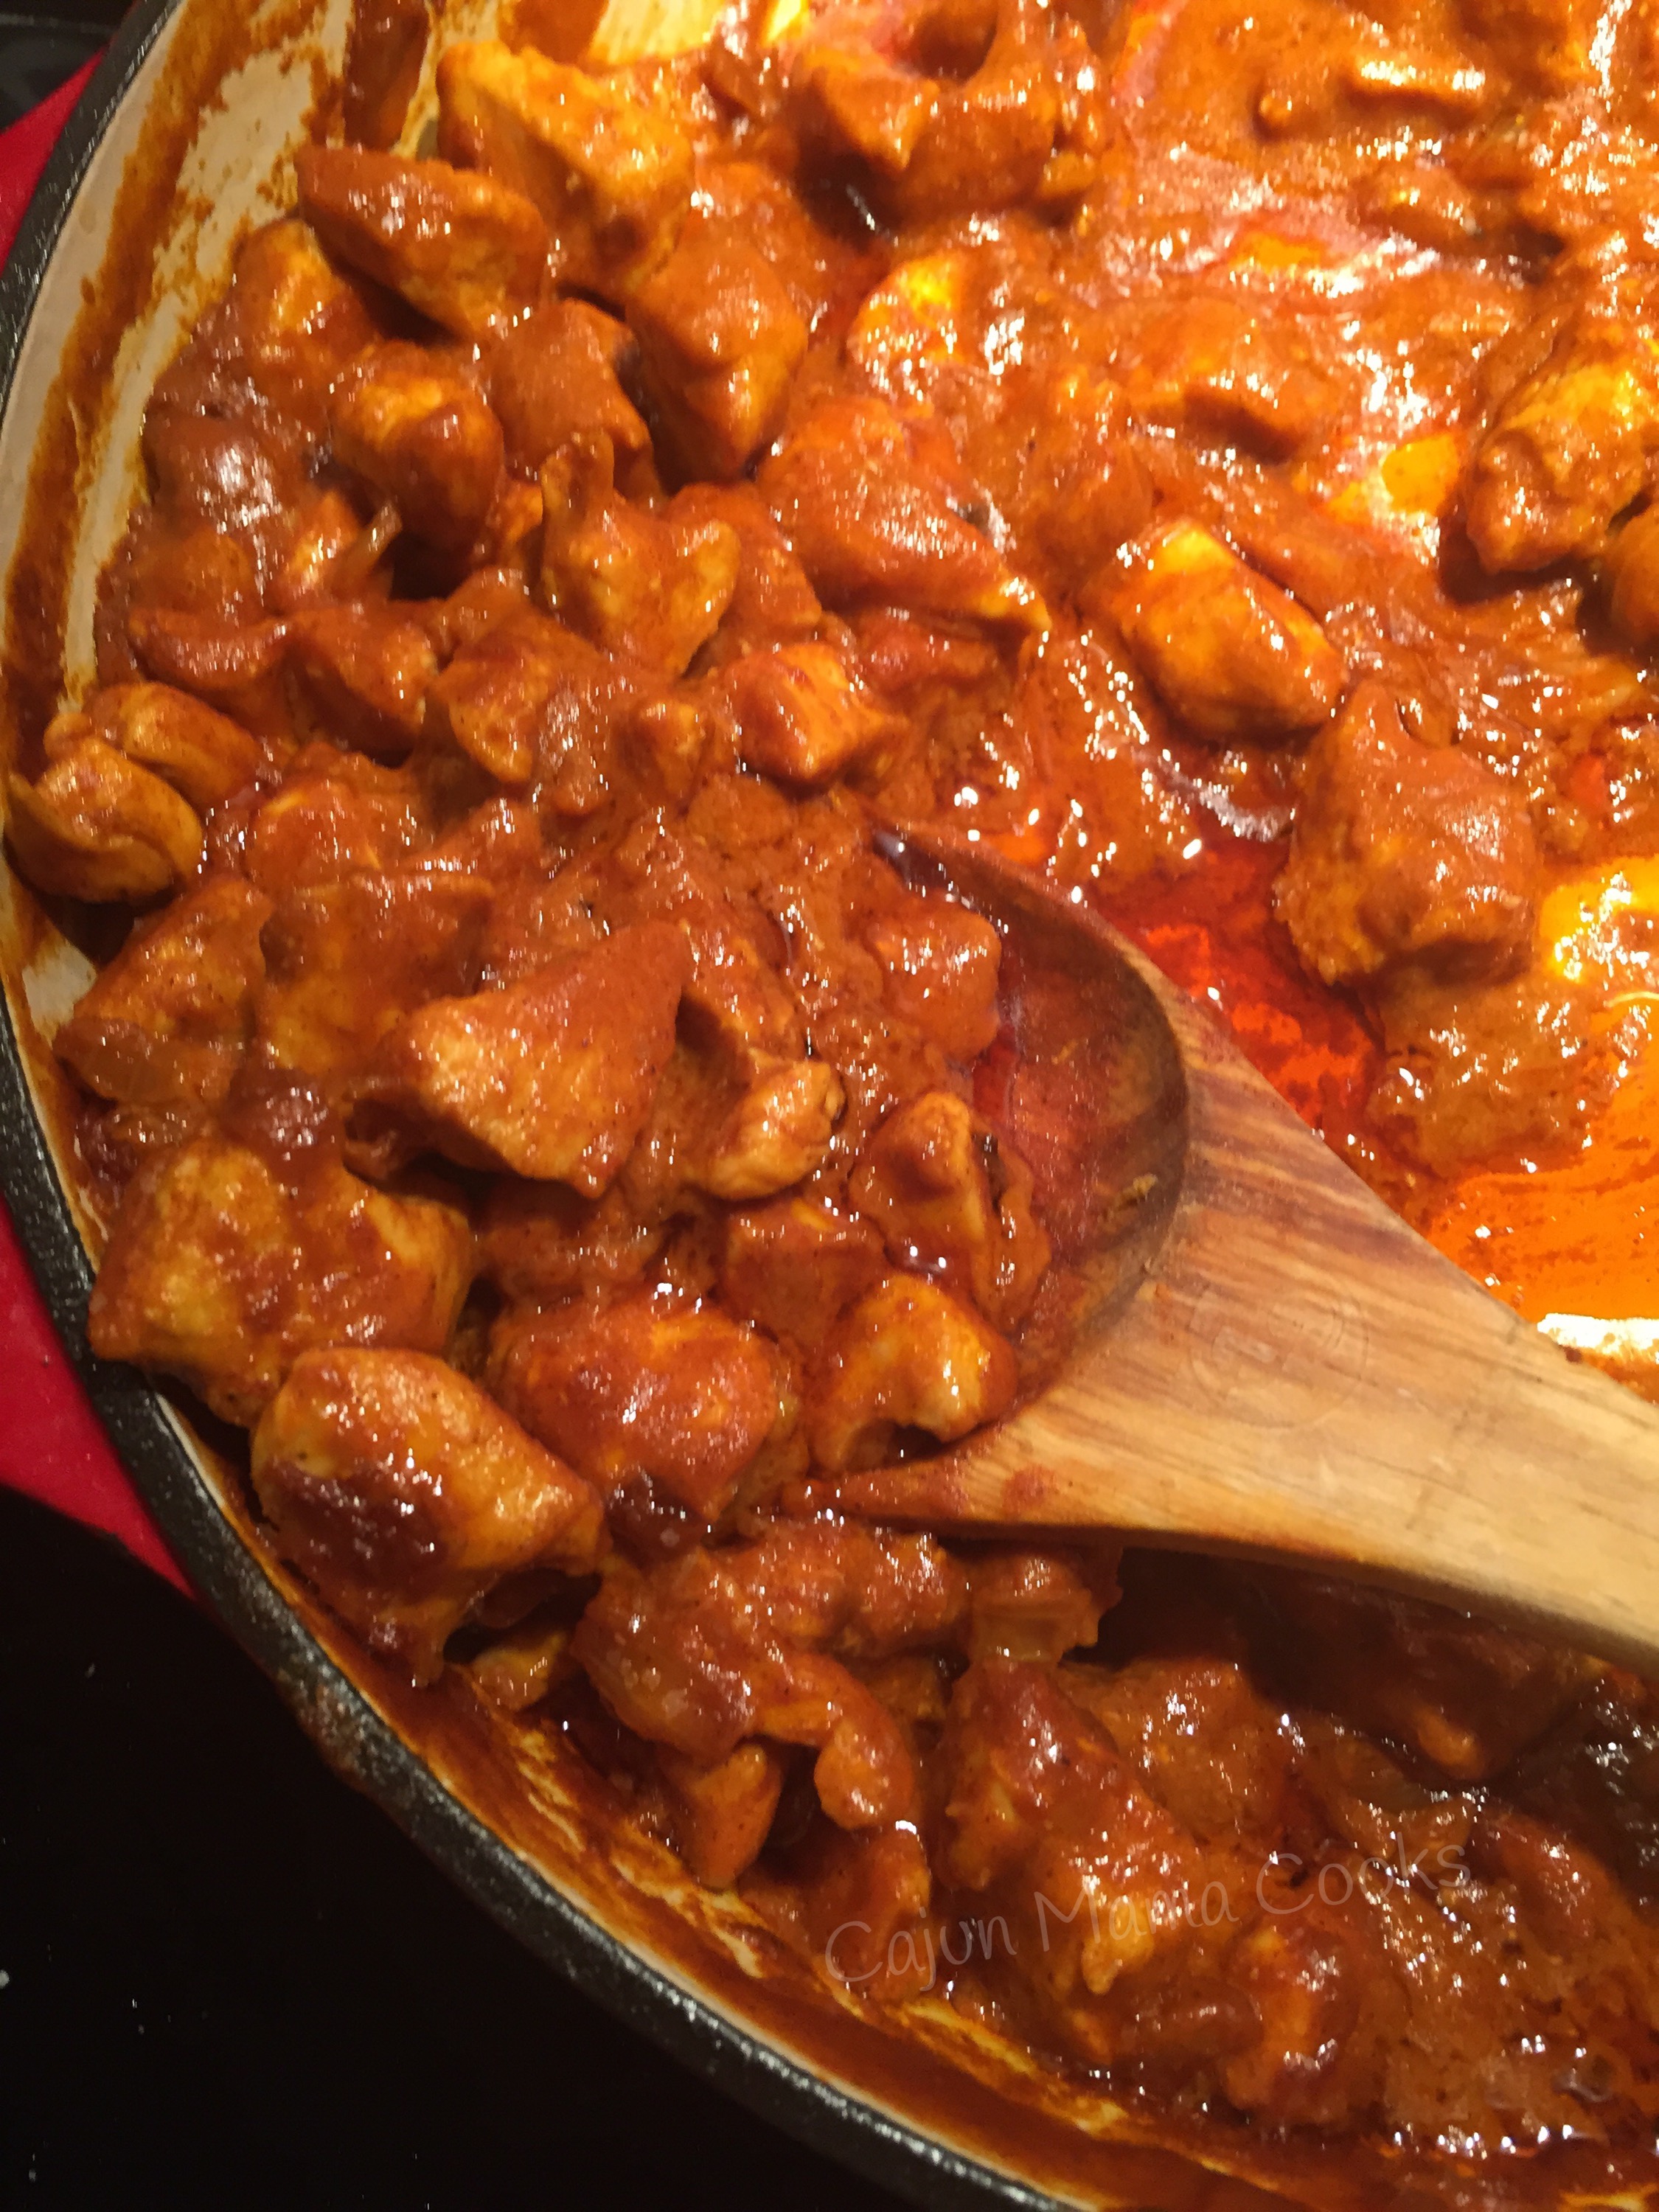
IMG_2937
mouth. Watering.

IMG_2941
I could eat this at least once a month. Maybe more.

Creamy artichoke bruschetta and Louisiana Friday night around here

First off…TGIF ya’ll. Thank God it’s Friday!!! It seems each week I am increasingly eager to get to Friday. There is just something about Friday. Today has been a tad bit gloomy and overcast. It has rained some with a little bit of sunshine mixed in. It’s been a busy week for us and I am just ready for whatever downtime I can get. Trust me, my expectations are low. I am nothing if not realistic. But the weekends have to bring some relief from the harried pace our weeks seem to take on, right? Just nod and back away slowly friends. There is something about Friday, isn’t there? Makes you want to party, celebrate, bow to the weekend Gods. And celebrate we shall. Today, I picked up 7 kids in the carpool line. Yeah…7. It was like trying to fit clowns into a clown car. My life is literally comparable to a circus and I am the ringmaster. It’s an incredibly funny and fitting comparison. So I loaded up my mini van aka swagger wagon with kiddos and backpacks and I toted them home. And then I decided since it was a Friday during Lent, it was overcast and we had a house full of kids that I needed to whip up something creamy and meatless and uber fantastic. That makes total sense, right? Exactly. This creamy artichoke bruschetta recipe that I found on http://www.thecookierookie.com fit that bill. Not only was it a cinch to whip up, it was a hit amongst my fellow circus people. They enjoyed it. The flavors just explode in your mouth. The creamy texture of the topping mixed with the crispness of the bread is simply heaven. It’s a perfect Friday night treat that lets you know the weekend has arrived…pop the top on that Angry Orchard Apple ginger beer or you know…whatever beverage you want.(clears throat) I just chose a beverage at random. Lol. This appetizer, that can totally hold its own as a meal in my book, is a perfect little treat to celebrate the weekend. It’s good to savor that. Hold on to the weekend and make it count ya’ll.

IMG_2840
party like its Mardi Gras ya’ll!! That is how we roll in our circus.

Creamy Artichoke Bruschetta

serves about 10

stuff you need~

1 load French bread, cut into slices
Olive oil
2 (8 ounce) packages cream cheese, softened
1 cup sour cream
1/4 cup mayonnaise
1 (14 ounce) can marinated artichoke hearts, chopped
1/2 cup grated Parmesan (aka what we call shaky cheese…idk)
1/2 cup shredded Parmesan
2 cloves garlic, minced
1/2 cup shredded mozzarella cheese
1/2 teaspoon garlic salt
1 tablespoon parsley flakes

what to do with the stuff~

Preheat your oven to 350 degrees. Place your bread slices on a foil lined baking sheet. Brush with olive oil.

IMG_2830

Bake in the preheated oven for about 8-10 minutes or until bread is nice and crispy.

Meanwhile, mix together all of the ingredients except the mozzarella in your standing mixer or with an electric mixer.

IMG_2833

Spread a generous amount of this mixture over each piece of toasted bread.

IMG_2834

Sprinkle the mozzarella cheese over each piece of toast. Pop it into the oven for about 15- 20 minutes or until the cheese is bubbly and has little browned spots on it. So seriously devilishly delicious. It’s a party for your mouth ya’ll.

IMG_2838
my lovely taste testers approve and rate it totes delish.

IMG_2837-0
you want a piece don’t you?

My girl Trisha’s chicken, broccoli and rice casserole and my real family

This casserole is a huge hit around our house. I have always been a fan of the Campbell’s cheesy chicken and rice casserole but to be honest the rice is not always cooked throughout and nothing like biting into a raw piece of rice to mess up your dining experience. Talk about throw someone off. So as I have found more and more new recipes to cook, I have pretty much taken that recipe out of rotation. But still. My heart yearned for that creamy concoction of rice and cheese, chicken and broccoli. And I wanted to try again…but how? Where will find the perfect chicken and rice recipe? Luckily I have an arsenal of fantastic cookbooks to peruse when such conundrums come up. And let’s not forget about Pinterest. Aka my crack. Aka my kryptonite. Enter in my gal pal (in my own mind) Trisha!! I love Trisha Yearwood’s show on Food Network and I love her music in general. She is just a good ole gal from Oklahoma who loves to cook. I bought her first cookbook before she had a show and I loved it. She has had another come out since that I purchased and has another one hitting shelves at the end of March. You best believe I will be getting it too. I may or may not have already preordered it on Amazon. I really love her recipes and how doable they are. I do love a recipe that challenges me, but most days I want a recipe that is pretty straight forward and get some real food on the table to feed my super real family. Because I am a real tired mama who gets real worn out about supper time after the real bickering between kids and the real homework and all the real laundry. Let’s not get me started on all of the real stuff that goes on here there and in between. Trisha is like most of us, she keeps it real. Get it? Good. So this recipe absolutely fit the bill. The rice was perfect because it was precooked. It was the perfect amount of creamy and flavorful. I used rotisserie chicken and frozen broccoli to cut down on how long it took to prep this meal. It’s an all in one meal that your family will likely enjoy. We fought over the leftovers and I am not even kidding. The kids all had at least one helping and my oldest, aka Mr. Picky, really enjoyed it. And I crave this stuff. So glad it’s been a few weeks since I made it so I can make it again very soon. This will be on our monthly rotation without a doubt.

IMG_2804
a really great cookbook

My girl Trisha’s chicken, broccoli and rice casserole

serves 10

stuff you need~

2 cups cooked rice
3 cups cooked chopped broccoli (I used frozen broccoli that I cooked in the microwave)
1/2 cup mayonnaise
1 cup sour cream
1 tablespoon lemon juice
1 (10 ounce) can cream of chicken soup
10 ounces shredded cheddar cheese
1/2 teaspoon kosher salt
1/4 teaspoon black pepper
4 cooked chicken breasts (again, I used rotisserie chicken breast meat)

what to do with the stuff~

Preheat your oven to 350 degrees. Prepare a 9 x 13 inch dish by spraying it with nonstick cooking spray.
Spread the cooked rice all over the bottom of the baking dish…

IMG_2793

Now make a layer with the broccoli on top of the rice layer…

IMG_2794

In a mixing bowl, mix together the mayo, sour cream, lemon juice, soup, half of the cheese, salt and pepper and chicken.

IMG_2795

Spoon this mixture over the top of the broccoli layer…

IMG_2796

Sprinkle remaining shredded cheese all over this and bake for about 40 minutes. Allow to cool about 5 minutes before serving. Dinner is served for real. And your really hungry family will be really grateful, because this casserole is just so good. ❤️❤️❤️❤️

IMG_2806
oh so comforting and perfect

My really real family. The struggle is real. The joy is real. Cue the pictures…

IMG_2802
my really silly tween being tweenish

IMG_2699
my really real no makeup (as usual) selfie chillin on the porch of the camp. Really happy me

IMG_2801
my really wild child with a new missing front tooth

IMG_2800
my really sassy 8 year old

IMG_2803
our really cuddly pup Roy aka Roozie aka Boozie aka Von Doozie

IMG_2646
my really handsome fellas going out for a hunt at Bayou LaGrue

IMG_2657
my really proud 6 year old with his first squirrel

IMG_2683
my really beautiful girls

IMG_2799
one of my really most favorite pics

skinny shrimp scampi and for the love of noodles…give me some

I noticed that I have only blogged twice this month and it kinda sorta bothers me. I cook all the time and the majority of what I cook is new recipes and my camera has a ton of food pics on it. It has just been slap packed to the gills busy. And no sign of it stopping. So I am sitting in carpool line right now blogging. There has been some sick kiddos (yes again. New virus. Good times.)

IMG_2540

IMG_2545
no sickness can match Roy’s love

Sick kids who got better and had their game faces on which means a nice basketball game for me (he plays rough not fair)

IMG_2541

There’s been some movies (50 shades of spongebob anyone?)

IMG_2543

There’s been some brotherly love

IMG_2538

And there’s been some slap silliness…

IMG_2542
hey silly is good

So when just comes to living life and taking care of the is family God blessed me with…sometimes blogging has to take the back burner. It’s hard for me to concede to this but it is what it is. For instance, I started this post a few days ago and I am finally posting.
This recipe today is a no brainer. It is prepared in a way that you don’t have to feel guilty, but the taste is right in your face. It is restaurant quality delicious but made at home. It’s definitely got of lovely qualities but my favorite is the FLAVOR!! This is real food made with love by you. I actually used this recipe in the January Red River Mom’s issue and I loved it so much I decided to share it on my blog as well. You will turn to this recipe time and time again and it will never disappoint.

Skinny shrimp scampi

Serves 4

Stuff you need~

1 pound shrimp, peeled, leaving tail intact
1 tablespoon butter
1 shallot, diced
2 teaspoons minced garlic
1/4 cup reduced sodium chicken broth
3 tablespoons white wine
Juice of lemon
Lemon zest
Crushed chili pepper flakes
Kosher salt
Black pepper
Whole wheat linguine, cooked al dente
Freshly grated Parmesan (optional)

What to do with the stuff~

In a large skillet, melt the butter over medium heat. Add shallots and cook about 2 minutes or until they are fragrant. Add shrimp and immediately sprinkle with red pepper flakes, salt and black pepper. Sauté shrimp with the garlic until shrimp is pink and no longer opaque, about 3-4 minutes. Add chicken broth, lemon juice, zest, and wine. Bring to a boil and let it continue to let the broth cook down a bit. Remove from heat. Serve over cooked pasta. Grate fresh parmesan over each serving if that is what your precious little heart desires. It’s all up to you darlin.

IMG_2537
for the love of noodles…give me some

Leftover Hambone soup and my mama is smart

So today we shall review how to make the most of a ham. We have discussed the beauty of buying a ham and making it last all week using it 4 different ways. If you buy said ham on sale and then freeze it until ready to use, that makes the whole scenario even more lovely. You know you are your mother’s child when you get excited over getting a deal on a ham, and then get jazzed up over being able to stretch it. I am learning as I approach the 40 that in lots of ways, being my mother’s daughter is a dang good thing. Looking at us you might not see many similarities. She is a teeny tiny French woman and I take after my daddy’s German side of the family. We both have dark hair and the same green eyes. My dad and 3 sisters all have the “Mayeux” blue eyes, but me and my mama have green. That’s pretty special now that I consider it. I am a sensitive soul like my mama too. She is a much nicer person than I am though and she giggles when I get riled up and tell someone off, but to tell the truth, I think I get that from her. I can recall several instances in childhood when she went off (justifiably so) on a grocery store checkout clerk or someone she felt acted inappropriately. Still she is much nicer than me on a daily basis. My mom is way more fun than me and always has been. She has that French “let the good times roll” attitude about her. I take life way too seriously a lot of the time. We both have a perverse sense of humor that makes us crack up laughing at inappropriate things…me and all my sisters have that about us though. So don’t let something unexpected happen in Mass because we would all be laughing inappropriately. So we are different, have had our differences, but we are alike in the ways that matter. I am seeing that more everyday and it makes me smile. I am so glad she passed on her secret of how to stretch a ham to get several meals from it. That’s an art and skill that I will pass on to my kids and today I will pass it on to you. Bernie aka BB would approve…right mama? Now she did it differently than me and that’s ok. I always did love ham week in our household. She would bake that ham as only she can, then Monday make crockpot red beans, then we would ham and egg mcmuffins at some point. Bern is a creative gal I tell you that.

IMG_2446
she plays the guitar like poppee (her daddy) and can cook a boot and make it taste good (as per big daddy)…BB has skills.

IMG_2448
my beautiful and talented mama

Now ok but onto this leftover hambone soup recipe. Again with the soup recipes right?! I know. I have issues. It is what it is. This soup is out of this world fantastic. It is a warm you to the bone soup that is perfect on a blustery windy day. It can cure what ails you. Or at least it sure does seem that way. Big Daddy came in the house last week and was starving after being out seeing customers until past his supper time. He walked in to the smell of this warm you to your bones and some cornbread and he was in. He went wild over this soup. He tolerates my soup psychosis usually but he does not go wild for most of them. This one he did. He was sad when it was gone. It really could not be easier to prep this soup and get it on the table. So read on and learn how you an make it too. Make the most out of that ham ya’ll!!

Leftover Hambone soup adapted from http://www.damndelicious.net

serves 6

Stuff you need~

1 leftover hambone
1 tablespoon olive oil
3 cloves garlic, minced
1 onion, chopped
2 carrots, peeled and diced
1 russet potato, peeled and diced
1 can white beans, drained and rinsed
3/4 cup frozen corn
1 teaspoon dried thyme
2 bay leaves
Kosher salt and black pepper, to taste
2 cups chopped leftover ham

what to do with the stuff

In a large stock pot, cover the hambone halfway with water. Bring to a boil and then reduce heat. Simmer for at least an hour but I allowed mine to simmer longer. Remove from heat and discard hambone. You can also do this part the night before you plan to make this soup.

IMG_2320

Next, in a Dutch oven or large heavy bottom sauce pan, heat olive oil over medium heat. Add onions, carrots, garlic and potatoes. Cook, stirring frequently, for about 3 minutes
And until onions are soft and translucent. Stir in ham stock (I started with about 2 cups and went from there), beans, corn, bay leaves, and thyme.

IMG_2319

Sprinkle in salt and pepper to taste. Bring this to a boil and then reduce heat to a simmer. Simmer over medium low heat until potatoes are tender, about 15 minutes. Stir in chopped ham. Serve with cornbread and you got it going on mop tit (or ma petite for those of you who don’t know that story)!!!

IMG_2477
so delicious

IMG_2479
me, my beautiful mama and sister (and baby Jonah bear)

One of my all time favorite recipes ever…Southern Living Breakfast Enchiladas

Did you read the title? One of my all time favorite recipes. You got that? That is no lie! My family adores baked ham and it is amazing the recipes you can make from the leftover ham. Including the hambone. I will be showing you this week some delicious ways to make the most out of a ham. 4 meals in all. #1 baked ham on a Sunday night is always wonderful then #2 make you a big old crockpot full of red beans and rice on Monday…here is the link for that awesome recipe …https://cajunmamacookinblog.com/2013/06/20/red-beans-make-me-happy/ . #3 make this dish for breakfast. And then I will give you #4 later in the week. A ham might be a little pricey but not when you find one on sale and freeze it for later. This is one thing my mama taught me that I have found useful over and over again.
I discovered this baby back in 2007 when I had 3 kids, 3 and under and somehow managed to still read Southern Living magazine on a semi regular basis. I was clinging to some normalcy I suppose. Determined to still be the quintessential stay at home mom and wife. Before I had baby #4 aka pappy and gave up the ghost completely. I was still trying so hard to believe I could do it all.

IMG_2346
so precious. She did this a lot. But oh a sweet baby girl.

I wanted to. I could not understand how in the world one extra child could possibly throw off the balance so much and change me so completely. I was in bliss having all of these chubby munchkins rule my house, but I was determined I was not going to change. Little did I know how much I had already changed.

IMG_2287

It caused me some hard times. Not wanting to admit that baby # 3 aka Madame Toot aka Goose aka Tootie Belle could change things so much. But sometimes we forget that some things are supposed to change us and there is no going back. And aren’t I glad about that? I really am. Lolly says every baby comes
to us to teach us something, to change us into who we are meant to be. I believe that. Madame Toot taught me to love myself as is. She taught me to judge other moms less. She taught me it’s ok to lose control and sometimes winging it is good enough. That even when things are not perfect and there is no control to be had, you can be happy.

IMG_2288-0

I just wish I had given into it long before I did. I wish I had succumbed to being the overwhelmed mom of 3 small kids. I wish I could go back and tell her, “hey sister, you’re overwhelmed and you are supposed to be. Cut yourself some slack.”

IMG_2292
one of my favorite pics from that time in my life. True love

But I do know now. By the time Pappy came along, I had started to embrace my chaotic life and gave up pretending, faking my way through it, or acting as if it was all the same. My sweet girl with the big eyes showed me how.

IMG_2291
her so precious

The fact that I distinctly remember making these enchiladas and being super proud of myself around the time Goose was about 8 months old, tells me that I was trying hard. And also what a huge accomplishment it was at the rune.. I wanted to reclaim who I was before. I wanted to be able to do all the things I did before…before there were 3, before I was tremendously overwhelmed by life. But I did make them. Somehow I managed to scrape together enough what have you to know “I have leftover ham, this recipe calls for cubed ham, good breakfast recipe…yes, yes I can make these!!! I can make a delicious breakfast. I think I can. I think I can. Babies hanging off of me, one screaming to nurse, but I think I can!!”

IMG_2347
Ah mama is so happy and so overwhelmed. Joyful chaos

Little did I know that the time would come for me to feel more like myself. Maybe not exactly the same because these precious people I birthed have changed me forever. Thank God for that. Now, don’t get me wrong. I am still overwhelmed and I am still tired, a lot of the time, but I made these breakfast enchiladas for the first time in a while today and you know what…it was not the feat that it used to be. Ah gotta love progress albeit small.

IMG_2285-0

Which brings me back to one of my all time favorite recipes that I want to share with you. Ya’ll know I like to take a little detour down memory lane before we get to our final destination. These breakfast enchiladas are one of my favorite breakfast dishes to make. It’s one of those things that you wake up in the morning happy to be alive so you can indulge in this true breakfast delight. The beauty in it is that you do almost all of the prep work the night before and then bake them the next morning. Big Daddy thinks I am a culinary genius every time I make them. You will wow your overnight guests if you serve these in the morning and just in general the people in your life will think you are a brilliant cook whenever they get a taste of these. At least that has been my experience. They will make an exhausted overwhelmed mother of 3 small kids feel like she has her stuff together and she can pull anything off when she pulls these out of the oven, even if only for a moment. Ask how I know? So now for what you have all been waiting for…the recipe!

Southern Living breakfast enchiladas

serves about 10

stuff you need~

2 cups cubed cooked ham
8 eggs
2 cups half and half
10 small flour tortillas
2 cups shredded cheddar , divided (pepper jack is nice too if making for only adults)
1/2 cup chopped green onions
1/2 teaspoon kosher salt
1/4 teaspoon cayenne pepper

what to do with the stuff

THE NIGHT BEFORE…Prepare a 9 x 13 dish by spraying it with nonstick cooking spray.
Next get your work space ready. Tortillas, cut up ham, green onions and cheese. Prepare a place to roll the tortillas. I use a paper plate. Because I am super fancy that way.

IMG_2335

Now, lay out a tortilla and place some ham, sprinkle in some green onions and a little cheese down the middle. Remember to reserve about 1/2 cup of the cheese for later.

IMG_2336

Roll up tightly and place seam side down in your prepared dish. Do this with the remaining tortillas.

IMG_2337

Next, beat eggs and then whisk in half and half, salt and cayenne.

IMG_2338

Pour this mixture over the rolled tortillas…

IMG_2339

Cover with foil and place in fridge overnight.

The next morning…preheat the oven to 350. Take the enchiladas out of the fridge and allow to sit for 30 minutes. Bake covered for 15-20 minutes. Remove foil and sprinkle the remaining 1/2 cup cheese.

IMG_2340

Return to oven and allow the enchiladas to cook for about 20 more minutes or until egg is set. What I do is turn the oven off after 15 minutes and let them finish like that. You don’t want them dried out but you do want cooked eggs. Runny eggs are a deal breaker for this girl.

IMG_2341-0
oh I love this dish!!

IMG_2343-0
that makes a happy morning

One more pic….

IMG_2286
baby girl turns 1 and pappy would be on his way in less than a month.

Copycat boudin king cake

So about a week ago a picture came across my Facebook newsfeed about a boudin king cake. I was all like “hold the phone! A king cake with boudin in it?! Mama needs that!!” So I read the little blurb about the king cakes and the man behind the idea. So let me make sure you all hear me…this boudin king cake is NOT my idea. This is a copycat recipe that I came up with from the description that was in the blurb. I did email the guy asking how to buy one at cake@boudinlink.com as the article suggested. He responded quickly saying he could not handle all the orders and was turning the recipe over to a local bakery to make them. He said he would get back to me. Here is a link to the original article so you can read all about it http://www.theadvertiser.com/story/entertainment/food/2015/01/23/bites-boudin-king-cake-steens-cracklin-now-available/22218135/. But once you tempt a Cajun with boudin king cake, you cannot say “I will get back with you” because well…the damage has been done. It’s out there. Boudin. Inside of dough. It’s all I could think about. I was obsessed. So luck would have it, we were already headed down to Baton Rouge last weekend and my favorite place in the world is on the way. Yeah. Borques. We went on down to Baton Rouge because Big Daddy and several other Farm Bureau agents were being honored for being part of the 200 auto club. That’s an amazing achievement and I was happy to drop them kiddos off with their BB and Poppy in Alex. And head south. A night out at a hotel?! Sign me up! And we got to stay in the Renaissance Hotel that has the wallpaper in the bathroom I have been dying to get my hands on! No really, I have emailed the company who makes it. A friend stayed there and posted a pic on Facebook and I have been pining after it ever since. So I was stupid excited to stay there. Big daddy was like “yeah ok you want to stay here because of the wallpaper in the bathroom…whatever makes you happy babe.” (I know in his head he was like “I married a crazy lady.”)

2015/01/img_2148.jpg
it has Cajun colloquialisms written on it! I need that!

2015/01/img_2152.jpg
me and my main squeeze all gussied up to celebrate!!

2015/01/img_2149.jpg
so proud of Big Daddy!! He works for a great company that rewards their agents for their hard work.

Ok…so we had our night out and then it was time to head home to have lunch at my mom and dad’s. Bernie made smothered chicken and rice and gravy. My favorite! My mom is an amazing cook I must say. So we headed north but on the way home Big Daddy surprised me with a detour through Port Barre to go to Borque’s Supermarket. You can check them out online at http://www.bourquespecialties.com. I truly love this place and it always feels a little like going home. Funny thing is, while we were there getting our boudin, I tell the woman at the counter that I was making a copycat boudin king cake and she says she had just answered a phone call from someone asking to order one. She said the person calling thought they had them. Lol!! But they do have boudin dip in case anyone wants to know that. That place is my Disneyland.

2015/01/img_2150.jpg
oh that’s a happy sight to me

2015/01/img_2151.jpg
me with my loot. Some boudin for the king cake (and a few links for the road!), some cracklins and a Mr. Pibb. I was a happy girl!!

So we made it home with our posse in tow. I love getting away but I sure do love coming home, especially to these little faces…

2015/01/img_2165.jpg

Ok…to get to this copycat recipe. The one I made was not hard and I am sure a very simplified version of the original. I do not claim that mine tastes like the original. I am just trying to figure out to get some since I could not order one. This recipe is not hard and requires few (though specialty) ingredients. I did not use steen’s syrup because I had some Lambert’s cane syrup from our summer trip to the beach. Also, I used frozen store bought dough because I don’t do yeast. If you have been reading along , you are aware that I summon a demon when I try to use Yeast.
This boudin king cake was off the chain and I can only imagine how the original recipe must taste. But…for a Cajun girl living in Shreveport, this recipe will definitely get me by. If I make another one, I will head to Bergeron’s Boudin and Cajun meats. We got one in Shreveport a few years ago and while my heart belongs to Borque’s, I am totally down with the saying “if you can’t be with the one you love, honey love the one your with…” Especially when it comes to boudin. They have cracklins too so that’s a good option for those too. If you are so inclined, try your hand at this culinary delicacy. It’s just in time for Mardi Gras season!!

Copycat Boudin King Cake

stuff you need~

One roll of frozen dough (it comes in a package of 3)
4-5 links of boudin
Cane syrup
A few cracklins run through the food processor

2015/01/img_2153.jpg
the dough I used

what to do with the stuff~

Night before, take the dough out of the freezer. Lay it out to defrost.

Ok…the next morning…preheat your oven to 350 degrees. Sprinkle a bit of flour on a rolling mat.

2015/01/img_2154.jpg

Next roll it out into a semi square. I was not picky here, I just kind of made sure it was big enough to encompass all the boudin. I would say about 6 ” by 12″ or round about. Cut a slit in the boudin and scoop out all the boudin.

2015/01/img_2155.jpg

Lay all that boudin in the middle of your rolled out dough. I laid the boudin almost the length of the dough. Next time I will likely use a link or two more.

2015/01/img_2156.jpg

Now, bring the dough at the top toward the boudin. And then roll again.

2015/01/img_2137.jpg

Roll towards you until you have a roll of dough. And then bend it into an almost closed circle. Like the shape of a King cake.

2015/01/img_2136.jpg

Next lay your king cake on a baking dish. I used by Pampered Chef baking stone and it did not disappoint.

2015/01/img_2157.jpg

Slip it into your preheated oven and bake for about 20 minutes. While it is baking, place your cracklins in your food processor. I just tossed the whole cracklin (several of them) in the processor. It made a lot of noise but it did a good job at knocking the crumbly parts off and processing them into bits. I pulled the still solid parts out and then pulsed a few more times. You don’t need a bunch of the cracklin crumbs.

2015/01/img_2159.jpg

Now, after the first 20 minutes of cooking, pull your King cake out and baste with the cane syrup. Really coat it well. Your King cake is depending on you!!

2015/01/img_2161.jpg

Bake another 20-30 minutes or until the King cake is well browned and that cane syrup is sticky and baked to a nice golden brown. Pull from oven and sprinkle those tasty cracklin crumbs all over the cake. Hot damn we did it!!!

2015/01/img_2162.jpg

Big Daddy’s request: Lemon blueberry layered pie and I aim to please

The other day Big Daddy, love of my life, man who drives me bananas, my partner in crime and my babies’ daddy was thumbing through my All Recipes Magazine and came across a recipe that looked good to him. He rarely does this and just gladly eats whatever I make. Now in the past he has mentioned in passing that he had the envie for a blackberry cobbler, I make it and he forgets to eat it. Yeah that has happened. But still, he’s big daddy and I aim to please my man. Sometimes. When he is not annoying me. Which really could depend on the day or hour, because we are married and I am tired and we don’t live in a bubble. Ha ha!!! Truthfully I do aim to please when I can and he does not usually ask for much. He works so hard and takes good care of us and he deserves a pie if that is what he wants. So of course I was all over making him that pie asap. He cut that recipe out and I stuck it in my purse so I could get the ingredients on my weekly (ok triweekly…ok dang it sometimes daily) trip to Target. I collected the stuff I needed and a few days later (there was a delay called life) I set out to make my man a pie!! It was a success and he LOVED it! He raved about it. If the way to a man’s heart is through his stomach, he is mine all mine forever.
It was super easy to put together and the colors make it a shoe in for your upcoming spring soirees. So make someone happy today and make them a really effortless pie that will yield high praise for you. Also you make someone feel loved and valued. And that’s how you stay married. Lol! I wish it was all that easy but it dang sure cannot hurt.

2015/01/img_2126.jpg
we kiss and it amuses or disgusts our kids. I am just glad to have him as a partner on this journey through life.

Lemony blueberry layered pie

Stuff you need~

1 (8 ounce) package cream cheese, softened
2 teaspoon lemon zest
1/4 cup fresh squeezed lemon juice
1 (3.4 ounce) package instant lemon pudding mix
1 (14 ounce) can sweetened condensed milk
1/4 cup powdered sugar
1 (21 ounce) can blueberry pie filling
1 (9 inch) graham cracker pie crust

What to do with the stuff~

In a large mixing bowl, combine the cream cheese, condensed milk and powdered sugar. Mix in with your standing mixer or electric mixer for 1-2 minutes, until smooth and creamy.
Blend in pudding mix, lemon zest and lemon juice.
Spread half of the blueberry pie filling into the bottom of the pie crust. Spoon the lemon cream cheese filling on top and spread to cover the pie filling. Speed the rest of the pie filling over the lemon cream cheese mixture. Cover and chill for at least an hour. Overnight is best. Enjoy!!!

Processed with Rookie
the way to a man’s heart…

Copycat Taco Bell Mexican Pizza and it all matters…

I know, I know…another recipe for Mexican food!! I told ya’ll we likey our cuisine de Mexicana around here in Cajun mama’s kitchen. Since the Taco Bell in Alexandria opened more than I care to count years ago, the Mexican pizza has been a favorite of mine. Not something I indulge in often, but I love them. My oldest (aka the picky one) is getting into trying different kinds of foods and loves a copycat recipe. He is into restaurant chains and I knew recreating this recipe at home would peak his interest. I know I make it seem like we never eat out and bless our hearts, we have to eat at home, but the truth is, I prefer to save our out to eats for big restaurants. The little fast food splurges here and there add up fast with 4 kiddos to feed. Plus I really like to challenge myself to try new recipes so this was a win win. Oh ya’ll this recipe is so good. So dead on. So close to the actual Taco Bell Mexican pizza that you will swear you can hear the Taco Bell chihuahua whisper “yo quiero Taco Bell”. And I after you try this recipe, you will want Taco Bell Mexican pizza more often.
It has been a regular week around our household. I got a new hairdo…which is really no big feat except when you figure everyone has been sick and finding a time when my amazing hair stylist can fit me in that I am not needed elsewhere and I can still make it to carpool in time…well it’s like trying to reinvent the wheel. The kiddos had their awards ceremonies at school for the 9 weeks. I am so proud of them and am glad I get to be there for them, but I was literally at their school from drop off at 8 until 11. I really cannot remember what all else this week entailed, I just know many times I was short on patience, long on exhaustion and in need of space for creativity. Time to think my thoughts, get a few recipes together and maybe even bang out a few blog posts. Big Daddy has been busy at work and that has meant little help on the Homefront, but you know…that comes with the territory.
And that’s where I get to the meat of this post. The taco meat that is…he he he. This is my calling, part of my path. Raising kiddos to become productive members of society is a big job and sometimes I lose sight. I get swept up in $$$$. What I do does not really hold importance because there is no money in it. Then I see the light. I get stopped in a moment on the way to school, I catch a glimpse of my oldest’s son’s face filled with empathy and pride as he talks about a situation at school that he handled and processed the deeper meaning all on his own. My daughter as she expresses satisfaction with who she is. Picking up my sweet girl and her telling me about reaching her AR goal. Seeing the recognition dawn on my little one’s face as he gets that math problem. Man these kiddos…they are really learning and growing. I lose sight that though my little ole cooking blog is small potatoes compared to another, it matters to some people. When someone comments on my blog and expresses excitement about a recipe that I posted, I smile because maybe my words made a difference to someone. Or when Big daddy finds a recipe for a pie he would like me to make and I do make it for him. Sure, I know moms everywhere who work 9-5 jobs and manage to do all of those things. This is not about that. This is about me fulfilling my purpose that God has laid out for me. I am working on remembering that I am in no competition with anyone but myself because I am my own worst enemy. Aren’t we all? So for me, deciding to make something for supper I know one of my kids or all of my kids will love, maybe that’s my calling. Being me. It’s so important that we all stop and breathe and realize where we are is where are meant to be. It’s always changing, evolving, but in this moment is where we are supposed to be. It’s all divine. It’s all a part of a bigger picture that maybe we cannot see right now. Those copycat Mexican pizzas made on a Friday night might become that memory my kids cherish forever. What I do matters. What you do matters. We just have to do it. It all comes back eventually and the puzzle pieces will fit
together. Just my two cents…for what it’s
worth.
Back to Mexican pizzas…this recipe is awesome. I found it on http://www.food.com and tweaked it a bit…seriously a yum filled experience people. Add it to your culinary bucket list. Here is the recipe for your viewing pleasure…make up a batch and maybe even make a memory. In the end it’s the little moments that matter… What you do matters. Make the most of what YOU have!!!

2015/01/img_2032.jpg
Stuck in carpool traffic on a rainy day selfie. I love these kiddos

2015/01/img_2034.jpg
new hairdo and a lovely photobomb by two of my favorite people

Copycat Taco Bell Mexican pizza adapted from food.com

makes 4 pizzas

Stuff you need~

1 pound lean ground beef
1 package taco seasoning mix
2 tablespoons water
8 small flour tortillas
Cooking oil
1 16 ounce can of refried beans, warmed*
Taco sauce or picante sauce
I cup Shredded cheddar cheese, Monterey Jack or any blend you like
1/4 cup diced tomatoes
1/4 cup green onions
Small can sliced black olives (I absolutely love black olives so I added them…totally optional)

*I used the leftover homemade refried beans I made using the recipe from my last post. I happened to have some and it was a good way to use them up. Here is the link to that post…

Cheesy Spanish rice casserole and the best refried beans…and for the love of Mexican

what to do with the stuff~

Ok, first add your ground meat to a large skillet. Sprinkle in the seasoning mix and your 2 tablespoons of water. Using a spoon kind of mix that together and then brown the ground beef until completely cooked. Set aside.

2015/01/img_2035.jpg

Now, add enough to cooking oil to your skillet to cover the bottom and then a little more. Your oil should be about an inch deep. You don’t need much. Heat the oil over medium hear and then cook each tortilla for about 30-45 seconds on each side. Take special care to keep tortillas as flat as possible while cooking and pop any bubbles that may form. I laid a few paper towels on a cookie sheet and laid each freshly cooked tortilla flat once it was done.

2015/01/img_2036.jpg
Now, this is the easiest part. Turn your broiler on the lowest setting. Or you can use a toaster oven. On a large baking sheet, lay out 4 cooked tortillas . Spread some refried beans on each, then ground beef and add some taco sauce on top for good measure. Pretty sure Taco Bell uses this pretty liberally on their Mexican pizzas. Yum.

2015/01/img_2038.jpg

Follow up by laying a cooked tortilla on top of each of these half assembled pieces of heaven. Top each pizza with a nice smattering of cheese and then add a sprinkling of your choice of tomatoes, olives and green onions. The great thing is that each person can make it their own. Take the cooking sheet filled with Mexican pizzas and stick it under the broiler for a few minutes or until the cheese is melted.

2015/01/img_2039.jpg
yo quiero homemade Mexican pizzas!

2015/01/img_2041.jpg
I found this at a local grocery store and figured it couldn’t hurt to try it. Very good. Just the right blend of spices (said Benny Boo, my 11 year old food critic)

2015/01/img_2040.jpg
If Benny boo likes it, you can rest assured your picky eater likely will too. This meal is 11 year old approved.

Cheesy Spanish rice casserole and the best refried beans…and for the love of Mexican

So around our house we are Mexican food fanatics. No really. Every birthday dinner my Goosie girl has had has been celebrated at her favorite local Mexican restaurant since she was…oh about 3.

2015/01/img_1943.jpg
the Goose’s 6th birthday. celebrating over Mexican food.

2015/01/img_1944.jpg
new cowgirl boots, a doll, and Trejo’s…she turned 7 in style!!

And the rest of them are just as bad. It’s the one thing our opinionated, loud mouth family of 6 can agree on. We love Mexican food. It’s a no brainer that I would want to recreate some of our fave Mexican dishes at home. With 6 people in our family and me being a stay at home mom, eating out is not a regular occurrence in our home. I mean…we do eat out, don’t get me wrong, just not weekly. I found these amazing recipes while scanning through Pinterest and I am so glad I listened when I said to myself “self, you should make these recipes!!”. I am smart and clever and have really good ideas…when I actually am able am able to finish a thought. And then retain it long enough to make use of it. And the moon is blue. See what I mean? Anyway, enough about my bad memory due to popping out all these kiddos. Let’s get back to Mexican food. Yum. This Spanish rice casserole from http://www.mommyskitchen.net came to together so dang fast it was almost criminal and the refried beans from http://moneysavingmom.com were seriously so easy and the best I have EVA tasted and mama knows her refried beans. I can tell ya’ll this….my two oldest kiddos had science fair projects due and we’re finishing their boards and while the meltdowns and hissy fits (mostly mine) ensued, I was able to get this meal on the table. Yeah…that makes it so tops in my book. If you adore Mexican food and long for that authentic Mexican flavor without having to go out (except to buy ingredients now)…give these two recipes a go.

2015/01/img_1945.jpg
working on science fair project boards…this was earlier in the day when we all had our composure.

Homemade Refried Beans (adapted from Money Saving Mom)

stuff you need~

1 bag of dry pinto beans, that have been soaked in water overnight)
3 tablespoons of butter
1 onion, diced
5 cloves of garlic, minced (2 1/2 teaspoons of the jarred stuff)
2 1/2 teaspoons cumin
2 teaspoons sea salt
2 teaspoons paprika
1/2 teaspoon chili powder
1/2 teaspoon black pepper

what to do with the stuff

Okay, assuming that you have soaked the beans overnight in your crockpot …drain the water you soaked them in and then add fresh water to cover the beans. Cook on low for about 6 hours or so. I used my smaller crockpot for this and this was fine.
Now, after the beans have cooked and are soft….in a heavy bottomed large saucepan, melt the butter. Sauté the onions until translucent and then add garlic towards the end. Next, using a ladle, ladle your cooked beans (about 4 cups) Into the saucepan, along with some of the liquid.

2015/01/img_1948.jpg

Sprinkle in all of the seasonings so crucial to giving these beans that authentic, straight from your favorite Mexican restaurant flavor. Allow them to simmer for about 20 minutes. Now…I used my immersion blender to get the texture I wanted. At this point you can do the same, just stick that immersion blender in your pot O’ beans or you can put them in the blender or you can use a good ole masher. I like some texture to my refried beans so I did not blend them much. Do your thing and make them the way you want.

2015/01/img_1950.jpg

You can serve these beans with some warned tortillas on the side and a good green salad or you can go all out (aka full Mexican) and prepare this cheesy Spanish rice casserole…

Cheesy Mexican rice casserole (adapted from Mommy’s kitchen)

stuff you need

1 tablespoons canola oil
1 1/2 cups of long grain white rice
1 can chili ready diced tomatoes
1/2 cup salsa or picante sauce
1/2 teaspoon ground cumin
1/2 teaspoon onion powder
1/2 teaspoon garlic powder
1/4 teaspoon Mexican oregano (I used regular dried oregano and it was just fine)
1 teaspoon chili powder
4 cups reduced sodium chicken broth
1 pound ground beef or ground turkey (I used ground turkey…yum!)
1 small onion, diced
1 clove minced garlic
1 8 ounce package shredded Mexican cheese blend
Fresh cilantro for serving (crucial! It made this dish for me!)

What to do with the stuff~

Preheat oven to 350 degrees. In a large skillet, heat the canola oil over medium heat. Add in rice and stir constantly as it turns a golden brown color. You want most of the grains of rice to be a toasty brown. This takes about 5 minutes. Stir in the tomatoes, salsa, chicken broth and all of those spices. Bring to a boil and reduce heat. Cover and allow to simmer for 15- 20 minutes or until all the liquid is absorbed. It will look just like this…

2015/01/img_1946.jpg

Meanwhile, while the rice is simmering in those spices and liquid, brown your ground meat and onion and garlic in a large skillet until onions are translucent and meat is fully cooked.

2015/01/img_1947.jpg

Stir the meat into the rice skillet. Cover with shredded cheese blend and bake until the cheese is all bubbly and yummy looking (you know what I mean right?). Sprinkle with chopped fresh cilantro. So good ya’ll…I mean seriously Mexican restaurant worthy.

2015/01/img_1949.jpg
“have mercy!!” said in Uncle Jesse’s voice from Full House

2015/01/img_1989.jpg
now she is 8 and likes to kick back while mama makes up some Mexican dishes. That’s how sister rolls!

Delicious food that is simple and real.