All posts by cajunmamacookin

Welcome! My name is Aimee aka Cajun Mama. I am from Alexandria and my family's roots are deep in Avoyelles Parish. I love where I am but I love where I'm from and I love to tell you all about it . I am a wife, mom, sister and teacher! I love to cook meals my family loves and I enjoy sharing family recipes with you all. I live in Shreveport now and I am blooming where I'm planted. I love sharing stories about my family and the foods we love with our Shreveport friends and my coworkers. Nothing makes me happier! I also love spending time with my family, taking trips with my 3 sisters, and snuggling with our two dogs, Roy and Millie! I'm so glad you're here and I hope you enjoy my stories and recipes!

Oreo Balls

Ok now some people call these Oreo Truffles.  I admit that does sound fancier.  But when my sister, Jenny, offered me one for the very first time, she called them Oreo Balls.  So it stuck.  My kids ask for them by name…Oreo balls.  And so it is.  These things are so tasty and a wonderful addition to any dessert buffet.  Perfect party treat.  They can be easily packaged into cute gifts.  Teacher appreciation gifts?  Put them in a clear treat bag, make a tag that says “It’s been a ball being in your class!!” , punch a whole in the corner and tie it to your treat bag with some colorful twine.  It’s in the bag…literally!!  They are superb treats for your neighbors, especially if you are into ding dong ditching.  You can use vanilla candy quick and put the food coloring of your choice in and voila…yummy, edible party favors that go with your color scheme.  I could go on but I know ya’ll want me to get on with it already and so I will.  You can use vanilla candy Quik, white chocolate chips, chocolate candy quick or semi sweet or milk chocolate chips.  I am working on a mint variation right now.  Mint oreos with those limited edition Nestle mint chocolate chips.  I will let ya’ll know.  You really truly can do almost anything with this recipe.  Make it your own!!  Now that the lovely people at Nabisco are offering so many different varieties of Oreos, the options are nearly endless.

Oreo Balls

Ingredients

1 8 ounce package cream cheese, softened

1 package Oreos, crushed

1 package candy quik or 1 package chocolate chips

Directions

Now, I use my food processor to crush my Oreos.  You want them to be ground until they are almost like sand and the food processor works perfectly.  I get that not everyone has a food processor or wants to get it out for this task, so you can also put them in a gallon size Ziploc bag and take a rolling pin to them.  This also works great for getting rid of some pent up aggression.  Unless you don’t have any…if that is the case, you can bring them to me and I will crush them for you.  I have plenty of pent up aggression…kind of makes me wonder why I missed the opportunity to smash cookies with a rolling pin?  Hmmm…need to consider this next time.  Anyway, once this is done put your cookies crumb sand into your standing mixer bowl or a regular mixing bowl along with the softened block of cream cheese.  Mix away until it is well combined.

Watermarked Photo (1)

This is how your mixture of cream cheese and cookie crumbs should look

Now, you are going to make them into uniform balls.  I just take a spoon and scoop some up and roll it into a ball.  Line a cookie sheet with parchment paper and place your balls on parchment paper a few inches apart.  Now, melt your candy quik according to package directions or put your chocolate chips in a microwave safe bowl and microwave for 30 seconds at a time, stirring in between each round until they are melted.  Taking one ball at a time, roll in the melted candy quik or chocolate chips.  I will tell you, this can get messy.  Place each dipped ball back on parchment paper once you are done until each ball is covered.  If you want, you can put some sprinkles or mini chocolate chips on some or all of the balls.  It gives them a little added texture and makes them look especially festive.  My kids like them plain, so I usually do half and half.  Put them in the fridge over night or for several hours at least, to cool.  Get ready to make more because they will disappear quickly.  Big Daddy says these are “tasty” and he is not usually a dessert person.

Watermarked Photo

Oh luscious Oreo balls…how I love thee…

Watermarked Photo (4)

The plan was to have some left for the man in red…yeah…there is one left.  Onto plan B.

Fairfield Grocery Chicken salad and Blooming where you are planted

Blooming where you are planted.  That is easier said than done.  When I moved to Shreveport and got married after I graduated from my Master’s program, I got a job.  I met some wonderful ladies, many of whom I still treasure a close relationship with many years later.  It wasn’t hard to make friends because I went to work everyday and I had lots of adult conversation.  The real test of blooming where I was planted came after I had a few kids.  I was a new mom with a 10 month old and pregnant with baby number 2 and we lived in the country with very few houses anywhere near us.  A precious lady we called Mama Kate lived next door to us and she took me under her wing.  Her granddaughter in law and I had babies a few months apart and we became friends.  It was very nice and I look back on those times with so much fondness.  Still though, something was missing.  After baby number 2, now referred to as Kayla Ann, came along, my feelings of wanting something more (not instead mind you because that is not how I roll.  I don’t replace, I just add on) grew.  We bought our first house in Shreveport in the middle of a great little neighborhood.  I would push Ben and Kayla in the double stroller through that neighborhood several times a day.  I was lonely and longed for adult interaction.  I met a few ladies on the street and of course we ended up getting to know one another.  Days became weeks and weeks turned into months, time passed as it tends to do and I had baby number 3.  Aka Madame Toot aka Aubrey Dianne.  So now I was the woman with 3 kids, 3 and under.  I was tired.  I was overwhelmed.  I was still lonely.  Now a few posts ago, I told ya’ll about my precious baby sitters and their mom.  Those relationships are a product of me walking up and down our street, getting to know the neighbors.  Their grandmother lived on that street and she encouraged them to come down and offer to babysit.  For that, I will always be grateful.  That small gesture changed my life.  Well…after we had a good stride going and I felt like I was handling 3 babies…Madame Toot turned one and I had stopped nursing her and felt like I could leave her more.  So Big Daddy and I went out to dinner and had a few drinks.  Well…a few weeks later we found out that we were expecting baby number 4!  Wow!  My mind was blown.  Say what?  I was going to have 4 kids under 4?!  Holy cow?!  How would I do that?  I wasn’t prepared for such a feat, as happy as I was with the news.  But my sister Lisa would remind me, God does not called the equipped..he equips the called.  And he did.  So here comes baby number 4…my precious Lucas Mayeux.  My little caboose.  I was overjoyed.  I had my sitters and their mom and a few other friends…but now I was the mom with 4 kids.  4 and under.  I felt like a 2 headed circus freak everywhere I went.  I was, to say the least, overwhelmed.  My oldest started kindergarten at our wonderful gem of a neighborhood school and the girls were in MDO at a local church.  One day, in early December, things started to change.  I met a fellow circus freak named Alexis who I refer to as Lexie B…she had 4 kids too (she has 6 now ya’ll!)  And I got to know other moms with several kids and we banded together like a pack of circus freaks and started to have girls’ nights.  Collectively we had close to 30 kids.  This bonding with fellow mommies of a bunch of kids did something for me.  I felt my roots starting to get comfortable in the soil I was in.  Maybe just maybe, the transplant shock was wearing off and my roots were growing.  Again, time passed.  Because of my friends, my awesome mommy friends who understood me and helped me see the beauty and humor in all of the chaos and liked me just as I was, I felt less isolated.  I began to find my footing as a mommy of 4.  There was no shame…it was pretty dang great come to think of it.  I was made for this life.  It only got better from there.  Sometimes when we can’t see ourselves in an accurate light and when we see ourselves through the eyes of our friends who love us and cherish us…we catch a glimpse of how they see us.  It changes everything.  We start to reach out…we start to feel worthy of those friendships and give back.  That little flower that was weary and withered has blossomed into a lovely bloom…fitting in quite nicely in its own special way.  Now, today, all 4 of my kids go to that wonderful neighborhood school.  I am no longer the overwhelmed mom of one kindergartner and 3 little ones who has no time to join in and get involved.  I am no longer isolated.  In fact, some days I wish to be able to hide and be isolated.  Then I remember how I hated feeling invisible and I smile.  I have come full circle.  It puts in perspective and I am perfectly content to be just where I am.    The teachers, parents and staff at that school are family.  You know on how on the Cheers theme song it says “sometimes you want to go where everybody knows your name…and there always glad you came?”  That is how I feel when I am there.  And many other places in this town that once never felt like it could be home.  A place where I could hardly find my way around and felt so foreign.  Where I stood out like a sore thumb.  Somehow, some way, through some God given miracle…that has all changed.  And when I see another mom looking like she may feel like a foreigner…I am always happy to learn her name and bring her in.  Because I never want someone else to feel the way I used to if I can help it.

Now we come to the chicken salad…I was getting there all along.  Ya’ll know I like to talk.  Today as I was processing how I would give discuss this chicken salad in a way that you all would understand the significance, I was able to see how it all fit together.  Hence the above story.  So, in my son’s class, there was this precious little red headed girl.  Sweet as can be and would always give me a big hug when she saw me.  I had never met her mama…I had seen her around some but we had never met.  Well last year that all changed.  I met her.  She was a precious as her little girl and I knew we were meant to be friends.  Her family has a restaurant in Shreveport called Fairfield Grocery.  I never knew she had a connection with it, but I LOVE that restaurant.  I love their chicken salad.  I owned their cookbook.  This place is fantabulous ya’ll.  If you are not from here, don’t live here and come to visit…you need to eat there.  The blondies are to die for.  The grown up grilled cheese is ah-mazing.  The chicken and dumplings will make you want to cry they are so good.  It is wonderful.  The restaurant is so quaint and cozy and it has a very family like atmosphere.  The other day, I decided I needed to make up a batch of Fairfield Grocery chicken salad.  Big Daddy and 2 of my kiddos absolutely LOVE it.  I wondered as I made it…could I blog this recipe?  I needed permission as I would never just post a treasured recipe without permission.  So I called my precious friend and asked.  She gave me her blessing.  So I am sharing it here today.  The cookbook is awesome and you should order a copy if you love cookbooks full of delicious recipes.  It also gives some back history on a wonderful Shreveport establishment.  When you are in the area, you should definitely stop by.  It is off of Youree Drive in the Shoppes at Bellmead.  Here is a link to the Mr. Menu site which tells you a little about it and the menu http://mrmenu.biz/bossier-shreveport/menu/fairfield-grocery-market-cafe/.  Anyway, with the holidays coming up, this chicken salad is great to have around.  It makes a ton so it is really good to make if you will have a house full of hungry visitors.  You can eat it as a sandwich, with crackers or as Aubs like to do it…with a spoon.  It really is wonderful.  It is amazing how so many wonderful things can transpire in just a few great years.  Lifelong friends are made, kiddos grow up, life gets a lot busier but in many ways a tad easier, mommies find their footing (only to lose it again later…but let’s not get into that), and life moves right along.  There is beauty in that.  Friends become family and what once was unfamiliar becomes home.  New recipes that once seemed daunting become family favorites you could make with your eyes closed.  I am grateful for all of those things.  And I am so glad to be able to share this recipe with all of you.


Image

This picture does not do this chicken salad sandwich justice…me oh my. 

Fairfield Grocery chicken salad 

Ingredients

5 pounds of chicken breasts

1 cup celery

1/4 cup red bell peppers

1/2 cup water chesnuts

6 tablespoons purple onions

1 1/2 teaspoon salt or to taste

1 1/2 teaspoon white pepper or to tsste

1 1/2 teaspoon cayenne pepper or to taste

1 quart mayonnaise, give or take some…they suggest Hellmann’s and I use that or Duke’s

Instructions

Cook and shred chicken.  I boil mine until no longer pink and then remove from water.  I then run them through the food processor. I think it gives it the same texture as Fairfield’s but you can shred with a fork.  Whatever works for you.  Dice the celery bell pepper, water chesnuts and purple onions.  Add this to the chicken in a big bowl.  Mix all ingredients with mayo until very moist.  I just add half the quart of mayo and stir.  I add more as necessary.  This time I used about 3/4 of a quart jar of mayo.  Season to taste.

Stop salivating and fix yourself a sandwich.  Make a few more and get ready for the ambush.  Send a container of this to a good friend to make their day.  When my friend Stacie had surgery, this is the only thing that she wanted to eat.  I was really glad that this recipe makes such a big batch then.  There is plenty to share.  When you are trying to bloom where you are planted, feeding the flowers around delicious food is a GREAT place to start.  Make this chicken salad and make good friends.  Circle of life my friends.

Image

Some beautiful friends of mine…part of my village…we are a tribe of mommies…Good heavens I love these girls.

Image

Me and my fellow circus freak…my precious Lexie B!  That girl made my blooming so much easier.  I love her to pieces. 

Copycat Wendy’s Chili Recipe

Chili is a buzz word around here.  Creates quite a stir.  Gets peeps going.  If you say Frito pie in conjunction with chili, you are asking for chaos.  Big Daddy and my kids can hear nothing else but chili.  Frito pie.  We have some?  Where is it?  So I have learned not to even mention it when I am cooking it until it is close to ready to prevent a revolt.  These people over here REALLY love chili.  A while back, I came across a copycat Wendy’s chili recipe.  It looked really good and I know Wendy’s has really good chili, so I thought “score!!” Well, life happened and I kind of kept it on the backburner…excuse the pun.  Until Big Daddy says to me the other day…”Cajun Mama…I think it is about time to make some chili.”  It was cold, I had ground chuck and you know how they say when you know, you know?  I am sure “they” weren’t talking about making chili…but let’s just pretend.  I knew. The time had come to break out the copycat Wendy’s chili recipe.  Big Daddy about did a little happy dance of delight.  It was some good stuff ya’ll!!  Oddly enough,  the other day I am in Target chatting up the cashier and I am talking about my lasagna recipe.  We talk a little more and I tell her about the copycat Wendy’s chili and she smiles really big.  She tells me she is the GM at a local Wendy’s.  I ask her if she has tried this recipe and she says no and asks what all the recipe calls for.  I tell her and she says that it sounds pretty close except for the seasoning.  She said they have packets of seasoning they put in theirs and it is not McCormick chili seasoning like what is called for here.  Of course, this does not surprise me.  You best bet your sweet behind I am going to ask her about what all this seasoning entails next time I go through her line.  Next week.  Not that I go to Target that much…today.  Errr…I may have a problem.  My kids may or may not call some of the employees by name.  Anyway, that’s another story for another time and we are not here to discuss how many times a week a person has to go to Target before they are considered to have a problem.  🙂  We are here to talk about chili..stay focused people because ya’ll are NOT going to want to miss this chili recipe.  That cashier also said that since it has been unseasonably cold here in the past week or two that they have sold a crazy amount of chili.  This does not surprise me as this chili is absolutely delicious and warms you from your head to your frozen tootsies.  No need to hit the drive thru my friends.  The recipe is right here!!

Copycat Wendy’s chili 

Ingredients

1 onion, finely chopped

1 bell pepper, chopped

1-14 ounce can stewed tomatoes

4-8 ounce cans of tomato sauce

1-14 ounce can Ranch style beans

1-14 ounce can pinto beans

1-14 ounce can kidney beans

1 can Rotel tomatoes

1 package McCormick mild chili seasoning

2 pounds ground chuck

Directions

Brown ground chuck in a dutch oven until no longer pink.  Drain.  Stir in chopped bell pepper and onion and let this cook for 2 or 3 minutes.  Stir in all other tomatoes, beans (don’t drain)  and seasoning.  Just dump the tomatoes and beans directly into the pot.  No need to drain.  That is what makes this recipe super awesome.  It is so easy and yields absolutely delicious results!!!  Let this simmer over low heat until onions and bell pepper are tender and the smell is so amazing you cannot hardly stand it.  Or do what I did…call it done when your 5 year old comes over and starts to whine “mama I’m hungry!!!”  You will know when it is time.  We added some shredded cheddar, a little sour cream and of course Fritos to ours.  Well, they did.  I like mine straight.  Just chili…no need to garnish.  This stuff is good enough to stand alone.  You will LOVE this chili!  Your warm toes can write me a thank you, I love you post later.  For now, eat your chili.  It is best served warm.  ~AMB

1488757_577628985651006_225243479_n


Happiness is a good bowl of chili…or something like that.  


Lazy Girl’s Lasagna

This lasagna recipe…oh this lasagna recipe…there are few words I can use to describe how much I LOVE this lasagna recipe.  Cajun mama cooking Italian food, you say?  What?!  Ok, well I admit you will probably never go to Italy and find a piece of this lasagna on your plate.  Authentic Italian this is not, but after one bite, you will not care.  Growing up, when lasagna was on the menu, it was a happy day in the Mayeux household.  You knew right away walking through the door that we were having lasagna for supper.  One whiff of the delicious aroma and my mouth immediately watered.  Oh the wonderful smells of coming home, right?  It had been a while since I had made this lasagna.  I have had so many recipes to try out and it just sort of fell by the wayside.  Never again.  As Big Daddy is fond of saying, “this has been missing from my life!!!!” (he says this any time it has been a while since we have had something he really likes…lol!)  I made a pan of this lasagna for the office staff at my kids’ school the other day for their Christmas gift.  That’s right, I gave the gift of lasagna.  They all loved it!  While I was at it, I made a second pan for my husband and his coworkers.  It was lunch time when I brought them their pan, so I had a piece myself.  Oh. my. heavenly stars.  You know how food tastes so much better when you are starving?  This lasagna was so good already and I was so hungry, I just about blew my own mind.  So. flipping. good I tell you!!  I decided to name it lazy girl’s lasagna because it comes together super quick, with minimal ingredients, and while you are at it, you can easily make another pan for a friend.

Image

You are welcome!!!

Lazy Girl’s Lasagna

Ingredients

1 1/2 pound ground chuck

1 jar Ragu spaghetti sauce

1/2 box oven ready lasagna noodles (6 noodles per lasagna)

1 large container of cottage cheese

2 cups shredded Mozzarella cheese

1 cup Italian 5 cheese blend (I used the kind with the Philadelphia cream cheese in it for both)

Kraft Parmesan cheese (yes the kind in the shaker)

Directions

Preheat oven to 350 degrees.  Prepare a 9 x 13 dish by spraying with cooking spray

Brown ground chuck in a large skillet until no longer pink and drain.  Stir in jar of Ragu into the cooked ground chuck.  Bring it to a boil and then lower heat to a simmer.  Let the meat sauce simmer for about 10 minutes.  Lay 3 of the lasagna noodles on the bottom of the prepared dish.  Spoon half of meat sauce evenly over the noodles.  Spoon half of the cottage cheese over the meat sauce.  Sprinkle one cup of the Mozzarella and 1/2 cup of the five cheese blend over the cottage cheese.  Generously sprinkle the Parmesan cheese over all of this.  Repeat the layer, starting with 3 noodles and ending with Parmesan.  Pop into oven for about 45 minutes-1 hour or until cheese is slightly browned and all bubbly on top.  Let it cool a bit and then cut into squares.  Eat it up!!

Broccoli Cheese Rice Casserole and Carrot Souffle

Isn’t it amazing how the memories of a certain dish can take us back to a certain place and time?  I mean, I know in reality I am a grown woman who drives a minivan with 4 kids and a husband, 2 dogs and a cat, but as I sit here and think of broccoli cheese rice casserole, I can instantly recall being 8 years old (my daughter’s age eek!!) playing in my room after church, waiting for my mom to get lunch on the table.  Ham, broccoli cheese rice casserole and carrot souffle is one of those meals.  Sunday lunch or supper worthy.  A meal that evokes contentedness and makes your inner child smile and remember that simple joys are never that far away.  The best thing about this meal is that it is easy as pie to prepare but will have your family sitting happily around the table in no time flat.  Hold the fights.  Hold the ipads and ipods and hold the phone.  Nothing but yummy in the tummy and happy smiles around the table (for as long as there is food on the plate, after the food is gone I can’t promise anything).  Now, I encourage you to try these two dishes with a baked ham but of course, this is a free country and you can make them with whatever main dish you want.  I will be honest and say that I can eat just these two sides and they are the main dish.  The combination of the textures and savoriness of the broccoli cheese casserole with the sweetness and smoothness of the carrot souffle is like nothing else.

1450349_575054542575117_806966861_n

Hold the phone my friends…dinner is served

Broccoli cheese rice Casserole

Ingredients

2-10 ounce boxes frozen chopped broccoli, thawed

2 cups cooked rice

1 can cream of chicken soup

1 can Cheddar cheese soup

1- 8 oz. jar of Cheez Whiz

1 cup shredded cheddar

1 roll of Ritz crackers, crushed

salt, pepper and Tony’s to taste

Directions

Preheat your oven to 400 degrees.

Thaw your broccoli in a colander.  If you are in a hurry, you can run it under some water to help it thaw a little better.  Make sure it is drained well.  Cook your rice in the rice cooker (or however you cook your rice…I don’t understand any other way…rice cooker is the first appliance I learned to use after the toaster lol!).  Stir the drained thawed broccoli and hot steamed rice together in a big bowl.  Pour soups and Cheez Whiz over the broccoli rice mixture.  Stir well to combine .  Add salt, pepper and Tony’s to taste   Stir in 1/2 cup of cheddar cheese.  Pour this into a prepared (greased) 9 x 13 dish. I let my kids help by letting them crush the cracker crumbs over the casserole once it is in the dish.  Sprinkle the remaining cheese over the cracker crumbs.

Bake in 400 degree over for about 20 minutes or until all hot and bubbly and delicious looking.

Carrot Souffle 

Now, there is a story behind this carrot souffle.  My mom made me a recipe book when I got married.  It included this recipe, which is one of her favorites at Piccadilly.  Yes, you heard me.  Piccadilly.  I love Piccadilly.  Big Daddy loves Piccadilly.  Our kids, every one of them, loves Piccadilly.  When we go to the mall, we go eat at the Piccadilly.  It is not just a restaurant to us, it is an event.  It is a tradition.  Big Daddy and I have been best friends since we were little.  We grew up across the street from one another.  Our moms were best friends and worked together.  When our dads would go hunting on Friday nights, our moms would take us to Piccadilly.  When they moved to Broussard, we would go visit them and guess where we would go eat at least once?  You guessed it.  Piccadilly.  So naturally, this recipe was a must make for me when I got that special cookbook.   I made this for one of the holidays when we first got married.  It was sooo good.  But, it involved quite a bit of prep work and once I had babies, I was not a fan.  So when baby 3, Madame Toot, came along, we were blessed with 2 13 year old angel that came to our door one day with offers to baby sit.  They were THE most precious girls I had ever met and they knew just what I needed at that time in my life.  They took over and allowed me to get away.  I needed to get away.  3 kiddos ages 3 and under…I had to get away.  But it was so hard.  These two angels made it seem less hard.  And since then, they have become a part of our family.  And of course, the woman who gave birth to these angels, has been and always will be my fairy godmother.  And she can cook to boot.  Boy can she.  She taught me to make gravy and she taught me how to make this awesome carrot souffle.  These 3 ladies (those 13 year old girls are now young women in college) are so special to us.  We have spent holidays with them and they are a part of our family.  Lisa made this for one of the holiday meals we shared and it has been a mainstay ever since.  Her recipe is so much easier.  It used canned carrots and comes together fast.  It is kid friendly and just all around amazing.  This recipe will become a favorite at your house too.  This carrot souffle always reminds me that sometimes the most perfect things come to you by surprise.  And that blessings come in many forms…I mean canned carrots?  Bleck!!  But not in this dish…this dish turns canned carrots into the tastiest of side dishes.  Sweet and wonderful without being too complicated.  Like the surprising family we found in those two little girls who showed up at my front door.  Turned into so much more sweetness than I ever expected.  Carrot souffle…same thing.  So try it, you will be so glad you did.

photo (44)

Our precious girls with the kiddos…so much sweetness I cannot handle it

photo (42)

My fairy godmother and I…how I love that woman

Carrot Souffle

Ingredients

1- 16 ounce can of carrots, drained

1/2 stick of butter, melted

1 cup of sugar

3 eggs

1 teaspoon vanilla

1 teaspoon of baking powder

Directions

Preheat oven to 350 degrees.  Beat drained carrot and melted butter in a mixing bowl until smooth.  Add remaining ingredients and mix well.  Transfer to a souffle dish or a round Corningware dish (My fairy godmother made sure I got my own souffle dish several years ago but I used a 1 quart round Corningware until then).  Bake at 350 for 45 minutes or until knife comes out clean.  Once it cools some, sprinkle some powdered sugar over the top before serving.  Get ready for your kids to ask for seconds of carrots.  It is that good!!

photo (41)

Sweet, perfect carrot souffle…

photo (43)

Me and my two angels, all grown up…I love these two girls and I am so proud of them

Chicken Tortilla Soup

Ya’ll know I am a soupaholic right?  Right.  And I love, love, love me some Mexican.  So chicken tortilla soup is a no brainer for me.  One of my favorites ever is the chicken tortilla soup at Catina Laredo here in Shreveport.  I am sure some of you have one near you.  It is so delicious and simple and filling and just the best thing ever.  I have made several different variations over the past few years since first trying it.  This recipe I am about to share with ya’ll is not the same as that one or any of the others, but it is the one I tried last week when every person in our house was down with the flu or a virus.  And Big Daddy was up at my in-laws’ hunting lodge in Arkansas (www.bayoulagruelodge.com) nearly the entire time.  It was not pretty.  It would have been funny had it not been so hard and maybe one day I will laugh, when I am old and senile.   Me plus 4 sick kids equals help me Rhonda, SOS, call in for reinforcements, and making soup.  Chicken tortilla soup to be specific.  This recipe is a Pioneer Woman recipe which means it would be pretty fool proof and guaranteed to be muy delicioso. Unlike most chicken tortilla soups I have made, this one called for 2 cans of black beans, making it a little more filling, packed a good protein punch and added some texture.  Ding ding…we’ve got a winner.  This soup is the perfect thing to make on a blustery winter night.  It will warm you from your head to your toes.  MMMM good.  Yes, that is Campbell’s thing, but it goes for all yummy soups, right?  Right.

1460127_573398279407410_678241829_n


holy cow that is some good stuff right there!

Chicken Tortilla Soup (from Pioneer Woman’s cookbook The Pioneer Woman Cooks:  Food From My Frontier)

Stuff you need:

1 1/2 teaspoon ground cumin

approx. 1 1/4 teaspoons chili powder

1/2 teaspoon kosher salt, plus more according to your taste

2 boneless, skinless chicken breast

2 tablespoons olive oil

1 cup diced onion

3 garlic cloves, minced

1/4 cup diced green bell pepper

1/4 cup diced red bell pepper

one 10 ounce can Rotel Diced Tomatoes and Green Chiles (I used the kind with cilantro and lime…it was like Ole!!)

4 cups or 1 quart low sodium chicken broth

3 tablespoons tomato paste

4 cups hot water

2 15 ounce cans black beans, drained (I use the reduced sodium kind because canned beans have a crazy amount of sodium in them.  I have the best luck finding these at our local Super Target)

3 tablespoons cornmeal

5 small corn tortillas

diced avocado, for garnish

sour cream, for garnish

What to do with the stuff:

Preheat your oven to 375 degreees

Now, mix the spices together in a small bowl.  Drizzle your chicken breasts with about 1 tablespoon of the olive oil.  Sprinkle 1 tsp. of your spices over the chicken breasts.  Set your bowl of spices aside for later.  Bake your chicken busoms (Kylie , that is for you) for 15-20 minutes or until the chicken is no longer pink inside.  Remove from oven and shred the chicken using two forks.  Set aside.

Now, you are going to heat the remaining olive oil in your soup pot or dutch oven over medium heat.  Toss in your veggies and a teaspoon of your spices you used to season the chicken breasts.  If you are feeling frisky, toss in an extra dash of chili powder for some added heat.  Stir the veggies around until they begin to get a nice golden brown color, about 5 minutes or so.   Inhale.  smells good doesn’t it?

Throw your shredded chicken breasts into the pot.  Now, pour the can of Ro-tel in, juice and all.  Stir in the chicken broth, tomato paste and the 4 cups of hot water.  Stir this around to combine and bring this pot o yumminess to a boil.  Reduce to heat to low once it comes to a boil.  Now, add in your drained black beans.

Ok, now in a small bowl, mix together the cornmeal with 1/2 cup of water.  Whisk this mixture into the simmering pot o’ yum.  (What?  I am like 1/8  Irish too! ha ha!!  but I am)

Cut the tortillas into uniform 2 to 3 inch strips.  Cut those in half.  Stir them into the soup. Your tortilla soup is almost ready.  Are you ready?  Smells so good, huh?  Mouth is watering.  Ladle some of this wonderful stuff into bowls.  Garnish with chunks of avocado, shredded monterey jack cheese, a dollop of sour cream, and maybe some cilantro if you feel like it.  Serving it with extra tortilla strips is great or some crushed tortilla chips.

Enjoy!!

Paula Deen’s Corn Casserole

I love this recipe!! I am definitely making this for our big feast. Surprisingly, it adds to the wonderfulness of cornbread dressing instead of takes away. It isn’t cornbread overkill! Is there such a thing? Good stuff!

stacielk's avatarKats' Kitchen


corn-casserole

If you have never watched Paula Deen on the Food Network, you’re missing out.  She is always making recipes that are full of butter, sugar & chocolate, and doesn’t she say those are her major food groups or something? 

One year from today was my first post on Kats’ Kitchen, I posted a recipe called Savannah Bow Ties, which is one of Paula’s recipes.  Today, I am posting her Corn Casserole, which I made for our mini-church Christmas party this past weekend.  Those who like this type of dish loved it!  It’s almost as good as the Cottage Corn Bread you can get at Northwoods.

On the Anniversary of Kats’ Kitchen, I want to say thank you to everyone who checks my blog on a weekly basis and those who just discovered it!  Thanks to the hub for being a great guinea pig and putting up with all my…

View original post 139 more words

Momou’s mac and cheese

Image

Momou with my precious first born…the woman loves her grands and great grands…

If you have been following Cajun Mama Cooks for a while on facebook or have known me any amount of time, you know about the entity that is Momou’s Mac and Cheese.  My kids knew about this stuff as soon as they could eat solid food.  My babies all love it and ask for it on a monthly if not weekly basis.  This is the epitome of comfort food.  Nothing else comes close.  If you know me at all, you know all about Momou. Momou is my dad’s mom.  Her name is Narcille and I am not sure there is anyone on this Earth whom I adore as much as her.  I share a birth month with her.  Our birthdays are 5 days apart and I love my birthday, but I love that we share that even more.  She is one fine lady and I love her so much.  My husband loves her so much.  My kids love her so much.  Everyone who knows Narcille, or Nar, or Nice as my grandfather called her, loves her.  I again am beyond blessed to be able to call that woman my grandmother.  And can she cook.  Boy can she ever!!  And loved to do it.  She made this macaroni  and cheese for almost every occasion and just regular old Sunday dinner. You knew when she had the pyrex dish out and she had some of those luxury noodles boiling, you were about to be in for a treat.  When I first got married, Momou, my Nana, Aunt Lee and my mom came to my house and they taught me how to cook Momou’s mac and cheese.  That is one of my fondest memories as a grown up.  I cherish that night always and on cold days when I feel uprooted and out of place, that memory gives me comfort like a warm blanket.  This mac and cheese has spanned generations and now has been made famous in my own kids’ minds.  They know the story behind it and that it belongs to Momou.  They have not been a part of many of dinners at Momou’s because since they have been born, she has slowed down some and now lives in a nursing home.  But they know.  I love that when I cook this macaroni and cheese, they talk about their Momou and what they love about her.  It shows me that even if they have not eaten this dish at her house, per say, they associate this wonderful dish with the wonderful woman who has passed it down to us.  That is what matters most to me.  I have been reluctant to share this recipe because it is very special to my family.  But, after soul searching, I know that Momou would be so glad for me to share it.  She is above all things, a giving, loving person who wants to make others happy.  So I will share.  This is truly love in a 9 x 13 dish.  It is a perfect partner for a pork or beef roast and rice and gravy, an excellent side for turkey and dressing, and a delicious accompaniment to chicken fricassee.  I have never made it for anyone who did not love this stuff and ask if I would be serving it the next time they came to dinner.  I have had several people ask for this recipe and if you are one of them…here you go!! Now, the noodles…as far as I am concerned, these are the only noodles to make Momou’s mac and cheese with.  You can of course make it with any noodle, but I refuse.  I don’t care to change this recipe up one bit.  It is perfect as it is.  Just like Momou.  You don’t mess with something this wonderful.  Well, I don’t.  I have the most luck finding these noodles at our local target.  They are Luxury brand long macaroni noodles.  I have found them at some Wal-Marts.  When I do find them, I buy at least 5 packages of them at a time.  Just a suggestion.  Because you should always be ready to whip up some Momou’s mac and cheese.

Image

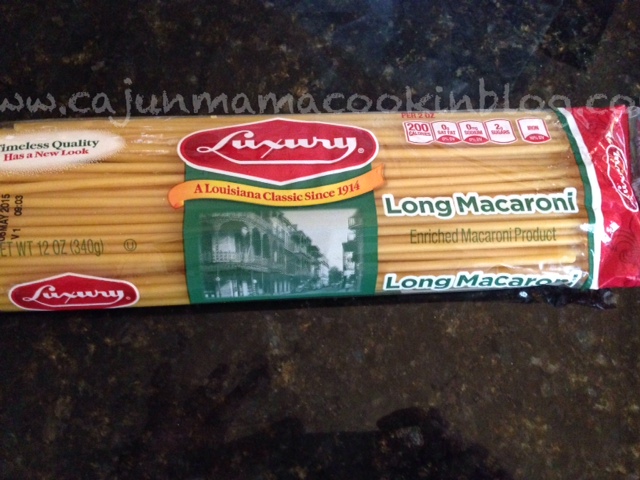
This a package of those noodles..if you find them…buy several packages.  Trust me.

Image

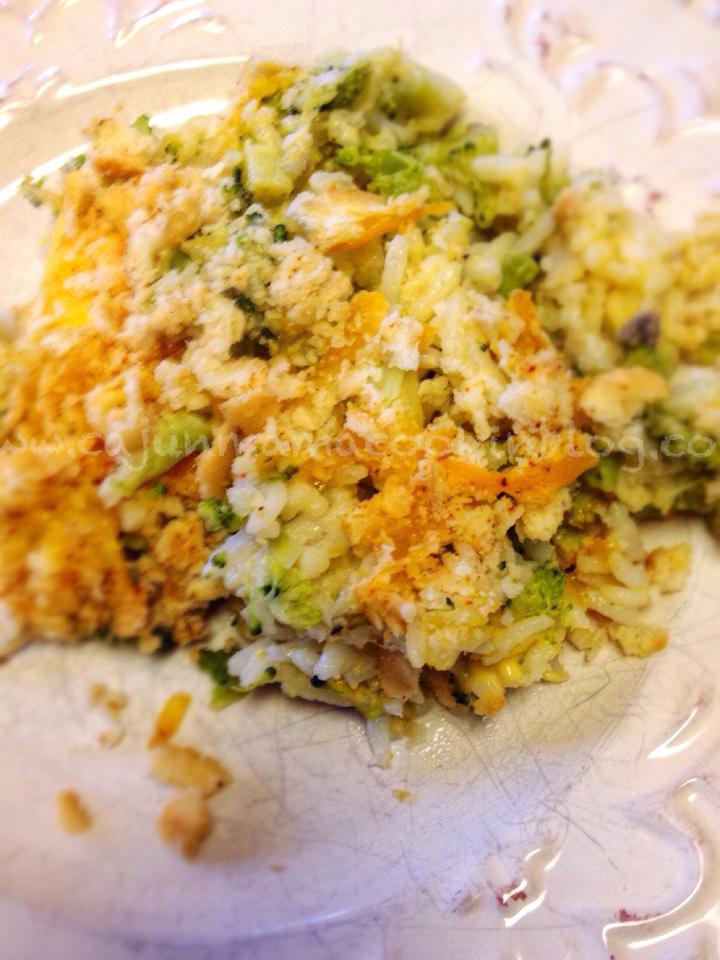
Love in a 9 x 13 dish I tell you…

Momou’s Mac and Cheese

Ingredients

1 16 oz. box of Velveeta

1 stick of butter

1 can of Pet Milk or evaporated milk

1 package Luxury long macaroni noodles

1/2 cup of sugar

Preheat your oven to 350 degrees.  Get your 9 x 13 dish out.  No need to grease it.

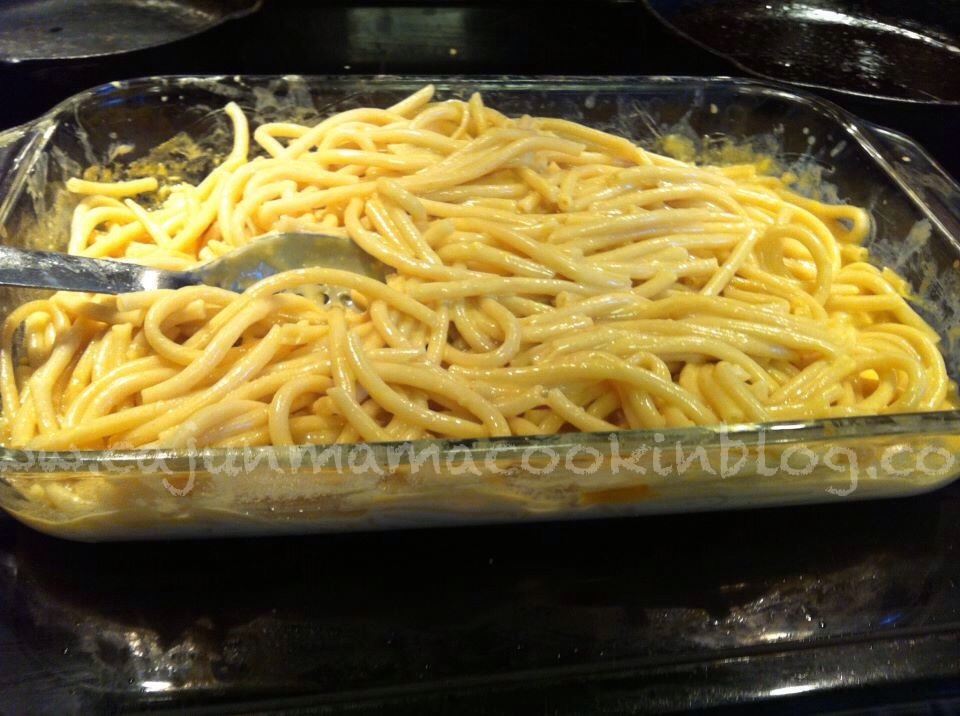
Bring about 8 cups of  salted water to a boil in a large stock pot or pasta pot.  Add your long macaroni noodles to the boiling water.  I break my noodles in half before adding them to the boiling water because it makes it easier for my kids to handle it, but it does cut down on the slurpability (is that a word?) that you get when the noodle is long.  Ah decisions.  Boil the noodles until they are tender.  These noodles take a little longer to boil because they are so long and thick.  If you prefer your pasta al dente, then by all means, pull them sooner.  Drain your pasta.  Now, just leave it long enough to drain because I have found (because Aunt Lee and Momou taught me) that this is easier if the noodles are still warm.  That helps everything to combine and melts the cheese and butter.  Ok, pour your boiled noodles into your 9 x 13 dish.

Now, you are going to cut your stick of butter into “pats” (that’s how Momou would say it…cut the butter into pats, my Doo :))  Take a stirring spoon and don’t stir, but sort of push the noodles around to let the butter circulate and make friends with the noodles.  Ha ha!  Ok, now, Cher, you are going to add chunks of Velveeta to the noodles and butter.  Do the same thing.  Don’t stir, but push the noodles around gently and let the Velveeta chunks come to the party.  Introduce them to the noodles and butter. Next, you are going to sprinkle some sugar ALLLLL over the noodles.  Gently push that around to let the sugar get up in there.  Now you will open your PET milk by poking a big hole on each side.  I suppose you can open the whole can with a can opener, but we have never done that.  It makes it easier to pour it slowly over the noodles.  I use one of those bottle opener thingies.  It has a point edge on one side and I poke it into the can.  Do ya’ll know what I am talking about?  I don’t know the technical term, so excuse my lack of formality.  Though at this point, I hope most of ya’ll are aware that formalities are not my thang.  🙂  Ok, slowly pour the PET milk over the noodles.  I use the whole can.  Gently push that around and let the noodles and all the other ingredients spend some time together.  Now…take a tasting spoon and get a taste of the milk.  If it tastes sweet, but not too sweet with a hint of butter and cheese, it is perfect.  Just add sugar to your taste.  It is supposed to be sweet.  That’s what makes it special!

Cover the pan with foil  and put it  in your preheated oven.  Cook for about 30 minutes and then check it.  Remove foil and using a spoon, gently stir the noodles.  You want there to be some “juice” left.  Be careful not to let the noodles dry out because they will also dry up some once you take the dish out of the oven.  Usually about 30 minutes does it for me.  All of the cheese should be melted, but if not, giving it a good stir will help with that.  The milk mixture should be thicker than it was and clinging to the noodles.  If it is still runny, put the foil back on and bake it for another 5 or 10 minutes.

Now, I really hope I have done this recipe justice.  If you have questions or need something clarified, please ask questions.  Don’t be afraid.  As I have been typing, my 5 year old aka the bull in a china shop has been asking to make goo repeatedly and I have been distracted.  So, let’s be honest, I make mistakes.  I hope you will give this truly wonderful mac and cheese recipe a try.  Just please call it Momou’s mac and cheese and when someone says “who is Momou?” you can tell them all about her.  She is one special lady!   I have given ya’ll 3 very special recipes for you to make for Thanksgiving or whenever you choose.  Since my kiddos are off for Thanksgiving and I have some cooking and baking to do, I am going to sign off for the next few days.  I want to spend some time with my family and friends.  I really hope you all savor every moment of your Thanksgiving celebrations to the fullest.  See you all next week with a fresh batch of delicious recipes!  Enjoy!! ~AMB 

Image

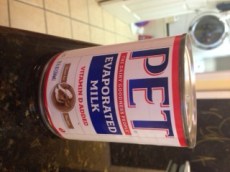
Can of PET milk…regular ole evaporated milk…but where I am from, all evaporated

milk is referred to as PET milk.  I love that.

photo (39)

Getting into the spirit of things at the Polar Express  

IMG_7799

Gobble till you wobble…cutest little turkey I know 


Happy Thanksgiving to all of my friends!!!